22
Picture menu
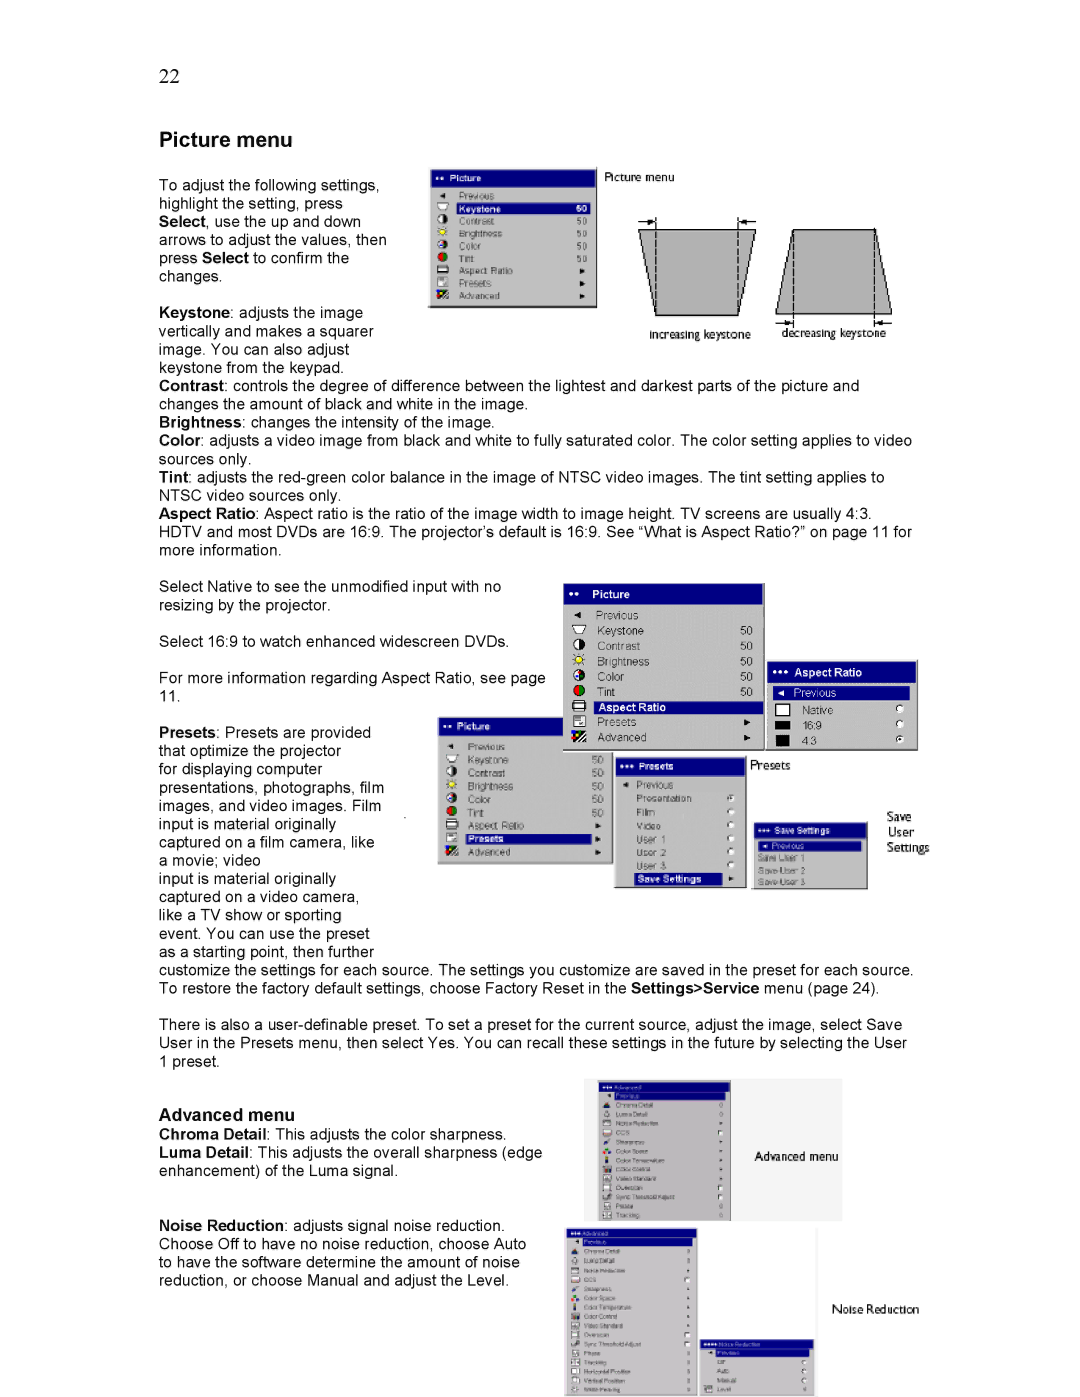
To adjust the following settings, highlight the setting, press Select, use the up and down arrows to adjust the values, then press Select to confirm the changes.
Keystone: adjusts the image vertically and makes a squarer image. You can also adjust keystone from the keypad.
Contrast: controls the degree of difference between the lightest and darkest parts of the picture and changes the amount of black and white in the image.
Brightness: changes the intensity of the image.
Color: adjusts a video image from black and white to fully saturated color. The color setting applies to video sources only.
Tint: adjusts the
Aspect Ratio: Aspect ratio is the ratio of the image width to image height. TV screens are usually 4:3. HDTV and most DVDs are 16:9. The projector’s default is 16:9. See “What is Aspect Ratio?” on page 11 for more information.
Select Native to see the unmodified input with no resizing by the projector.
Select 16:9 to watch enhanced widescreen DVDs.
For more information regarding Aspect Ratio, see page 11.
Presets: Presets are provided that optimize the projector for displaying computer presentations, photographs, film images, and video images. Film input is material originally captured on a film camera, like a movie; video
input is material originally captured on a video camera, like a TV show or sporting event. You can use the preset as a starting point, then further
customize the settings for each source. The settings you customize are saved in the preset for each source. To restore the factory default settings, choose Factory Reset in the Settings>Service menu (page 24).
There is also a
Advanced menu
Chroma Detail: This adjusts the color sharpness.
Luma Detail: This adjusts the overall sharpness (edge enhancement) of the Luma signal.
Noise Reduction: adjusts signal noise reduction. Choose Off to have no noise reduction, choose Auto to have the software determine the amount of noise reduction, or choose Manual and adjust the Level.
