13
Displaying video
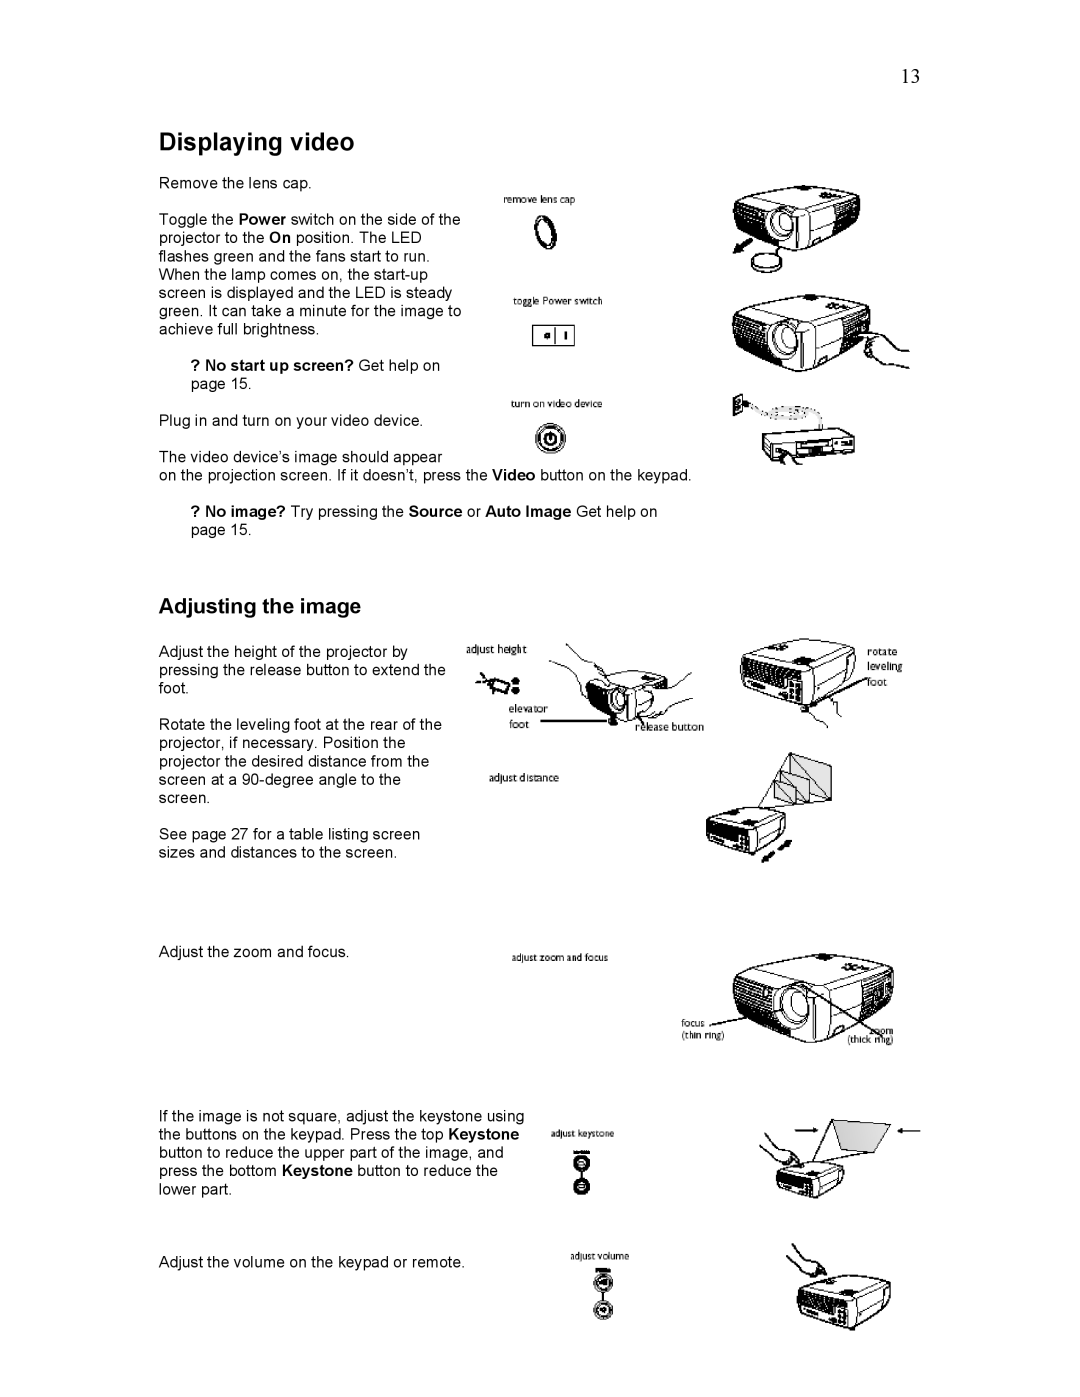
Remove the lens cap.
Toggle the Power switch on the side of the projector to the On position. The LED flashes green and the fans start to run. When the lamp comes on, the
?No start up screen? Get help on page 15.
Plug in and turn on your video device.
The video device’s image should appear
on the projection screen. If it doesn’t, press the Video button on the keypad.
?No image? Try pressing the Source or Auto Image Get help on page 15.
Adjusting the image
Adjust the height of the projector by pressing the release button to extend the foot.
Rotate the leveling foot at the rear of the projector, if necessary. Position the projector the desired distance from the screen at a
See page 27 for a table listing screen sizes and distances to the screen.
Adjust the zoom and focus.
If the image is not square, adjust the keystone using the buttons on the keypad. Press the top Keystone button to reduce the upper part of the image, and press the bottom Keystone button to reduce the lower part.
Adjust the volume on the keypad or remote.