KODAK V600 Digital Projector and KODAK V600 Zoom Digital Projector
Using KODAK Image Manager
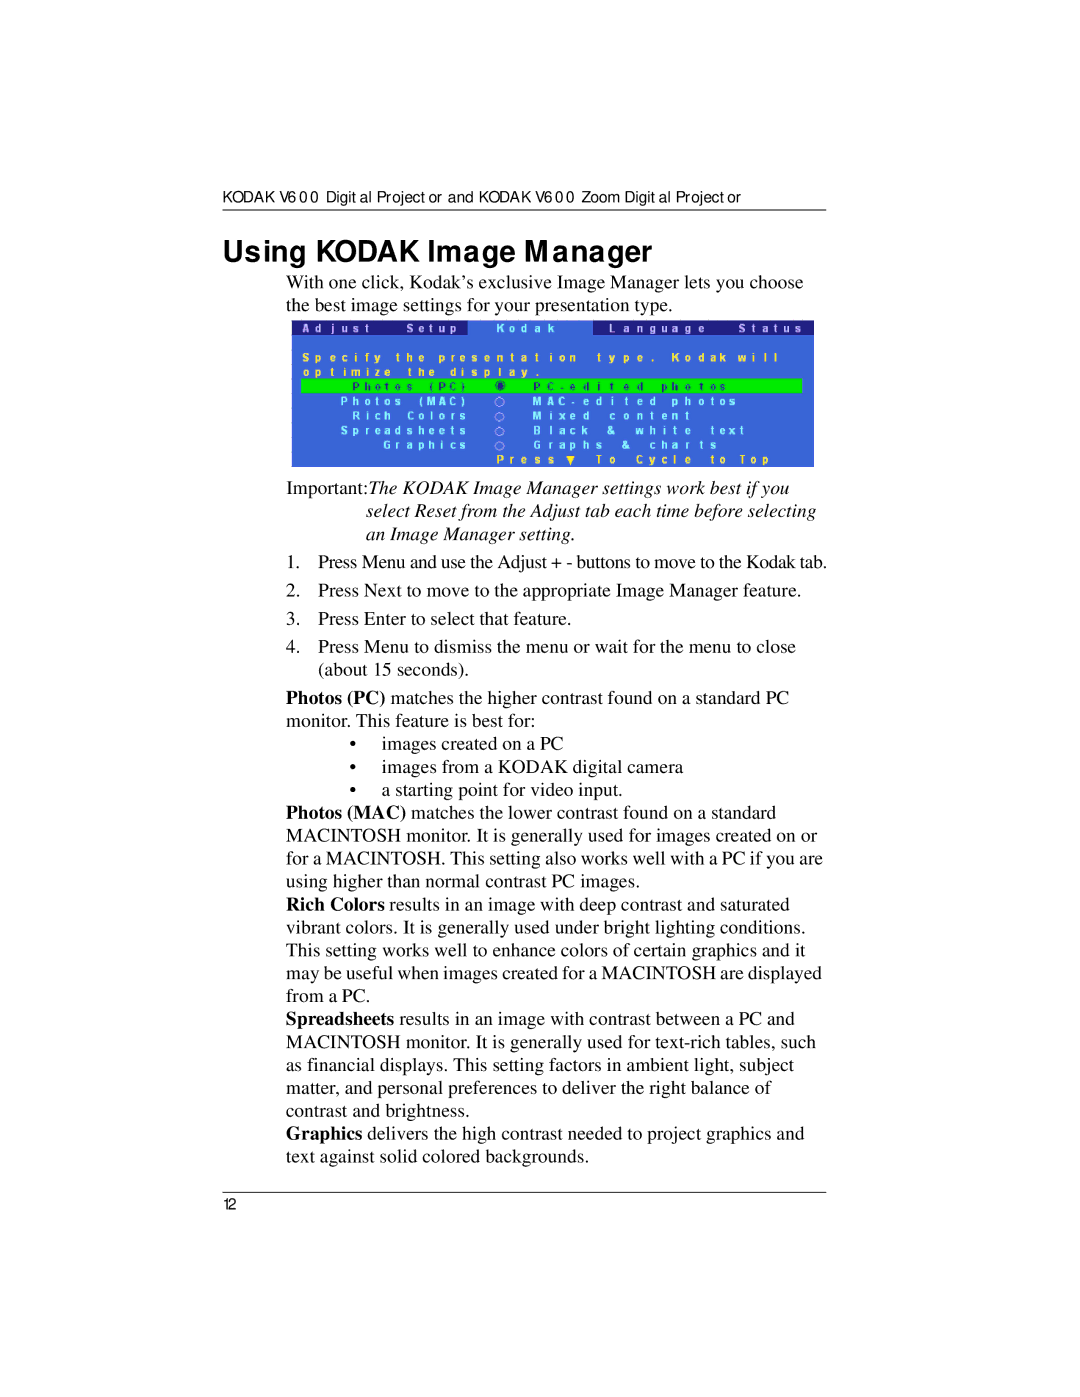
With one click, Kodak’s exclusive Image Manager lets you choose the best image settings for your presentation type.
Important:The KODAK Image Manager settings work best if you select Reset from the Adjust tab each time before selecting an Image Manager setting.
1.Press Menu and use the Adjust + - buttons to move to the Kodak tab.
2.Press Next to move to the appropriate Image Manager feature.
3.Press Enter to select that feature.
4.Press Menu to dismiss the menu or wait for the menu to close (about 15 seconds).
Photos (PC) matches the higher contrast found on a standard PC monitor. This feature is best for:
•images created on a PC
•images from a KODAK digital camera
•a starting point for video input.
Photos (MAC) matches the lower contrast found on a standard MACINTOSH monitor. It is generally used for images created on or for a MACINTOSH. This setting also works well with a PC if you are using higher than normal contrast PC images.
Rich Colors results in an image with deep contrast and saturated vibrant colors. It is generally used under bright lighting conditions. This setting works well to enhance colors of certain graphics and it may be useful when images created for a MACINTOSH are displayed from a PC.
Spreadsheets results in an image with contrast between a PC and MACINTOSH monitor. It is generally used for
Graphics delivers the high contrast needed to project graphics and text against solid colored backgrounds.
12