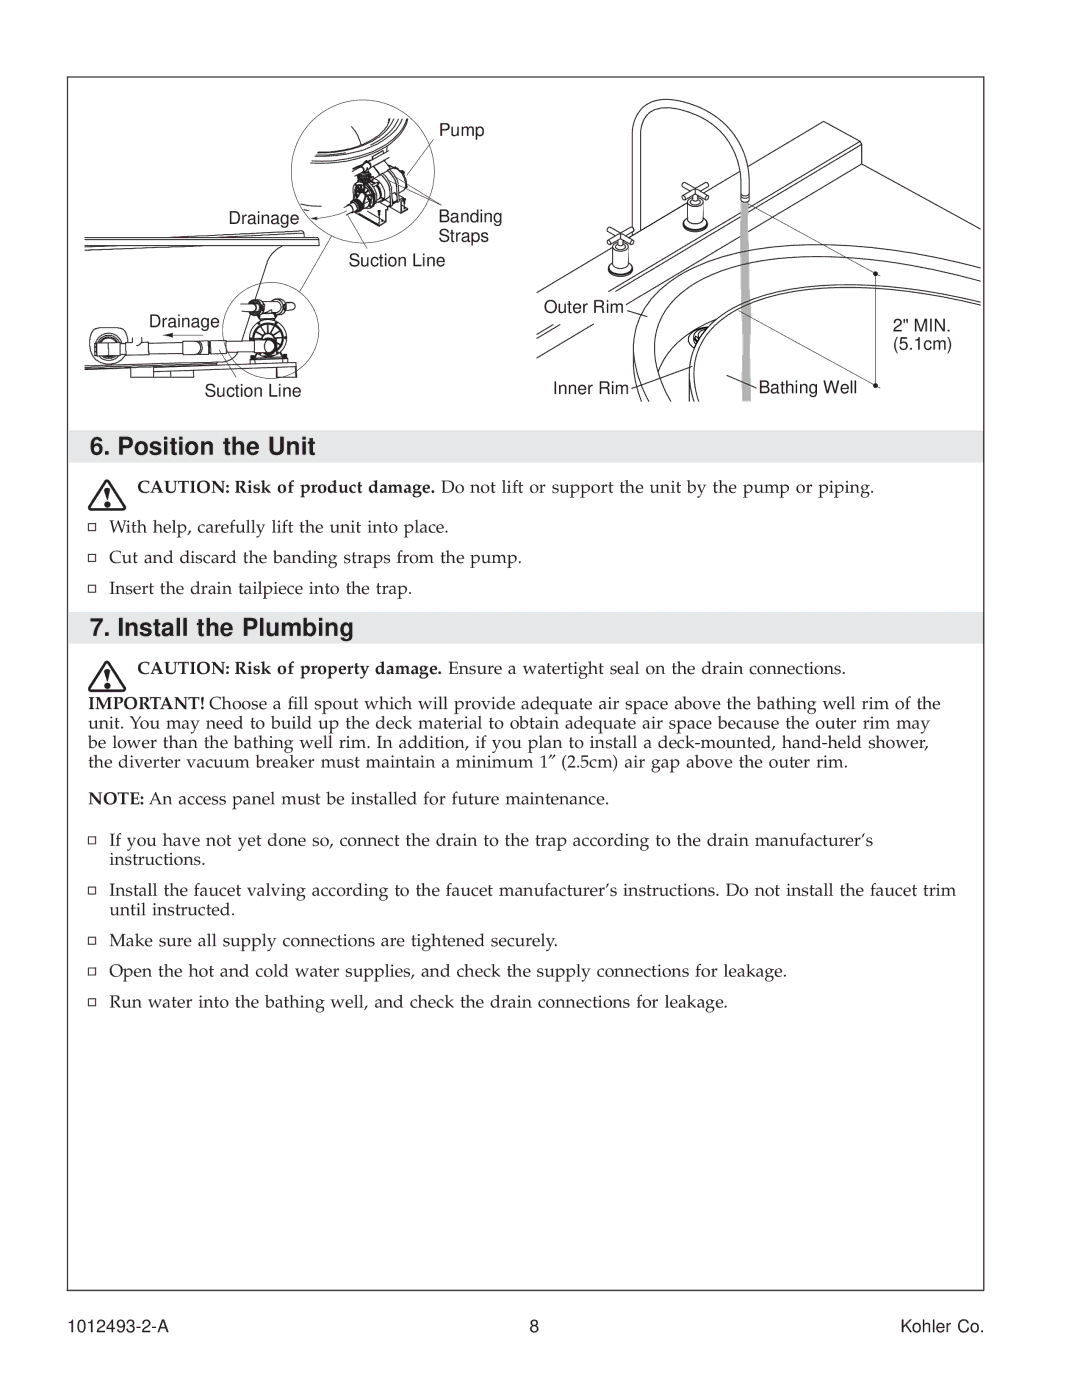
Pump
Drainage | Banding |
| Straps |
| Suction Line |
Outer Rim
Drainage
Suction Line | Inner Rim | Bathing Well |
2" MIN. (5.1cm)
6. Position the Unit
![]() CAUTION: Risk of product damage. Do not lift or support the unit by the pump or piping.
CAUTION: Risk of product damage. Do not lift or support the unit by the pump or piping. ![]() With help, carefully lift the unit into place.
With help, carefully lift the unit into place.
Cut and discard the banding straps from the pump.
Insert the drain tailpiece into the trap.
7. Install the Plumbing
![]() CAUTION: Risk of property damage. Ensure a watertight seal on the drain connections.
CAUTION: Risk of property damage. Ensure a watertight seal on the drain connections.
IMPORTANT! Choose a ®ll spout which will provide adequate air space above the bathing well rim of the unit. You may need to build up the deck material to obtain adequate air space because the outer rim may be lower than the bathing well rim. In addition, if you plan to install a
NOTE: An access panel must be installed for future maintenance.
If you have not yet done so, connect the drain to the trap according to the drain manufacturer's instructions.
Install the faucet valving according to the faucet manufacturer's instructions. Do not install the faucet trim until instructed.
Make sure all supply connections are tightened securely.
Open the hot and cold water supplies, and check the supply connections for leakage.
Run water into the bathing well, and check the drain connections for leakage.
8 | Kohler Co. |