10. COMPLETE FINISH WALL
Install
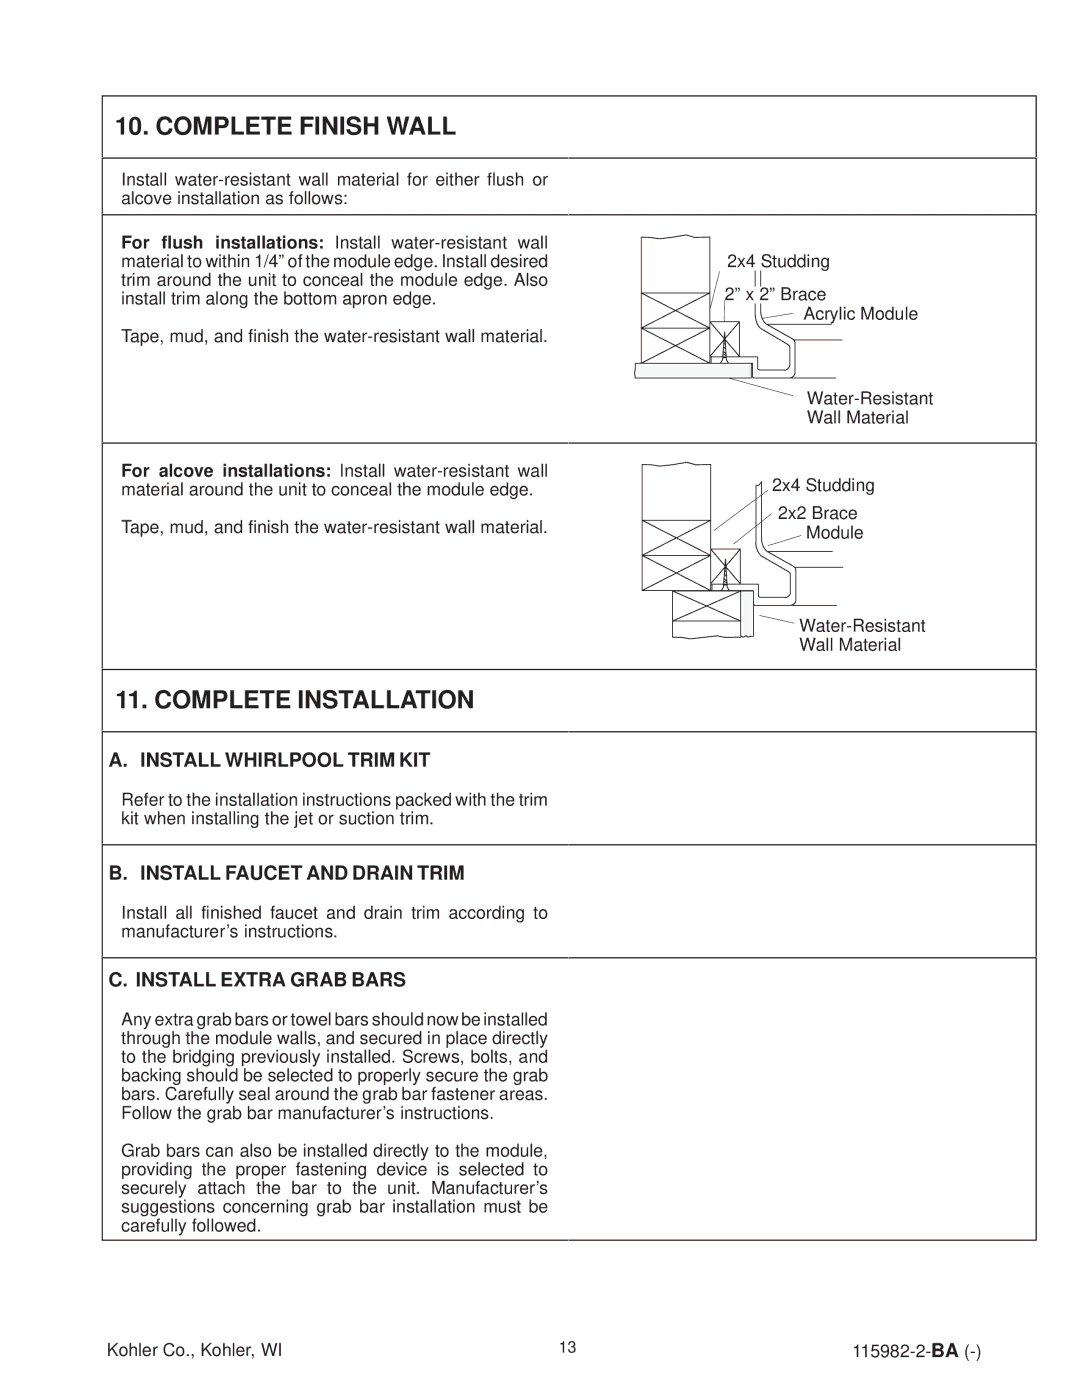
For flush installations: Install
Tape, mud, and finish the
For alcove installations: Install
Tape, mud, and finish the
2x4 Studding
2º x 2º Brace
Acrylic Module
Wall Material
2x4 Studding
2x2 Brace
Module
Wall Material
11.COMPLETE INSTALLATION
A.INSTALL WHIRLPOOL TRIM KIT
Refer to the installation instructions packed with the trim kit when installing the jet or suction trim.
B. INSTALL FAUCET AND DRAIN TRIM
Install all finished faucet and drain trim according to manufacturer's instructions.
C. INSTALL EXTRA GRAB BARS
Any extra grab bars or towel bars should now be installed through the module walls, and secured in place directly to the bridging previously installed. Screws, bolts, and backing should be selected to properly secure the grab bars. Carefully seal around the grab bar fastener areas. Follow the grab bar manufacturer's instructions.
Grab bars can also be installed directly to the module, providing the proper fastening device is selected to securely attach the bar to the unit. Manufacturer's suggestions concerning grab bar installation must be carefully followed.
Kohler Co., Kohler, WI | 13 |