OPERATION
WARNING: Before starting check if any part of your band saw is missing, malfunctioning, has been damaged or broken, such as the motor switch, or other operation control, a safety device or the power cord, turn the band saw off and unplug it until the particular part is properly repaired or replaced.
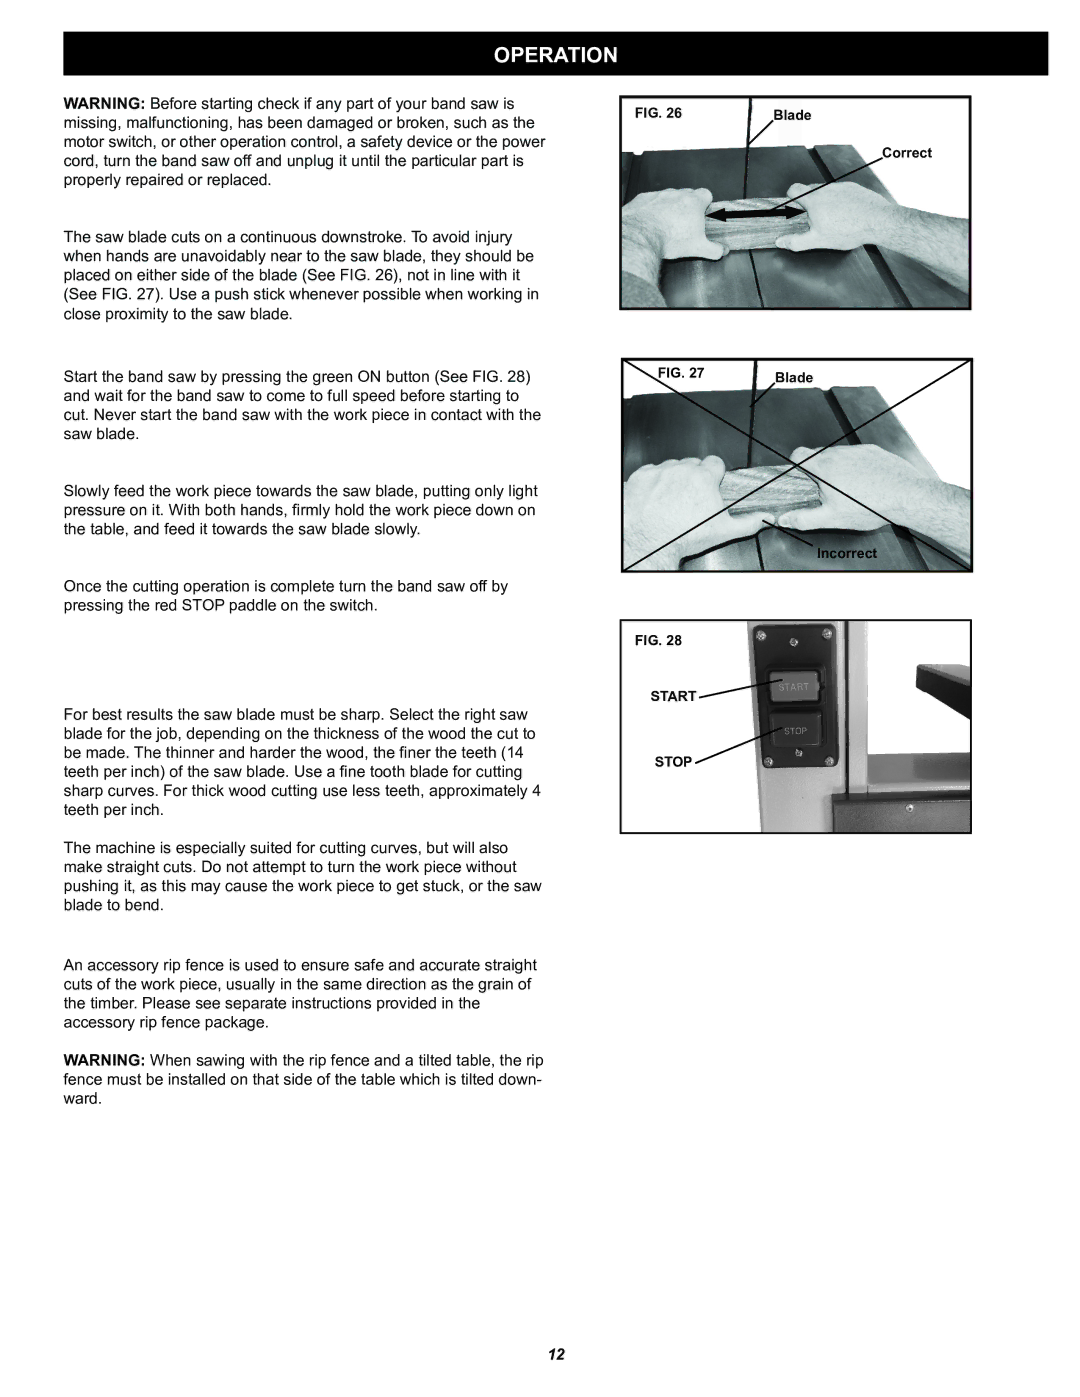
The saw blade cuts on a continuous downstroke. To avoid injury when hands are unavoidably near to the saw blade, they should be placed on either side of the blade (See FIG. 26), not in line with it (See FIG. 27). Use a push stick whenever possible when working in close proximity to the saw blade.
Start the band saw by pressing the green ON button (See FIG. 28) and wait for the band saw to come to full speed before starting to cut. Never start the band saw with the work piece in contact with the saw blade.
Slowly feed the work piece towards the saw blade, putting only light pressure on it. With both hands, firmly hold the work piece down on the table, and feed it towards the saw blade slowly.
Once the cutting operation is complete turn the band saw off by pressing the red STOP paddle on the switch.
For best results the saw blade must be sharp. Select the right saw blade for the job, depending on the thickness of the wood the cut to be made. The thinner and harder the wood, the finer the teeth (14 teeth per inch) of the saw blade. Use a fine tooth blade for cutting sharp curves. For thick wood cutting use less teeth, approximately 4 teeth per inch.
The machine is especially suited for cutting curves, but will also make straight cuts. Do not attempt to turn the work piece without pushing it, as this may cause the work piece to get stuck, or the saw blade to bend.
An accessory rip fence is used to ensure safe and accurate straight cuts of the work piece, usually in the same direction as the grain of the timber. Please see separate instructions provided in the accessory rip fence package.
WARNING: When sawing with the rip fence and a tilted table, the rip fence must be installed on that side of the table which is tilted down- ward.
FIG. 26 | Blade |
Correct
FIG. 27 | Blade |
Incorrect
FIG. 28
START ![]()
STOP ![]()
12