E. Locate four hex bolts and four lock washers from the bag of loose parts used to mount the table. Mount the table to the upper table trunnion and install a bolt with washer in each hole, then tighten with a 13mm wrench. (See FIG. 3)
FIG. 3
Mounting Bolts
F. Next locate one Hex Bolt M8x45 and one Hex Nut M8. Install un- der the table as shown. This assembly is used to level the table. (See FIG. 4)
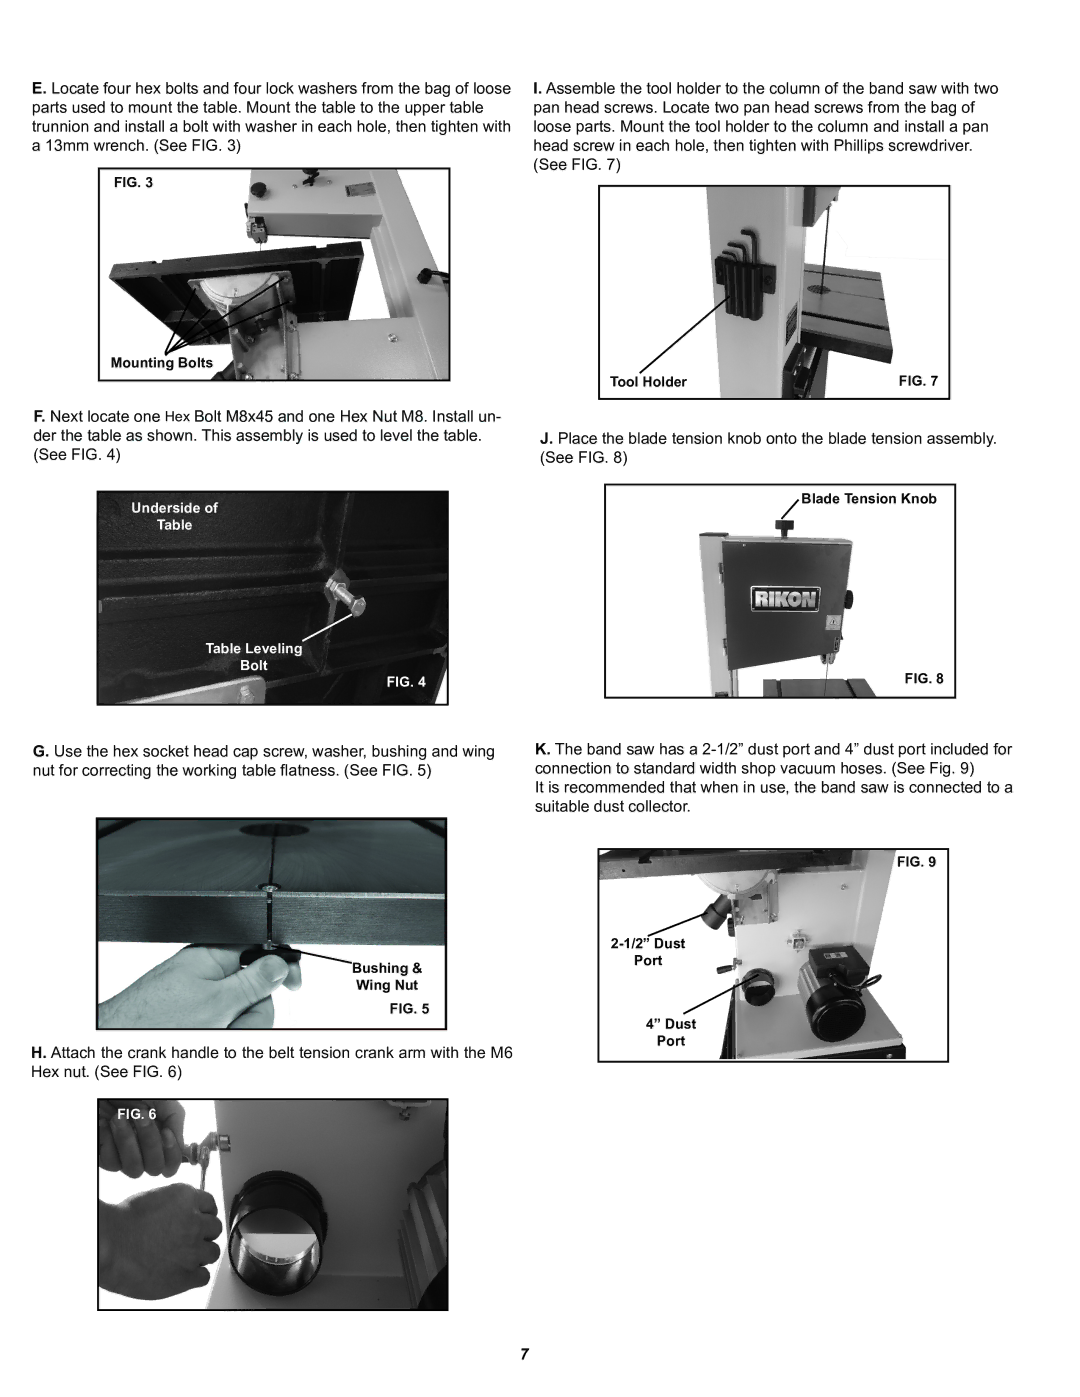
I. Assemble the tool holder to the column of the band saw with two pan head screws. Locate two pan head screws from the bag of loose parts. Mount the tool holder to the column and install a pan head screw in each hole, then tighten with Phillips screwdriver. (See FIG. 7)
Tool Holder | FIG. 7 |
|
|
J. Place the blade tension knob onto the blade tension assembly. (See FIG. 8)
Underside of
Table
Table Leveling
Bolt
FIG. 4
Blade Tension Knob
FIG. 8
G. Use the hex socket head cap screw, washer, bushing and wing nut for correcting the working table flatness. (See FIG. 5)
K. The band saw has a
It is recommended that when in use, the band saw is connected to a suitable dust collector.
Bushing &
Wing Nut
FIG. 5
H. Attach the crank handle to the belt tension crank arm with the M6 Hex nut. (See FIG. 6)
FIG. 6
FIG. 9
Port
4” Dust
Port
7