3. SETTING TABLE SQUARE BACK OF BLADE | 6. CHANGING AND ADJUSTING THE SAW BLADE |
Place a square against the back
A. Using a wrench, release the flange nut on the lower table trunnion. (See FIG. 13)
B. Place the M5 Hex “L” wrench on the Hex socket set screw and adjust until the table is square to the saw blade on the back
This band saw is
To change the saw blade; the following procedure must be followed:
WARNING: To avoid injury from unexpected starting, whenever changing the saw blade or carrying out adjustments, switch the band saw off and remove the power cord from the power outlet. To avoid injury to hands when handling the saw blade, wear gloves whenever necessary.
A. Open the upper and lower doors by turning the door locking knobs.
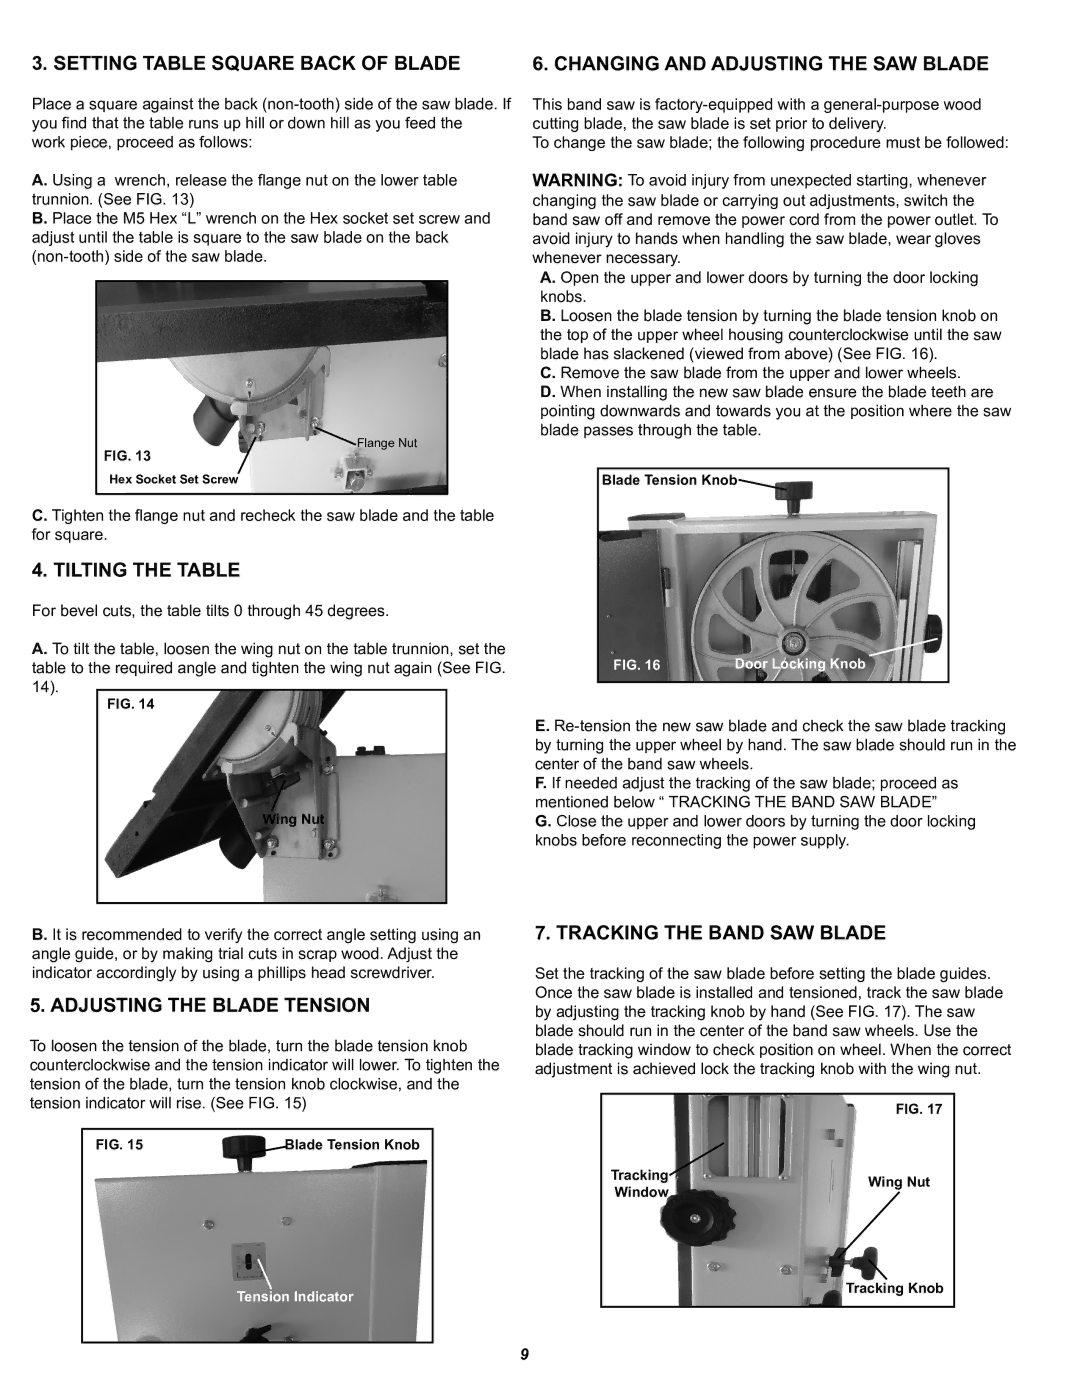
B. Loosen the blade tension by turning the blade tension knob on the top of the upper wheel housing counterclockwise until the saw blade has slackened (viewed from above) (See FIG. 16).
C. Remove the saw blade from the upper and lower wheels.
FIG. 13
![]() Flange Nut
Flange Nut
D. When installing the new saw blade ensure the blade teeth are pointing downwards and towards you at the position where the saw blade passes through the table.
Hex Socket Set Screw
C. Tighten the flange nut and recheck the saw blade and the table for square.
4. TILTING THE TABLE
For bevel cuts, the table tilts 0 through 45 degrees.
A. To tilt the table, loosen the wing nut on the table trunnion, set the table to the required angle and tighten the wing nut again (See FIG. 14).
FIG. 14
Wing Nut
Blade Tension Knob![]()
FIG. 16 | Door Locking Knob |
E.
F. If needed adjust the tracking of the saw blade; proceed as mentioned below “ TRACKING THE BAND SAW BLADE”
G. Close the upper and lower doors by turning the door locking knobs before reconnecting the power supply.
B. It is recommended to verify the correct angle setting using an angle guide, or by making trial cuts in scrap wood. Adjust the indicator accordingly by using a phillips head screwdriver.
5. ADJUSTING THE BLADE TENSION
To loosen the tension of the blade, turn the blade tension knob counterclockwise and the tension indicator will lower. To tighten the tension of the blade, turn the tension knob clockwise, and the tension indicator will rise. (See FIG. 15)
FIG. 15 | Blade Tension Knob |
Tension Indicator
7. TRACKING THE BAND SAW BLADE
Set the tracking of the saw blade before setting the blade guides. Once the saw blade is installed and tensioned, track the saw blade by adjusting the tracking knob by hand (See FIG. 17). The saw blade should run in the center of the band saw wheels. Use the blade tracking window to check position on wheel. When the correct adjustment is achieved lock the tracking knob with the wing nut.
| FIG. 17 | |
Tracking | Wing Nut | |
Window | ||
|
Tracking Knob
9