Land Pride | Table of Contents |
Section 2: Options, Assembly & Set-Up
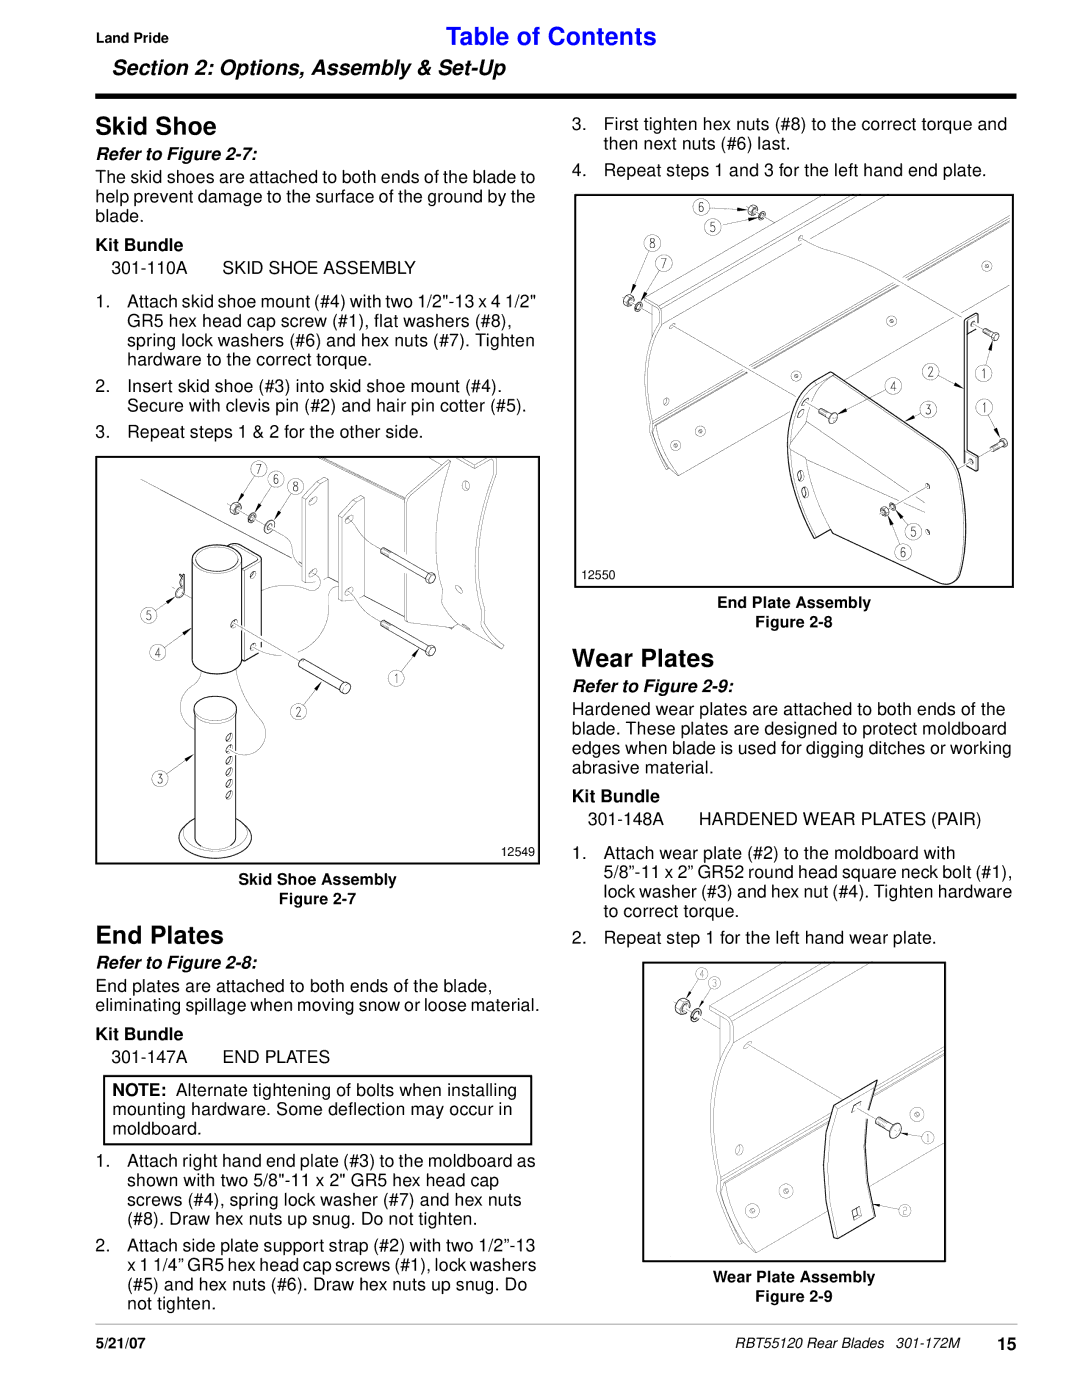
Skid Shoe
Refer to Figure 2-7:
The skid shoes are attached to both ends of the blade to help prevent damage to the surface of the ground by the blade.
Kit Bundle
301-110A SKID SHOE ASSEMBLY
1.Attach skid shoe mount (#4) with two
2.Insert skid shoe (#3) into skid shoe mount (#4). Secure with clevis pin (#2) and hair pin cotter (#5).
3.Repeat steps 1 & 2 for the other side.
12549 |
Skid Shoe Assembly
Figure
End Plates
Refer to Figure 2-8:
End plates are attached to both ends of the blade, eliminating spillage when moving snow or loose material.
Kit Bundle
301-147A END PLATES
NOTE: Alternate tightening of bolts when installing mounting hardware. Some deflection may occur in moldboard.
1.Attach right hand end plate (#3) to the moldboard as shown with two
2.Attach side plate support strap (#2) with two
3.First tighten hex nuts (#8) to the correct torque and then next nuts (#6) last.
4.Repeat steps 1 and 3 for the left hand end plate.
.
12550 |
End Plate Assembly
Figure
Wear Plates
Refer to Figure 2-9:
Hardened wear plates are attached to both ends of the blade. These plates are designed to protect moldboard edges when blade is used for digging ditches or working abrasive material.
Kit Bundle
301-148A HARDENED WEAR PLATES (PAIR)
1.Attach wear plate (#2) to the moldboard with
2.Repeat step 1 for the left hand wear plate.
Wear Plate Assembly
Figure
5/21/07 | RBT55120 Rear Blades | 15 |