USING THE DETACHABLE FRONT PANEL
To Reinstall the Front Panel
1.When the panel bracket is in slide up position, insert left side of the front panel to its proper position and push right side into the panel bracket, a ‘click’ sound should be heard.
5.Do not expose the front panel to high temperatures or direct sunlight in anywhere.
6.Keep away any volatile agents (e.g. benzene, thinner or insecticides) from touching the surface of the front panel.
7.Do not attempt to disassemble the front panel.
Front Panel
2.Note that if the front panel fails to lock in position properly, press control button may not function and LCD
display may be missing some segments. Pressing the button and then reinstall the front panel again.
3.Note that you cannot install the front panel in the following method.
PANEL ANGLE ADJUSTMENT (OPTIONAL)
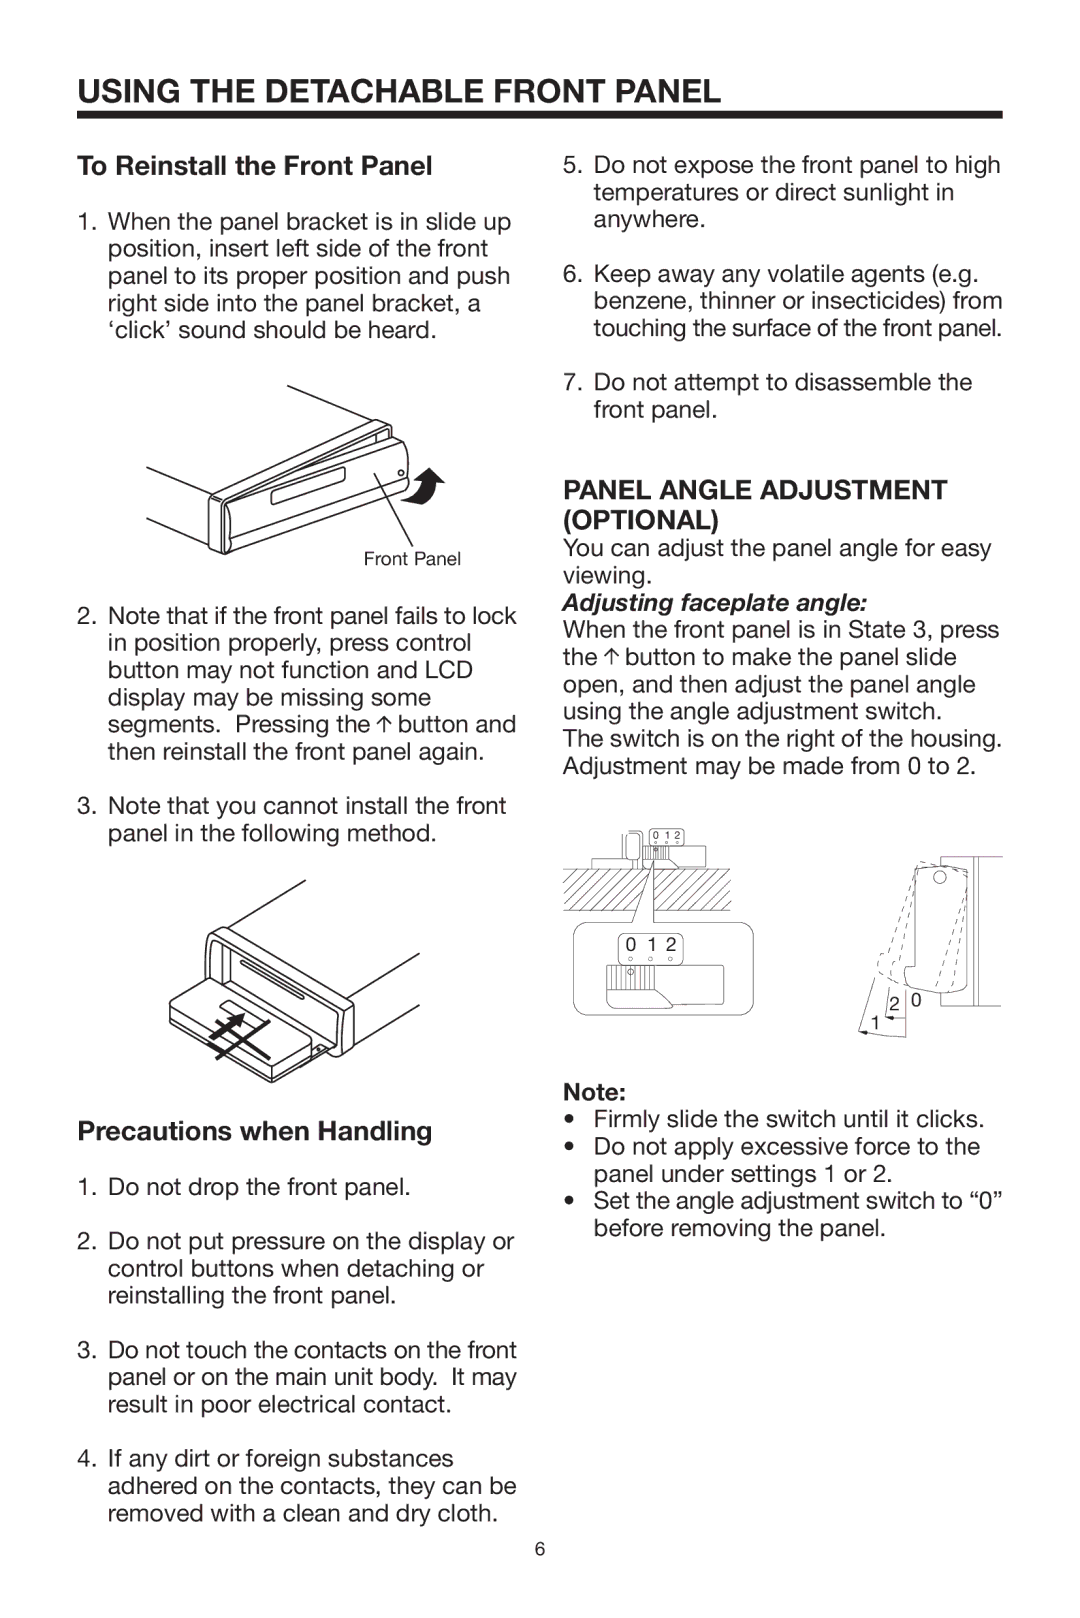
You can adjust the panel angle for easy viewing.
Adjusting faceplate angle:
When the front panel is in State 3, press the ![]() button to make the panel slide open, and then adjust the panel angle using the angle adjustment switch.
button to make the panel slide open, and then adjust the panel angle using the angle adjustment switch.
The switch is on the right of the housing. Adjustment may be made from 0 to 2.
0 1 2
0 1 2
2 0
1 ![]()
Precautions when Handling
1.Do not drop the front panel.
2.Do not put pressure on the display or control buttons when detaching or reinstalling the front panel.
3.Do not touch the contacts on the front panel or on the main unit body. It may result in poor electrical contact.
4.If any dirt or foreign substances adhered on the contacts, they can be removed with a clean and dry cloth.
Note:
•Firmly slide the switch until it clicks.
•Do not apply excessive force to the panel under settings 1 or 2.
•Set the angle adjustment switch to “0” before removing the panel.
6
