26 - PC400 Terminal Installation & User’s Guide
A P P E N D I X E
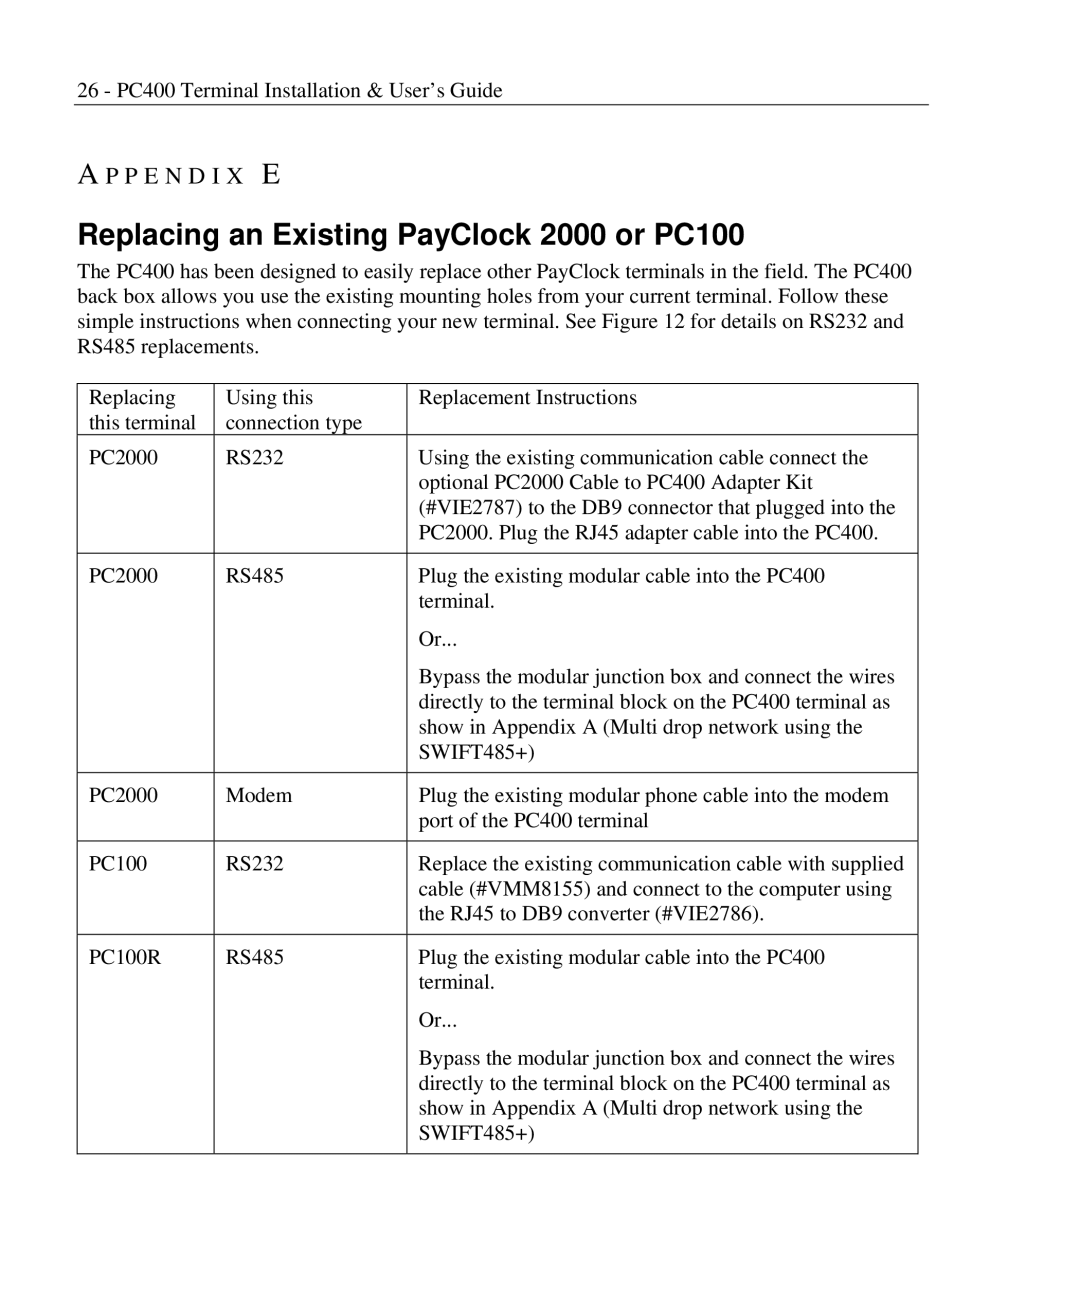
Replacing an Existing PayClock 2000 or PC100
The PC400 has been designed to easily replace other PayClock terminals in the field. The PC400 back box allows you use the existing mounting holes from your current terminal. Follow these simple instructions when connecting your new terminal. See Figure 12 for details on RS232 and RS485 replacements.
Replacing | Using this | Replacement Instructions |
this terminal | connection type |
|
PC2000 | RS232 | Using the existing communication cable connect the |
|
| optional PC2000 Cable to PC400 Adapter Kit |
|
| (#VIE2787) to the DB9 connector that plugged into the |
|
| PC2000. Plug the RJ45 adapter cable into the PC400. |
|
|
|
PC2000 | RS485 | Plug the existing modular cable into the PC400 |
|
| terminal. |
|
| Or... |
|
| Bypass the modular junction box and connect the wires |
|
| directly to the terminal block on the PC400 terminal as |
|
| show in Appendix A (Multi drop network using the |
|
| SWIFT485+) |
|
|
|
PC2000 | Modem | Plug the existing modular phone cable into the modem |
|
| port of the PC400 terminal |
|
|
|
PC100 | RS232 | Replace the existing communication cable with supplied |
|
| cable (#VMM8155) and connect to the computer using |
|
| the RJ45 to DB9 converter (#VIE2786). |
|
|
|
PC100R | RS485 | Plug the existing modular cable into the PC400 |
|
| terminal. |
|
| Or... |
|
| Bypass the modular junction box and connect the wires |
|
| directly to the terminal block on the PC400 terminal as |
|
| show in Appendix A (Multi drop network using the |
|
| SWIFT485+) |
|
|
|