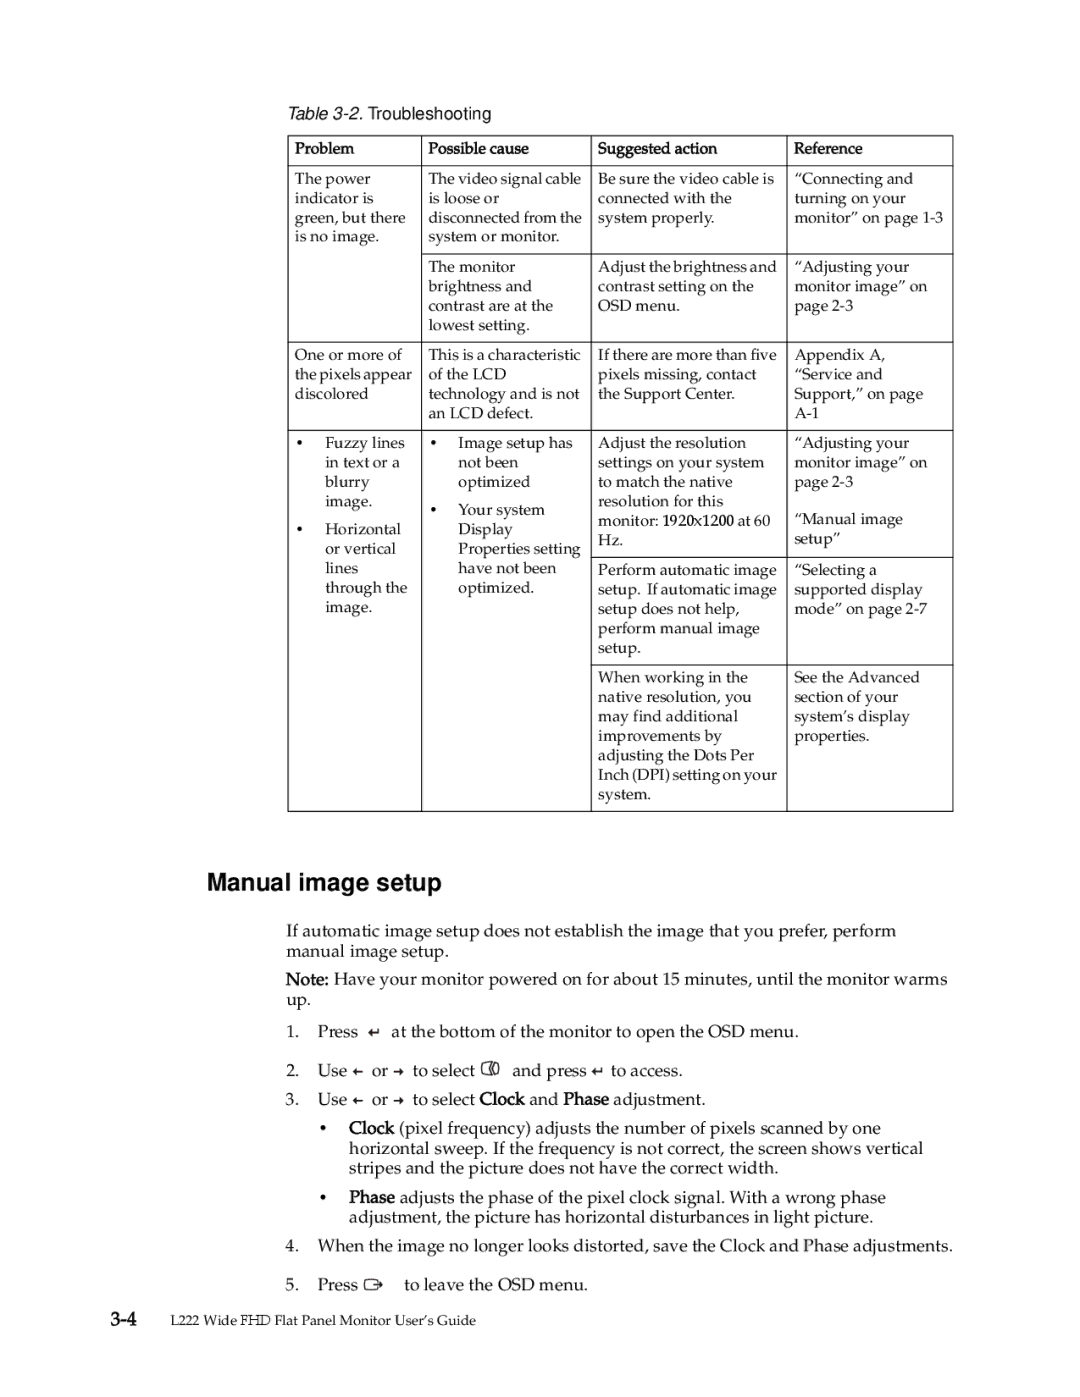
Table 3-2.Troubleshooting

Problem

Possible cause

Suggested action

Reference


The power

The video signal cable

Be sure the video cable is

“Connecting and

indicator is

is loose or

connected with the

turning on your

green, but there

disconnected from the

system properly.

monitor” on page 1-3

is no image.

system or monitor.


The monitor

Adjust the brightness and

“Adjusting your


brightness and

contrast setting on the

monitor image” on


contrast are at the

OSD menu.

page 2-3


lowest setting.


One or more of

This is a characteristic

If there are more than five

Appendix A,

the pixels appear

of the LCD

pixels missing, contact

“Service and

discolored

technology and is not

the Support Center.

Support,” on page


an LCD defect.


A-1


Fuzzy lines

Image setup has

Adjust the resolution

“Adjusting your


in text or a


not been

settings on your system

monitor image” on


blurry


optimized

to match the native

page 2-3


image.

Your system

resolution for this

“Manual image


monitor: 1920x1200 at 60

Horizontal


Display


Hz.

setup”


or vertical


Properties setting


lines


have not been

Perform automatic image

“Selecting a


through the


optimized.

setup. If automatic image

supported display


image.


setup does not help,

mode” on page 2-7


perform manual image


setup.


When working in the

See the Advanced


native resolution, you

section of your


may find additional

system’s display


improvements by

properties.


adjusting the Dots Per


Inch (DPI) setting on your


system.


Manual image setup

If automatic image setup does not establish the image that you prefer, perform manual image setup.

Note: Have your monitor powered on for about 15 minutes, until the monitor warms up.

1.Press at the bottom of the monitor to open the OSD menu.

2.Use or to select and press to access.

3.Use or to select Clock and Phase adjustment.

Clock (pixel frequency) adjusts the number of pixels scanned by one horizontal sweep. If the frequency is not correct, the screen shows vertical stripes and the picture does not have the correct width.

Phase adjusts the phase of the pixel clock signal. With a wrong phase adjustment, the picture has horizontal disturbances in light picture.

4.When the image no longer looks distorted, save the Clock and Phase adjustments.

5. Press

to leave the OSD menu.

3-4L222 Wide FHD Flat Panel Monitor User’s Guide

Page 22
Image 22
Lenovo 4432-HF1 manual Manual image setup

4432-HF1 specifications

The Lenovo 4432-HF1 is a powerful and versatile addition to the world of computing, catering to both professionals and everyday users. Designed with performance and reliability in mind, this model showcases an array of features that make it a valuable tool for a variety of tasks.

At the heart of the Lenovo 4432-HF1 is its robust processing capabilities, often powered by a high-performance processor that can handle multiple applications running simultaneously. This allows users to seamlessly switch between demanding software and basic applications, ensuring a smooth experience whether one is involved in data analysis, graphic design, or simple web browsing.

One of the standout features of the Lenovo 4432-HF1 is its impressive RAM capacity, which enables efficient multitasking. With ample memory, users can keep numerous tabs open without experiencing lag, making it an ideal choice for those who require heavy workload management, such as students and professionals in fast-paced environments.

The display of the Lenovo 4432-HF1 is designed to provide exceptional clarity and color accuracy, making it suitable for both entertainment and professional use. Whether watching high-definition videos or editing photos, the vibrant screen ensures that visual content is showcased in the best possible light.

In terms of connectivity, the Lenovo 4432-HF1 is equipped with a variety of ports, including USB Type-C and USB 3.0 options, alongside HDMI output for versatile external device connections. This feature makes it easy to connect the device to projectors, external monitors, and other peripherals, enhancing productivity and collaboration.

Security features on the Lenovo 4432-HF1 include biometric authentication and robust encryption options, safeguarding sensitive data from unauthorized access. These security measures are particularly beneficial for business users who handle confidential information.

The battery life of the Lenovo 4432-HF1 is optimized for extended use, ensuring that users can work or play for hours without needing to recharge frequently. This enduring power makes it an ideal companion for those on the go.

Overall, the Lenovo 4432-HF1 stands out as a reliable and high-performing device, equipped with advanced technologies and features that cater to a diverse range of needs. Whether for home use, educational purposes, or professional environments, the Lenovo 4432-HF1 is a compelling choice, combining power, performance, and practicality in one remarkable package.