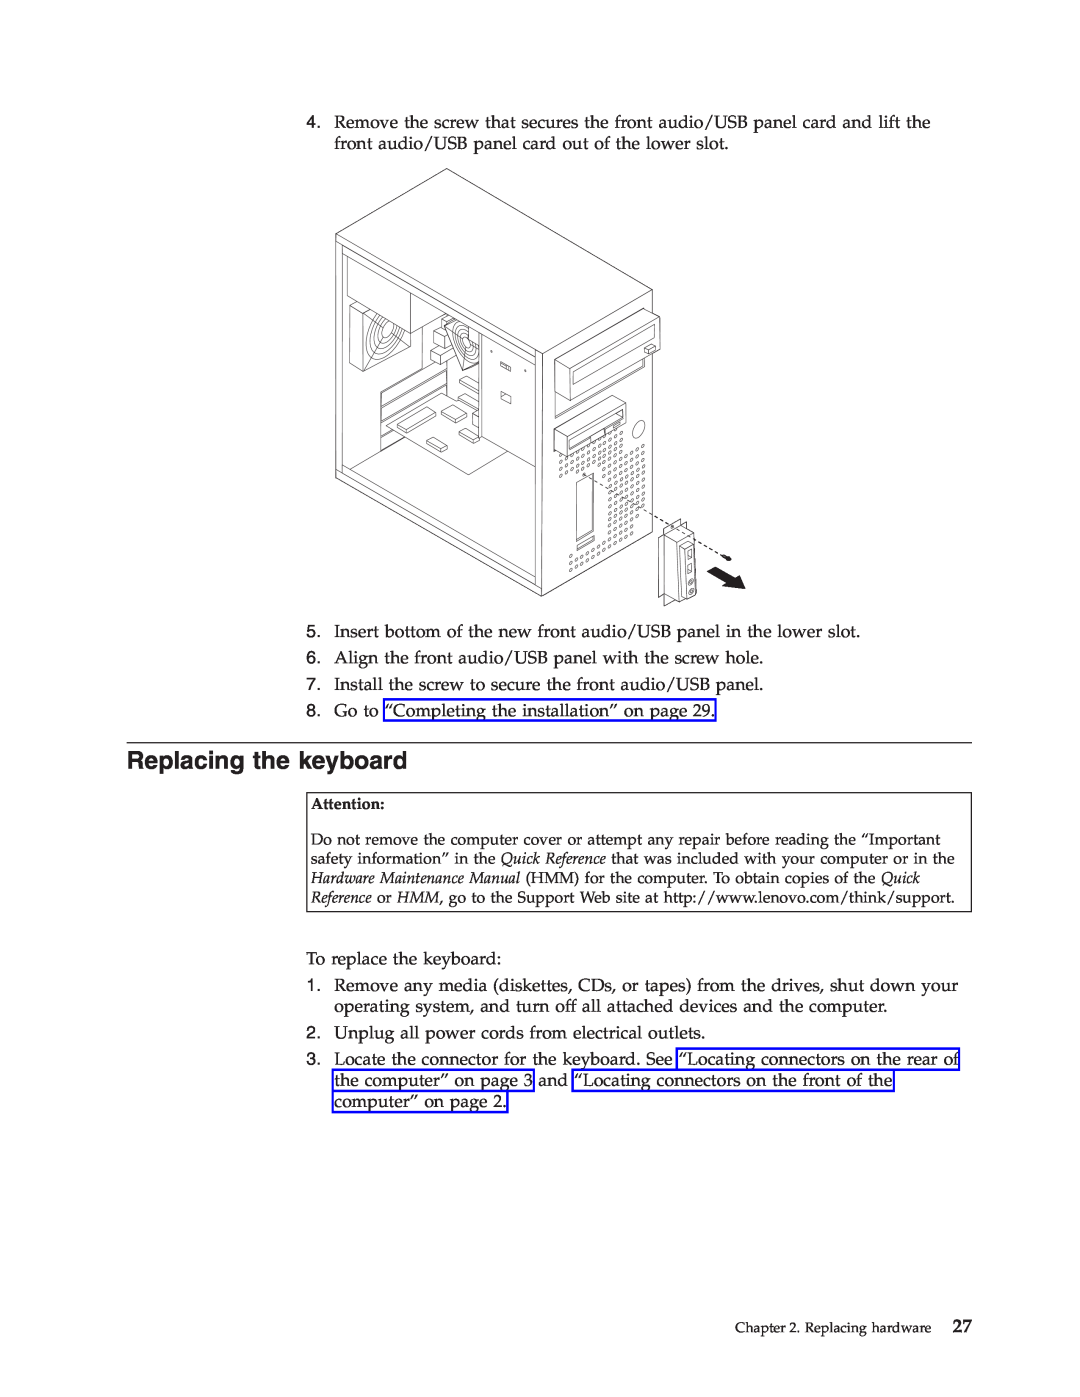
4.Remove the screw that secures the front audio/USB panel card and lift the front audio/USB panel card out of the lower slot.
5.Insert bottom of the new front audio/USB panel in the lower slot.
6.Align the front audio/USB panel with the screw hole.
7.Install the screw to secure the front audio/USB panel.
8.Go to “Completing the installation” on page 29.
Replacing the keyboard
Attention:
Do not remove the computer cover or attempt any repair before reading the “Important safety information” in the Quick Reference that was included with your computer or in the Hardware Maintenance Manual (HMM) for the computer. To obtain copies of the Quick Reference or HMM, go to the Support Web site at http://www.lenovo.com/think/support.
To replace the keyboard:
1.Remove any media (diskettes, CDs, or tapes) from the drives, shut down your operating system, and turn off all attached devices and the computer.
2.Unplug all power cords from electrical outlets.
3.Locate the connector for the keyboard. See “Locating connectors on the rear of the computer” on page 3 and “Locating connectors on the front of the computer” on page 2.
Chapter 2. Replacing hardware 27