IdeaPad U260 Hardware Maintenance Manual
Important information about replacing RoHS compliant FRUs
RoHS, The Restriction of Hazardous Substances in Electrical and Electronic Equipment Directive (2002/95/EC) is a European Union legal requirement affecting the global electronics industry. RoHS requirements must be implemented on Lenovo products placed on the market after June 2006. Products on the market before June 2006 are not required to have RoHS compliant parts. If the original FRU parts are
Note: RoHS and
Lenovo plans to transit to RoHS compliance well before the implementation date and expects its suppliers to be ready to support Lenovo’s requirements and schedule in the EU. Products sold in 2005 and 2006 will contain some RoHS compliant FRUs. The following statement pertains to these products and any product Lenovo produces containing RoHS compliant FRUs.
RoHS compliant FRUs have unique FRU part numbers. Before or after the RoHS implementation date, failed RoHS compliant parts must always be replaced with RoHS compliant ones, so only the FRUs identified as compliant in the system HMM or direct substitutions for those FRUs may be used.
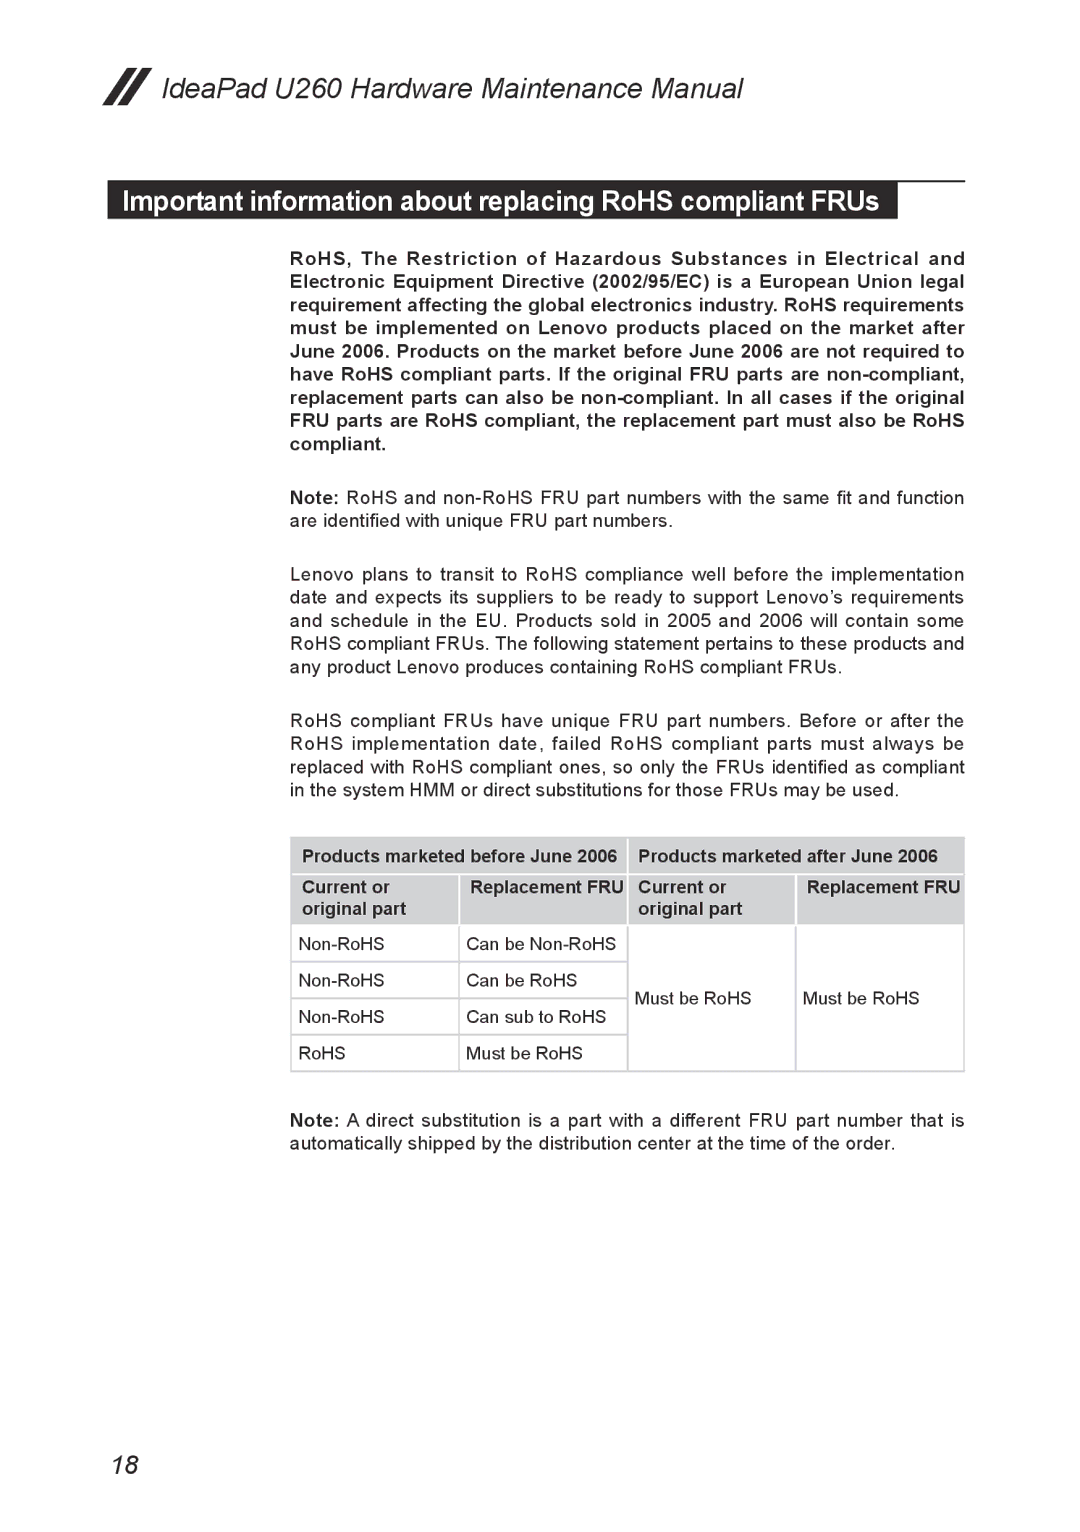
Products marketed before June 2006 | Products marketed after June 2006 | ||
Current or | Replacement FRU | Current or | Replacement FRU |
original part |
| original part |
|
Can be | |
|
|
Can be RoHS | |
|
|
Can sub to RoHS | |
|
|
RoHS | Must be RoHS |
|
|
Must be RoHS
Must be RoHS
Note: A direct substitution is a part with a different FRU part number that is automatically shipped by the distribution center at the time of the order.
18