RECORDING ON A TAPE
1
3
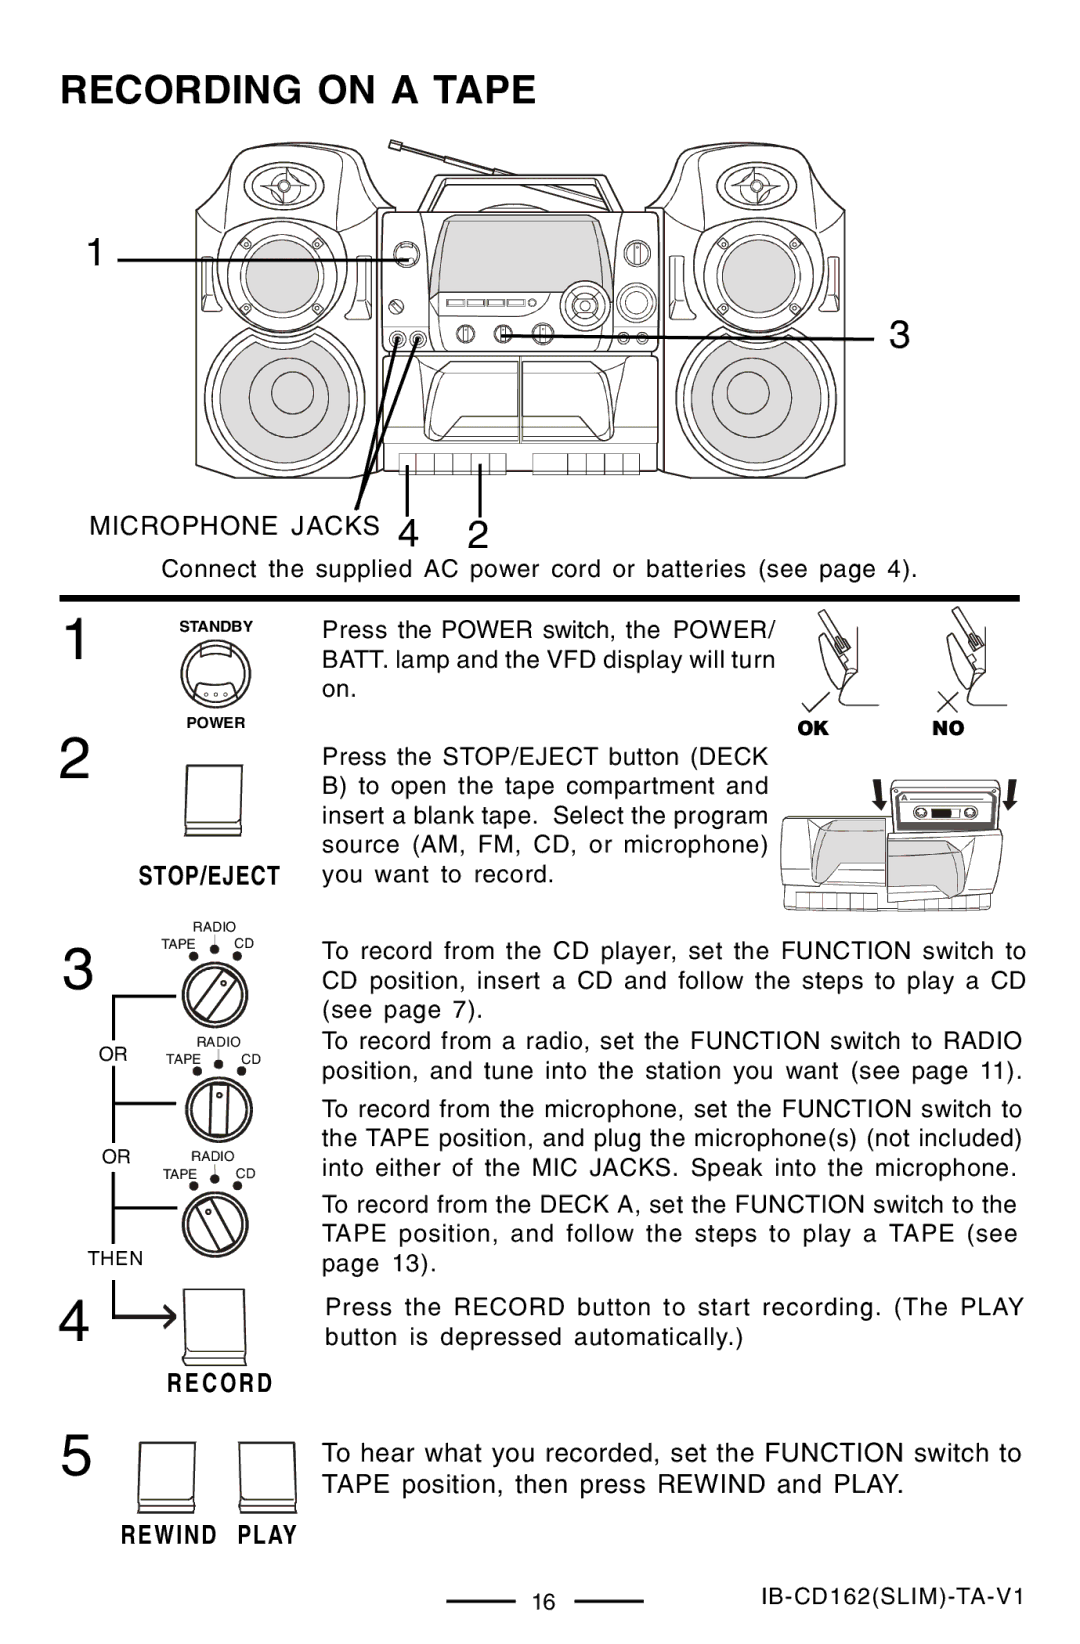
MICROPHONE JACKS 4 2
Connect the supplied AC power cord or batteries (see page 4).
1STANDBY
POWER
2
STOP/EJECT
Press the POWER switch, the POWER/ BATT. lamp and the VFD display will turn on.
OK NO
Press the STOP/EJECT button (DECK B) to open the tape compartment and insert a blank tape. Select the program ![]() source (AM, FM, CD, or microphone) you want to record.
source (AM, FM, CD, or microphone) you want to record.![]()
3
RADIO
TAPE CD
RADIO
To record from the CD player, set the FUNCTION switch to CD position, insert a CD and follow the steps to play a CD (see page 7).
To record from a radio, set the FUNCTION switch to RADIO
OR TAPE CD
OR RADIO
TAPE CD
THEN
4
RECORD
position, and tune into the station you want (see page 11).
To record from the microphone, set the FUNCTION switch to the TAPE position, and plug the microphone(s) (not included) into either of the MIC JACKS. Speak into the microphone.
To record from the DECK A, set the FUNCTION switch to the TAPE position, and follow the steps to play a TAPE (see page 13).
Press the RECORD button to start recording. (The PLAY button is depressed automatically.)
5 |
|
|
|
| To hear what you recorded, set the FUNCTION switch to |
|
|
|
|
| |
|
|
|
|
| TAPE position, then press REWIND and PLAY. |
| REWIND PLAY | ||||
16IB-CD162(SLIM)-TA-V1
