INSTALLATION
MANUFACTURED (MOBILE) HOME REQUIREMENTS This stove is certified as a Room Heater, Solid Fuel Type and may be used in Manufactured Housing providing the following requirements are followed:
from the stove to the chassis of the manufactured (mobile) home.
INSTALLING THE BAFFLE BRICKS
•An outside air inlet must be provided for combustion and be unrestricted while unit is in use.
•WARNING: DO NOT INSTALL APPLIANCE IN A SLEEPING ROOM.
•CAUTION: THE STRUCTURAL INTEGRITY OF THE MOBILE HOME FLOOR, WALL, AND CEILING/ROOF MUST BE MAINTAINED.
•Regulations require that the appliance must be secured to the floor and grounded to the chassis. See Securing the Stove to the Floor (and) Grounding Stove below.
•Required venting is 6” (152 mm) diameter Type
•The chimney must provide for a section joint so that any parts extending above 13' 6" (343 mm) from ground level can be removed for transportation of the mobile dwelling.
SECURING THE STOVE TO THE FLOOR
Manufactured (Mobile) Homes Only
Once the outside air floor duct is in position, replace the floor protector. Make sure that the floor protector's hole is aligned with the outside air opening. Next position and align the stove on the hearth pad. Manufactured (Mobile) home installations require that the stove be secured to the floor.
This ensures that the stove will not shift when the manufac- tured (mobile) home is moved. To do this, mark where the holes are to be drilled using a marking instrument long enough and small enough to fit through the (4) four holes in the stove legs. Mark holes, then remove the stove. Drill the
(4)four holes, with a 1/4" (7 mm) drill bit. Drill down through the floor protector and the manufactured (mobile) home floor. Use 1/4" (7 mm) lag bolts and secure to the manufactured (mobile) home floor.
NOTE: If the composition of the manufactured (mobile) home floor is of light particleboard construction, you will be required to secure the stove with regular hex head bolts and nuts. This will ensure that the bolts will not rip out of the floor when the manufactured (mobile) home is being moved.
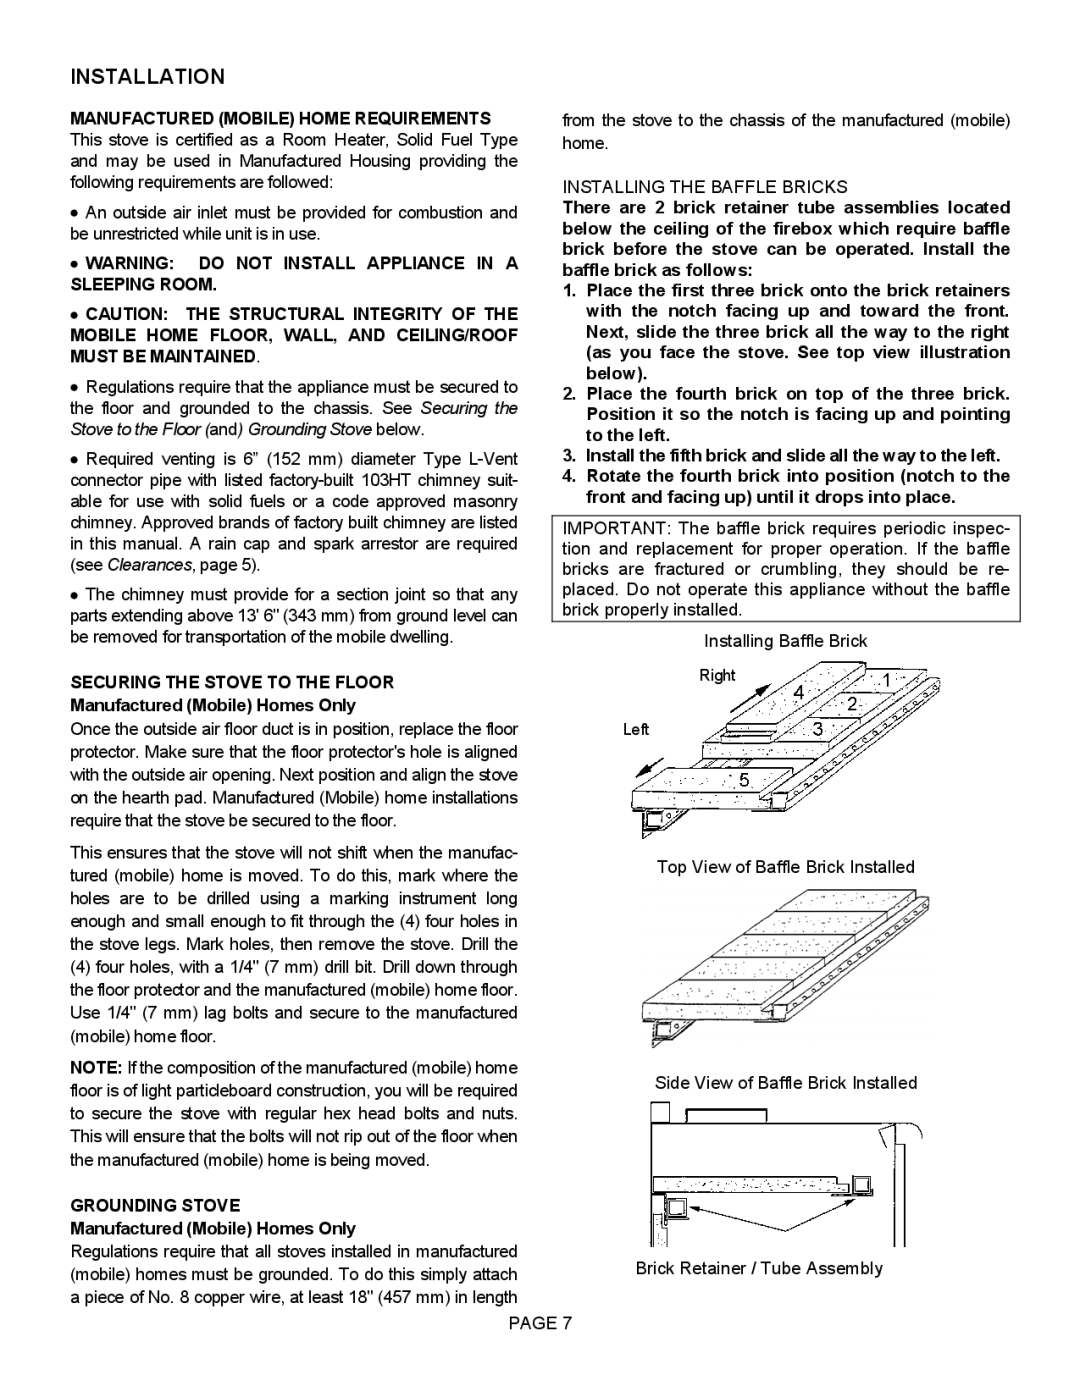
There are 2 brick retainer tube assemblies located below the ceiling of the firebox which require baffle brick before the stove can be operated. Install the baffle brick as follows:
1.Place the first three brick onto the brick retainers with the notch facing up and toward the front. Next, slide the three brick all the way to the right (as you face the stove. See top view illustration below).
2.Place the fourth brick on top of the three brick. Position it so the notch is facing up and pointing to the left.
3.Install the fifth brick and slide all the way to the left.
4.Rotate the fourth brick into position (notch to the front and facing up) until it drops into place.
IMPORTANT: The baffle brick requires periodic inspec- tion and replacement for proper operation. If the baffle bricks are fractured or crumbling, they should be re- placed. Do not operate this appliance without the baffle brick properly installed.
Installing Baffle Brick
Right
Left
Top View of Baffle Brick Installed
Side View of Baffle Brick Installed
GROUNDING STOVE |
| |
Manufactured (Mobile) Homes Only |
| |
Regulations require that all stoves installed in manufactured | Brick Retainer / Tube Assembly | |
(mobile) homes must be grounded. To do this simply attach | ||
| ||
a piece of No. 8 copper wire, at least 18" (457 mm) in length |
| |
PAGE 7 |
|