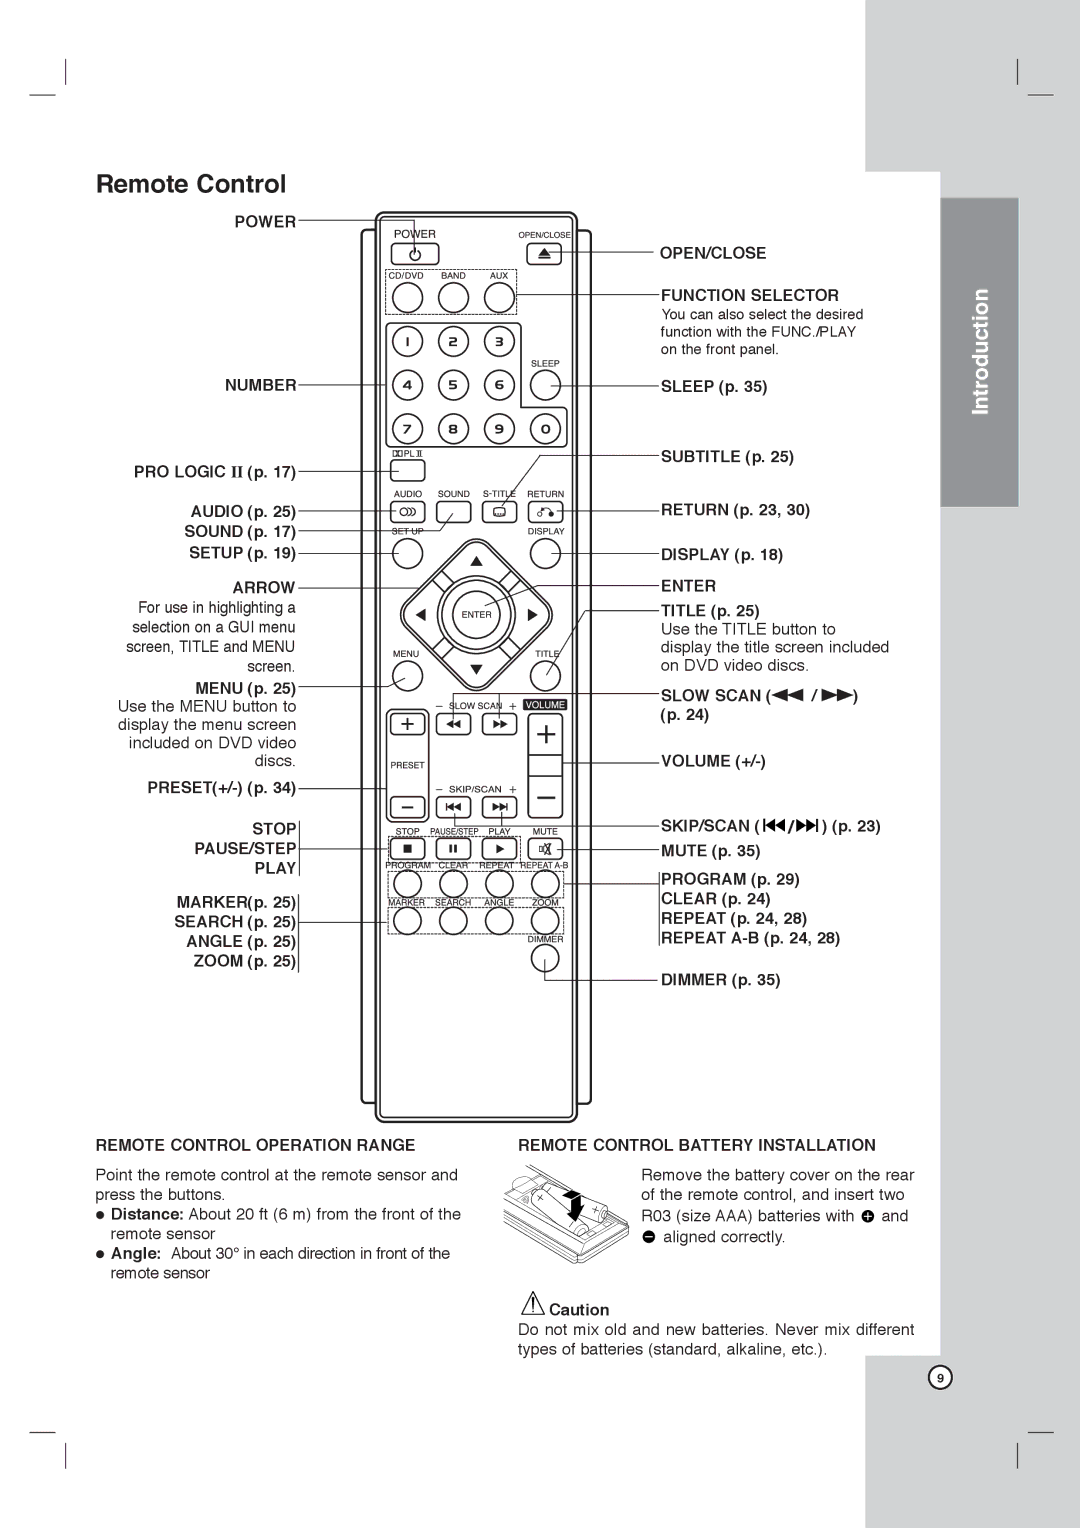
Remote Control
POWER
OPEN/CLOSE
![]()
![]() FUNCTION SELECTOR You can also select the desired function with the FUNC./PLAY on the front panel.
FUNCTION SELECTOR You can also select the desired function with the FUNC./PLAY on the front panel.
NUMBER | SLEEP (p. 35) | |
PRO LOGIC II (p. 17) | SUBTITLE (p. 25) | |
| ||
AUDIO (p. 25) | RETURN (p. 23, 30) | |
SOUND (p. 17) |
| |
SETUP (p. 19) | DISPLAY (p. 18) | |
ARROW | ENTER | |
For use in highlighting a | TITLE (p. 25) | |
selection on a GUI menu | Use the TITLE button to | |
screen, TITLE and MENU | display the title screen included | |
screen. | on DVD video discs. | |
MENU (p. 25) | SLOW SCAN (Q / R) | |
Use the MENU button to | ||
(p. 24) | ||
display the menu screen | ||
| ||
included on DVD video | VOLUME | |
discs. | ||
| ||
STOP | SKIP/SCAN ( / ) (p. 23) | |
PAUSE/STEP | MUTE (p. 35) | |
PLAY | PROGRAM (p. 29) | |
| ||
MARKER(p. 25) | CLEAR (p. 24) | |
SEARCH (p. 25) | REPEAT (p. 24, 28) | |
ANGLE (p. 25) | REPEAT | |
ZOOM (p. 25) | DIMMER (p. 35) | |
|
Introduction
REMOTE CONTROL OPERATION RANGE
Point the remote control at the remote sensor and press the buttons.
Distance: About 20 ft (6 m) from the front of the remote sensor
Angle: About 30° in each direction in front of the remote sensor
REMOTE CONTROL BATTERY INSTALLATION
Remove the battery cover on the rear of the remote control, and insert two R03 (size AAA) batteries with ![]() and
and ![]() aligned correctly.
aligned correctly.
![]() Caution
Caution
Do not mix old and new batteries. Never mix different types of batteries (standard, alkaline, etc.).
9
