Part 3 INITIAL STEPS FOR INSTALLING YOUR DRYER


 STEP 6 Preparation of the Dryer.


Prior to the first use of this appliance, use all- purpose cleaning products or a solution of detergent and water, with damp cloth to remove from the inside of the dryer drum/drying compartment any dust or dirt that may have accumulated inside the dryer.
STEP 7 Confirming Heat Source |
Operation. |
Confirming Heat Source in Gas Dryers
Close the door to the dryer drum/drying compartment and, after completing all steps in this manual for proper installation of this dryer, start the dryer on a heat setting. After the dryer starts, the igniter will glow red and the main burner will ignite.
Warning: If all air is not purged from the gas line, the gas igniter may go off before the gas and the main burner have ignited. If this happens, the igniter will
Confirming Heat Source in Electric Dryers
Close the door to the dryer drum/drying compartment and, after completing all steps in this manual for proper installation of this dryer, start the dryer on a heat setting. The exhaust air or the exhaust pipe should be warm after the dryer has been operating for three minutes.
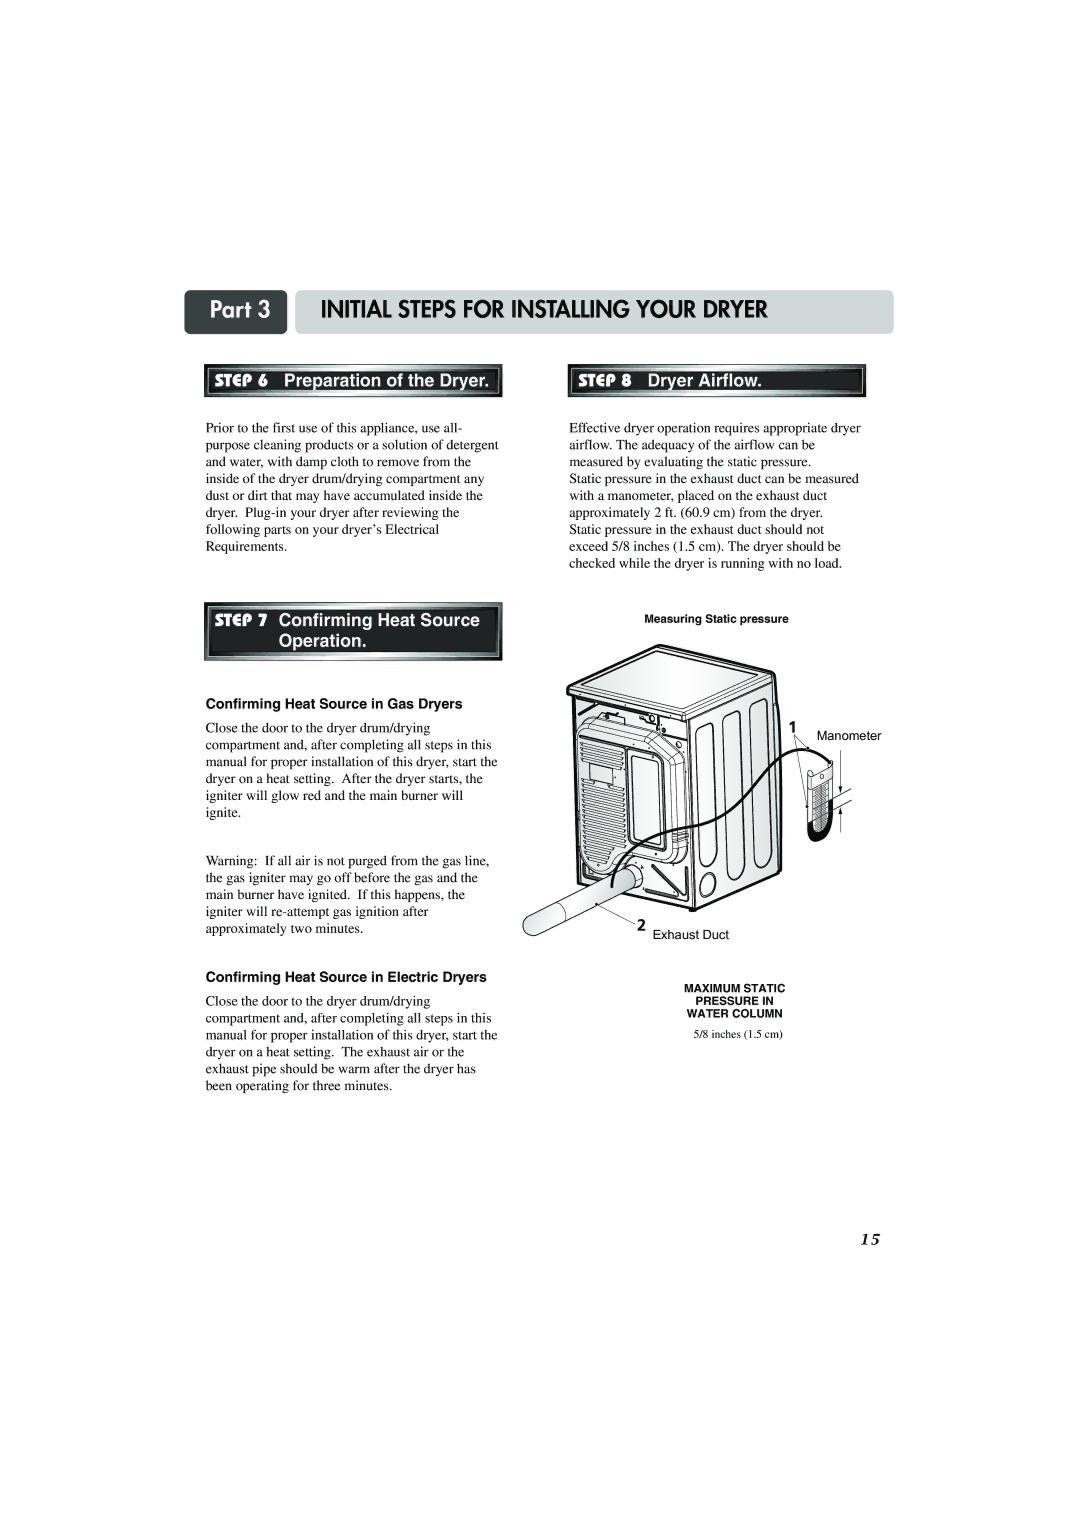
STEP 8 | Dryer Airflow. |
Effective dryer operation requires appropriate dryer airflow. The adequacy of the airflow can be measured by evaluating the static pressure.
Static pressure in the exhaust duct can be measured with a manometer, placed on the exhaust duct approximately 2 ft. (60.9 cm) from the dryer. Static pressure in the exhaust duct should not exceed 5/8 inches (1.5 cm). The dryer should be checked while the dryer is running with no load.
Measuring Static pressure
Manometer
Exhaust Duct
MAXIMUM STATIC
PRESSURE IN
WATER COLUMN
5/8 inches (1.5 cm)
1 5