Removing and Attaching the BAT MECHA |
|
|
| ||
|
|
|
|
| |
| If you need to remove the BAT MECHA as in the case of a failure, open the |
|
| ||
| control panel base and remove the BAT MECHA through the following |
|
| ||
| procedure. |
|
| ||
| To reinstall the BAT MECHA, reverse the removing procedure, being certain that |
| |||
| the BAT MECHA is faced in the correct direction. |
|
| ||
| For instructions on opening the control panel base, refer to the Instruction Manual |
| |||
| of the cabinet. |
|
| ||
|
|
|
|
|
|
|
| To prevent electric shock, be sure to turn off the power for the cabinet when |
|
| |
|
| removing or attaching the BAT MECHA. |
|
| |
1 |
|
|
|
|
|
|
|
|
| ||
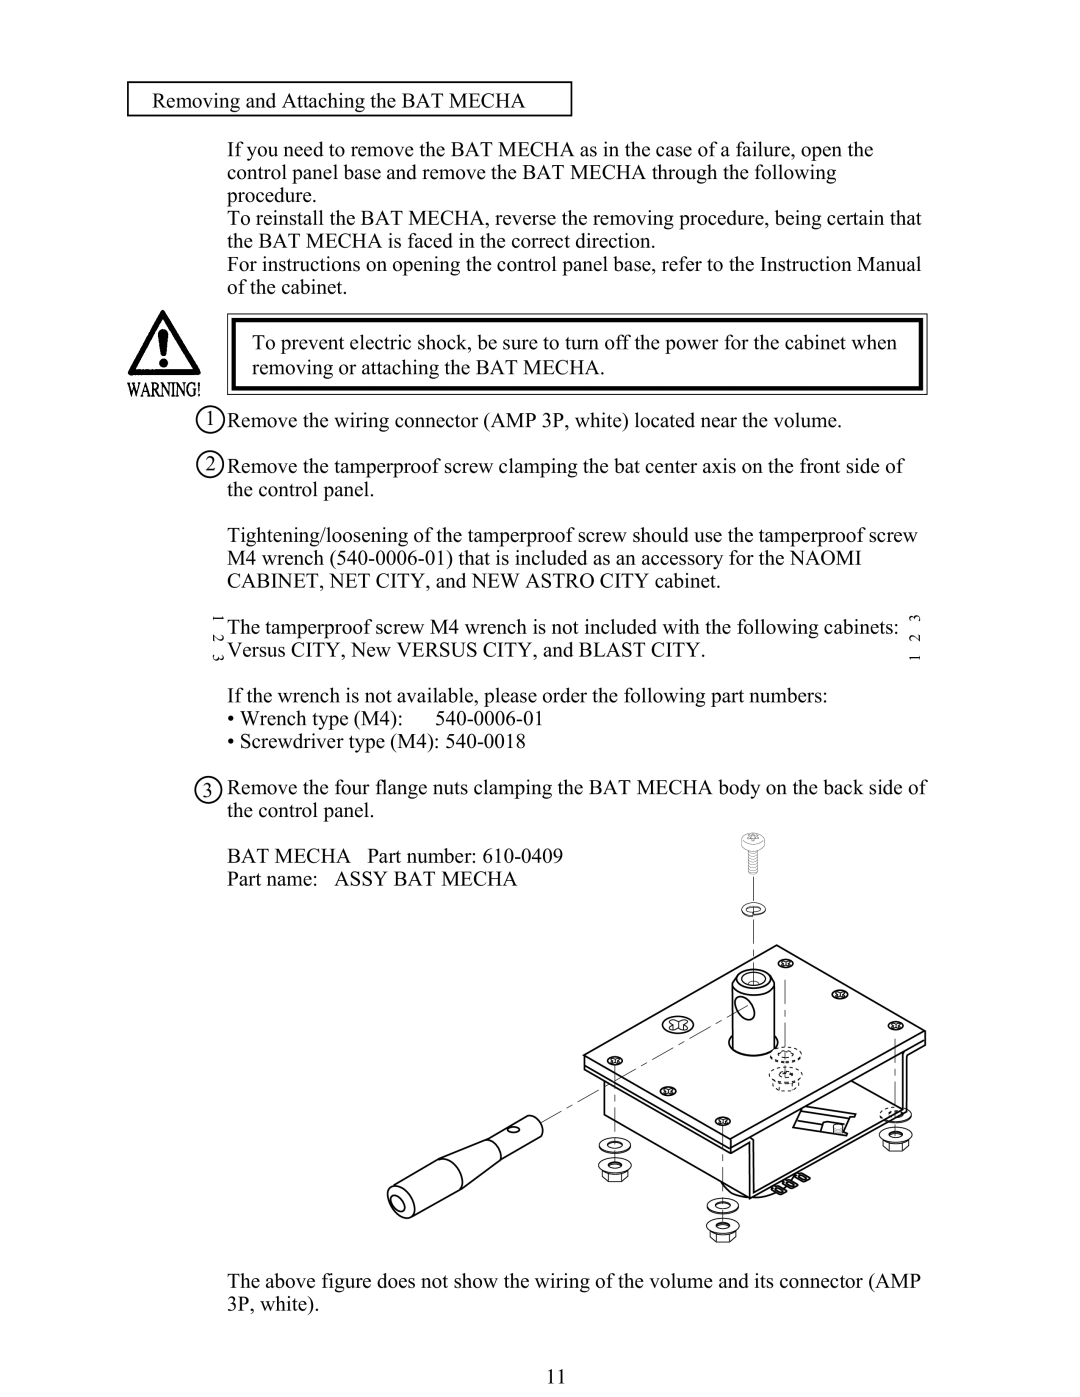
Remove the wiring connector (AMP 3P, white) located near the volume. |
|
| |||
2 | Remove the tamperproof screw clamping the bat center axis on the front side of |
|
| ||
| the control panel. |
|
| ||
| Tightening/loosening of the tamperproof screw should use the tamperproof screw |
| |||
| M4 wrench |
|
| ||
| CABINET, NET CITY, and NEW ASTRO CITY cabinet. |
|
| ||
1 | The tamperproof screw M4 wrench is not included with the following cabinets: | 3 |
| ||
2 | 2 |
| |||
|
|
|
| ||
3 Versus CITY, New VERSUS CITY, and BLAST CITY. | 1 |
| |||
If the wrench is not available, please order the following part numbers:
• Wrench type (M4):
• Screwdriver type (M4):
3Remove the four flange nuts clamping the BAT MECHA body on the back side of the control panel.
BAT MECHA Part number:
Part name: ASSY BAT MECHA
The above figure does not show the wiring of the volume and its connector (AMP 3P, white).
11