Troubleshooting
Your appliance is designed and manufactured for a long life span and reliable operation.
If a malfunction nonetheless occurs during operation, check whether it is due to an operating error. Please note that even during the warranty period the resultant servicing costs in this case will have to be borne by the owner.
You may be able to rectify the following faults by checking the possible causes yourself:
Malfunction Possible cause and remedy Appliance does not work, display is off
-Is the appliance switched on properly?
-Is the mains plug properly inserted in the socket?
-Is the socket fuse intact?
The interior light does not come on
-Is the BioFresh compartment switched on?
-Has the door been open for more than 15 minutes?
-The bulb is defective. Change the bulb as described in "Interior light".
Loud running noise
-Is the appliance standing firmly on the floor, or does the compressor cause nearby items of furniture or objects to vibrate? If necessary, move the appliance slightly, align by adjusting the adjustable feet, or move bottles and contai- ners apart.
-Burbling noises are normal. These are caused by the refrigerant flowing round the refrigerant circuit.
A short clicking sound: This will be heard whenever the refrigeration unit (the motor) switches on or off
Motor noise: This will be slightly louder for a brief period when the refrigeration unit switches on. The refrigerating capacity will increase when the SuperFrost function is activated, fresh food has just been placed in the appliance or the door has been left open for a while.
The audible warning signal sounds, the temperature is not cold enough
-Have you put too much fresh food into the freezer without activating SuperFrost? (See "SuperFrost")
-Does the door close properly?
-Is the appliance sufficiently well ventilated? Clear ventilation grilles if necessary.
-Is the ambient temperature too hot? (See "Safety regulations")
-Has the appliance been opened too often or left open too long?
-If applicable, wait until the appliance reaches the required temperature itself.
appears in the display
-There has been a power failure; proceed as described in "Power failure/FrostControl display".
The outside of the appliance may feel warm in places
-That is quite normal. The heat from the cooling circuit is used to avoid the formation of condensate.
Customer service and type plate
If none of the above causes apply and you cannot rec- tify the fault yourself, or if the temperature display reads
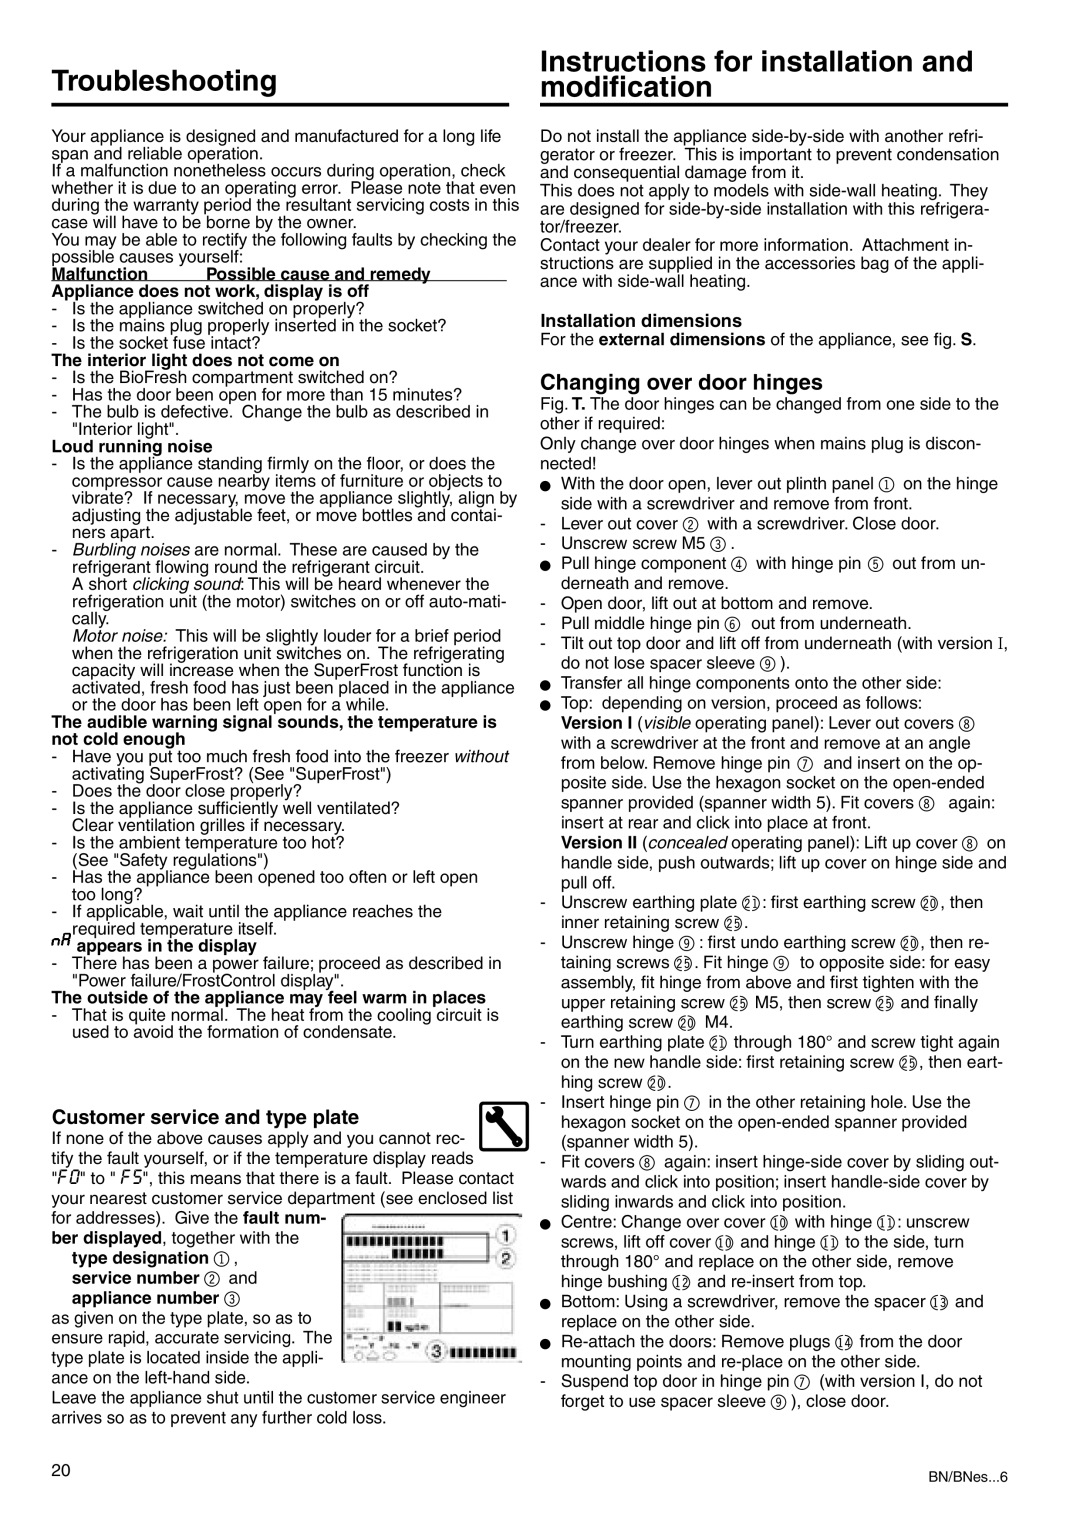
"F 0" to " F 5", this means that there is a fault. Please contact your nearest customer service department (see enclosed list for addresses). Give the fault num-
ber displayed, together with the type designation 1, service number 2 and appliance number 3
as given on the type plate, so as to ensure rapid, accurate servicing. The type plate is located inside the appli- ance on the
Leave the appliance shut until the customer service engineer arrives so as to prevent any further cold loss.
Instructions for installation and modification
Do not install the appliance
This does not apply to models with
Contact your dealer for more information. Attachment in- structions are supplied in the accessories bag of the appli- ance with
Installation dimensions
For the external dimensions of the appliance, see fig. S.
Changing over door hinges
Fig. T. The door hinges can be changed from one side to the other if required:
Only change over door hinges when mains plug is discon- nected!
WWith the door open, lever out plinth panel 1 on the hinge side with a screwdriver and remove from front.
-Lever out cover 2 with a screwdriver. Close door.
-Unscrew screw M5 3.
WPull hinge component 4 with hinge pin 5 out from un- derneath and remove.
-Open door, lift out at bottom and remove.
-Pull middle hinge pin 6 out from underneath.
-Tilt out top door and lift off from underneath (with version I, do not lose spacer sleeve 9).
WTransfer all hinge components onto the other side:
WTop: depending on version, proceed as follows:
Version I (visible operating panel): Lever out covers 8 with a screwdriver at the front and remove at an angle from below. Remove hinge pin 7 and insert on the op- posite side. Use the hexagon socket on the open-ended spanner provided (spanner width 5). Fit covers 8 again: insert at rear and click into place at front.
Version II (concealed operating panel): Lift up cover 8 on handle side, push outwards; lift up cover on hinge side and pull off.
-Unscrew earthing plate cm: first earthing screw cl, then inner retaining screw cq.
-Unscrew hinge 9: first undo earthing screw cl, then re-
taining screws cq. Fit hinge 9 to opposite side: for easy assembly, fit hinge from above and first tighten with the upper retaining screw cq M5, then screw cq and finally earthing screw cl M4.
-Turn earthing plate cm through 180° and screw tight again on the new handle side: first retaining screw cq, then eart- hing screw cl.
-Insert hinge pin 7 in the other retaining hole. Use the hexagon socket on the open-ended spanner provided (spanner width 5).
-Fit covers 8 again: insert hinge-side cover by sliding out- wards and click into position; insert handle-side cover by sliding inwards and click into position.
WCentre: Change over cover bl with hinge bm: unscrew screws, lift off cover bl and hinge bm to the side, turn through 180° and replace on the other side, remove hinge bushing bn and
WBottom: Using a screwdriver, remove the spacer bo and replace on the other side.
W
-Suspend top door in hinge pin 7 (with version I, do not forget to use spacer sleeve 9), close door.
20 | BN/BNes...6 |
|