36
Z31
37
33
WAlign the depth of the unit door Z : - top: loosen screws dr�
- at the bottom: loosen the hexagonal screws dq with the ring spanner sup- plied ds and adjust the door.
-Allow an air gap of approximately 2 mm between the unit door and the body of the unit. Do not allow any burls or seal- ing lips to touch - this is important for correct function!
34
35 | Z |
|
==![]()

 ca. = 2mm
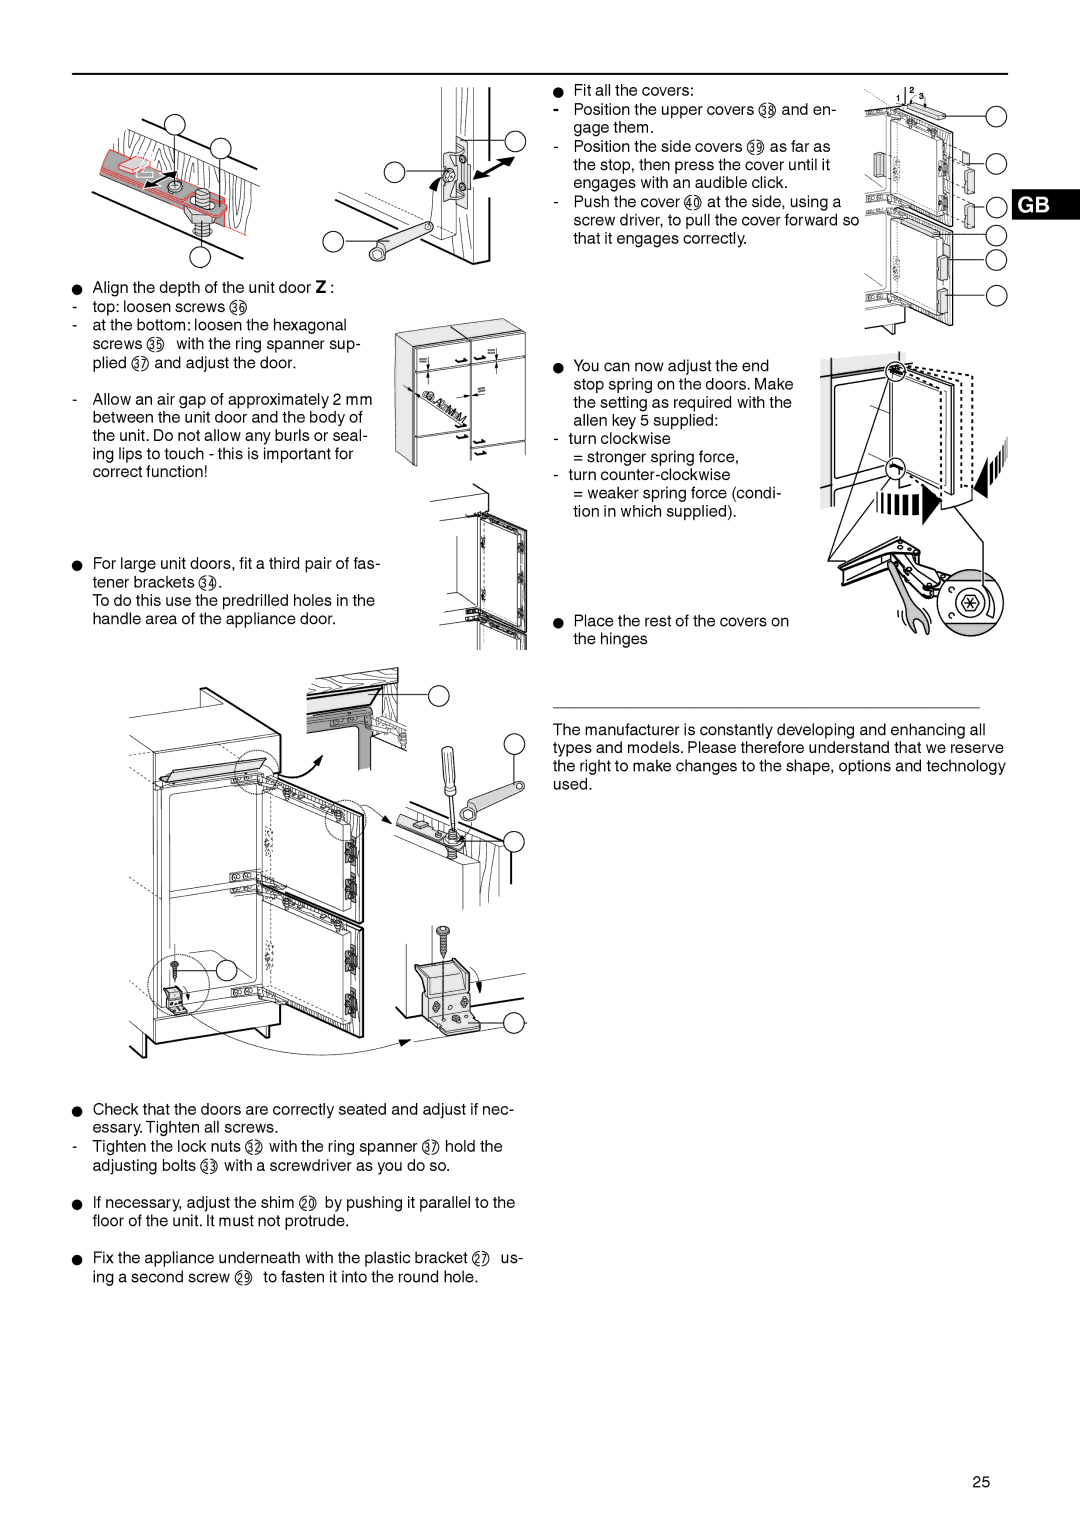
W | Fit all the covers: |
|
- | Position the upper covers dt and en- | 38 |
- | gage them. |
|
Position the side covers du as far as |
| |
| the stop, then press the cover until it | 39 |
- | engages with an audible click. | 40 GB |
Push the cover el at the side, using a | ||
| screw driver, to pull the cover forward so |
|
| that it engages correctly. | 38 |
|
| 39 |
|
| 40 |
W You can now adjust the end stop spring on the doors. Make the setting as required with the allen key 5 supplied:
- turn clockwise
= stronger spring force, - turn
= weaker spring force (condi- tion in which supplied).
W For large unit doors, fit a third pair of fas- tener brackets dp.
To do this use the predrilled holes in the handle area of the appliance door.
20
37
32
29
27
W Place the rest of the covers on the hinges
_______________________________________________
The manufacturer is constantly developing and enhancing all types and models. Please therefore understand that we reserve the right to make changes to the shape, options and technology used.
W Check that the doors are correctly seated and adjust if nec- essary. Tighten all screws.
- Tighten the lock nuts dn with the ring spanner ds hold the adjusting bolts do with a screwdriver as you do so.
WIf necessary, adjust the shim cl by pushing it parallel to the floor of the unit. It must not protrude.
WFix the appliance underneath with the plastic bracket cs us- ing a second screw cu to fasten it into the round hole.
25