ICEMAKER
Connection to the Water Supply
1.Install the
2.The solenoid valve has a Metric R3/4 male con- nector. A R3/4 (metric) to a 1/4" OD adapter is supplied with the icemaker.
3.Move the appliance towards the final position and leave a gap of approx. 30" behind.
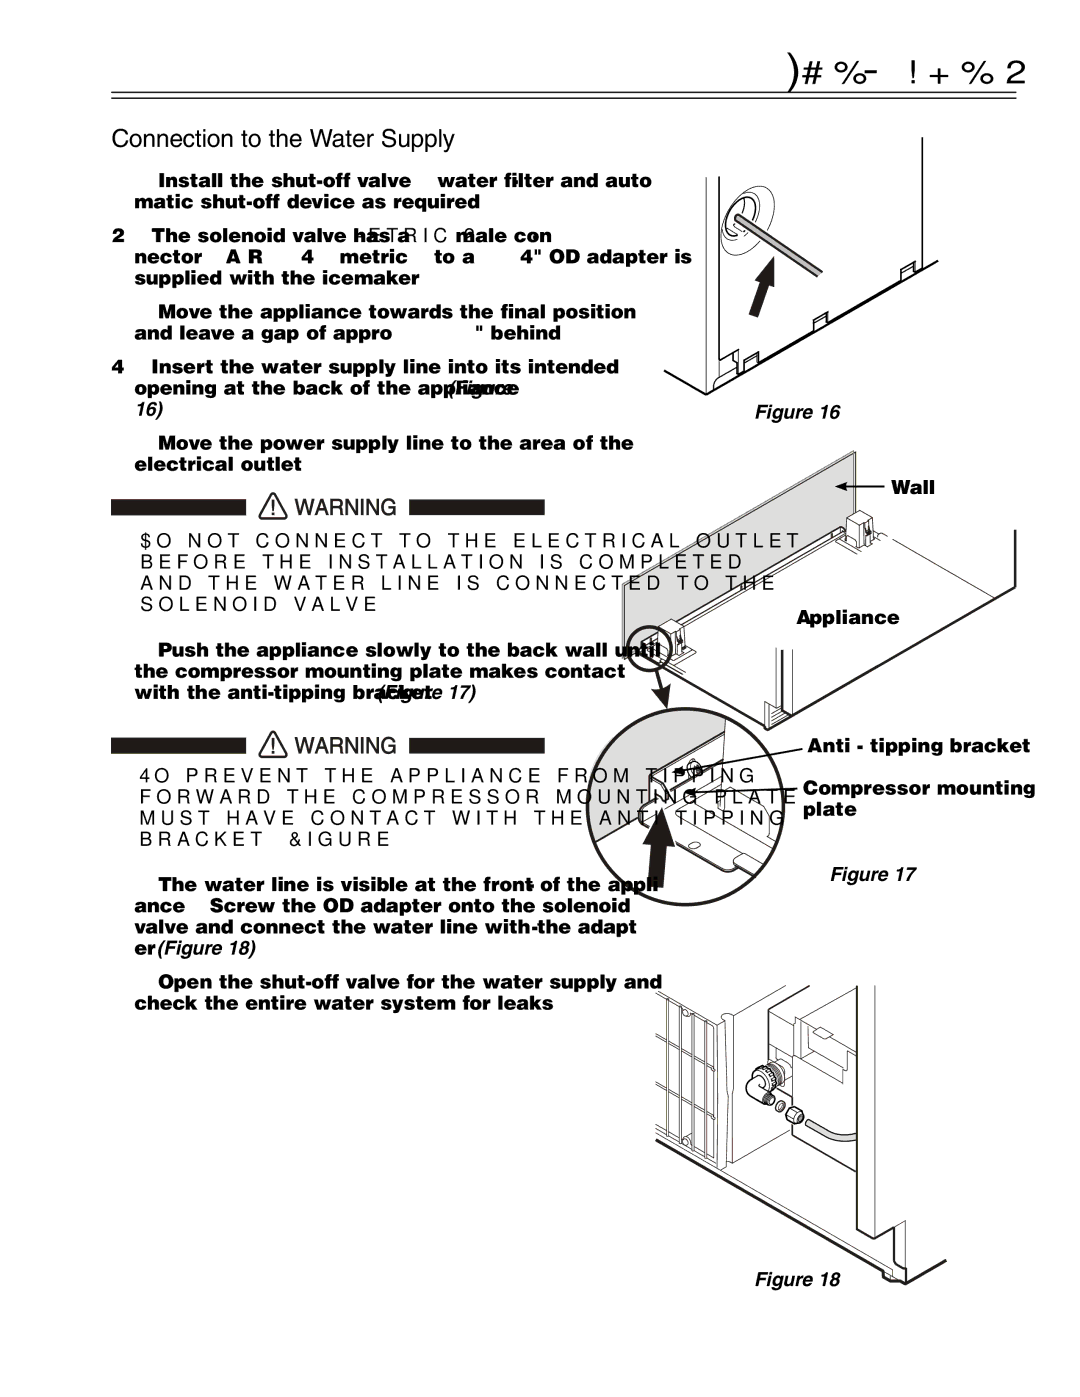
4.Insert the water supply line into its intended opening at the back of the appliance (Figure 16).
5.Move the power supply line to the area of the electrical outlet.
Do not connect to the electrical outlet before the installation is completed and the water line is connected to the solenoid valve.
6.Push the appliance slowly to the back wall until the compressor mounting plate makes contact with the
To prevent the appliance from tipping forward the compressor mounting plate must have contact with the anti tipping bracket (Figure 17).
7.The water line is visible at the front of the appli- ance. Screw the OD adapter onto the solenoid valve and connect the water line with the adapt- er (Figure 18).
8.Open the
Figure 16
![]() Wall
Wall
Appliance
Anti - tipping bracket
![]()
![]()
![]() Compressor mounting
Compressor mounting ![]()
![]()
![]() plate
plate
Figure 17
Figure 18
13