BLOCKING FOR SAFETY
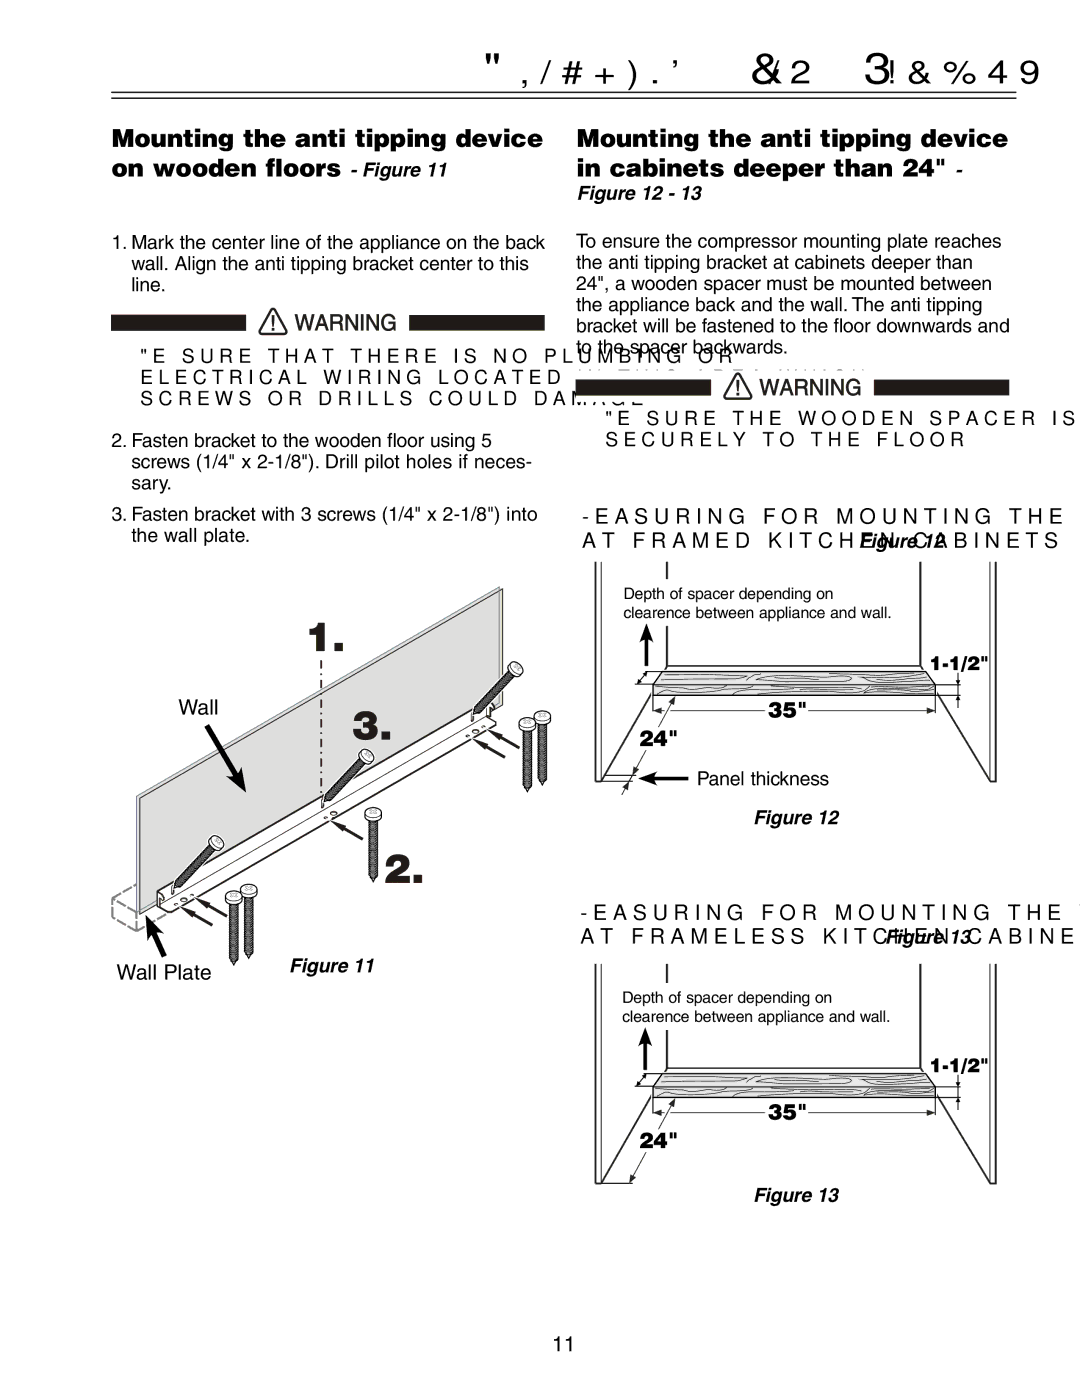
Mounting the anti tipping device on wooden floors
1.Mark the center line of the appliance on the back wall. Align the anti tipping bracket center to this line.
Be sure that there is no plumbing or electrical wiring located in this area which screws or drills could damage.
2.Fasten bracket to the wooden floor using 5 screws (1/4" x
3.Fasten bracket with 3 screws (1/4" x
Wall
Wall Plate | Figure 11 |
|
Mounting the anti tipping device in cabinets deeper than 24" -
Figure 12 - 13
To ensure the compressor mounting plate reaches the anti tipping bracket at cabinets deeper than 24", a wooden spacer must be mounted between the appliance back and the wall. The anti tipping bracket will be fastened to the floor downwards and to the spacer backwards.
Be sure the wooden spacer is fastened securely to the floor.
Measuring for mounting the wooden spacer at framed kitchen cabinets - Figure 12
Depth of spacer depending on clearence between appliance and wall.
![]()
![]()
![]() Panel thickness
Panel thickness
Figure 12
Measuring for mounting the wooden spacer at frameless kitchen cabinets - Figure 13
Depth of spacer depending on clearence between appliance and wall.
Figure 13
11