INSTALLATION
Installation of the Projector and Screen
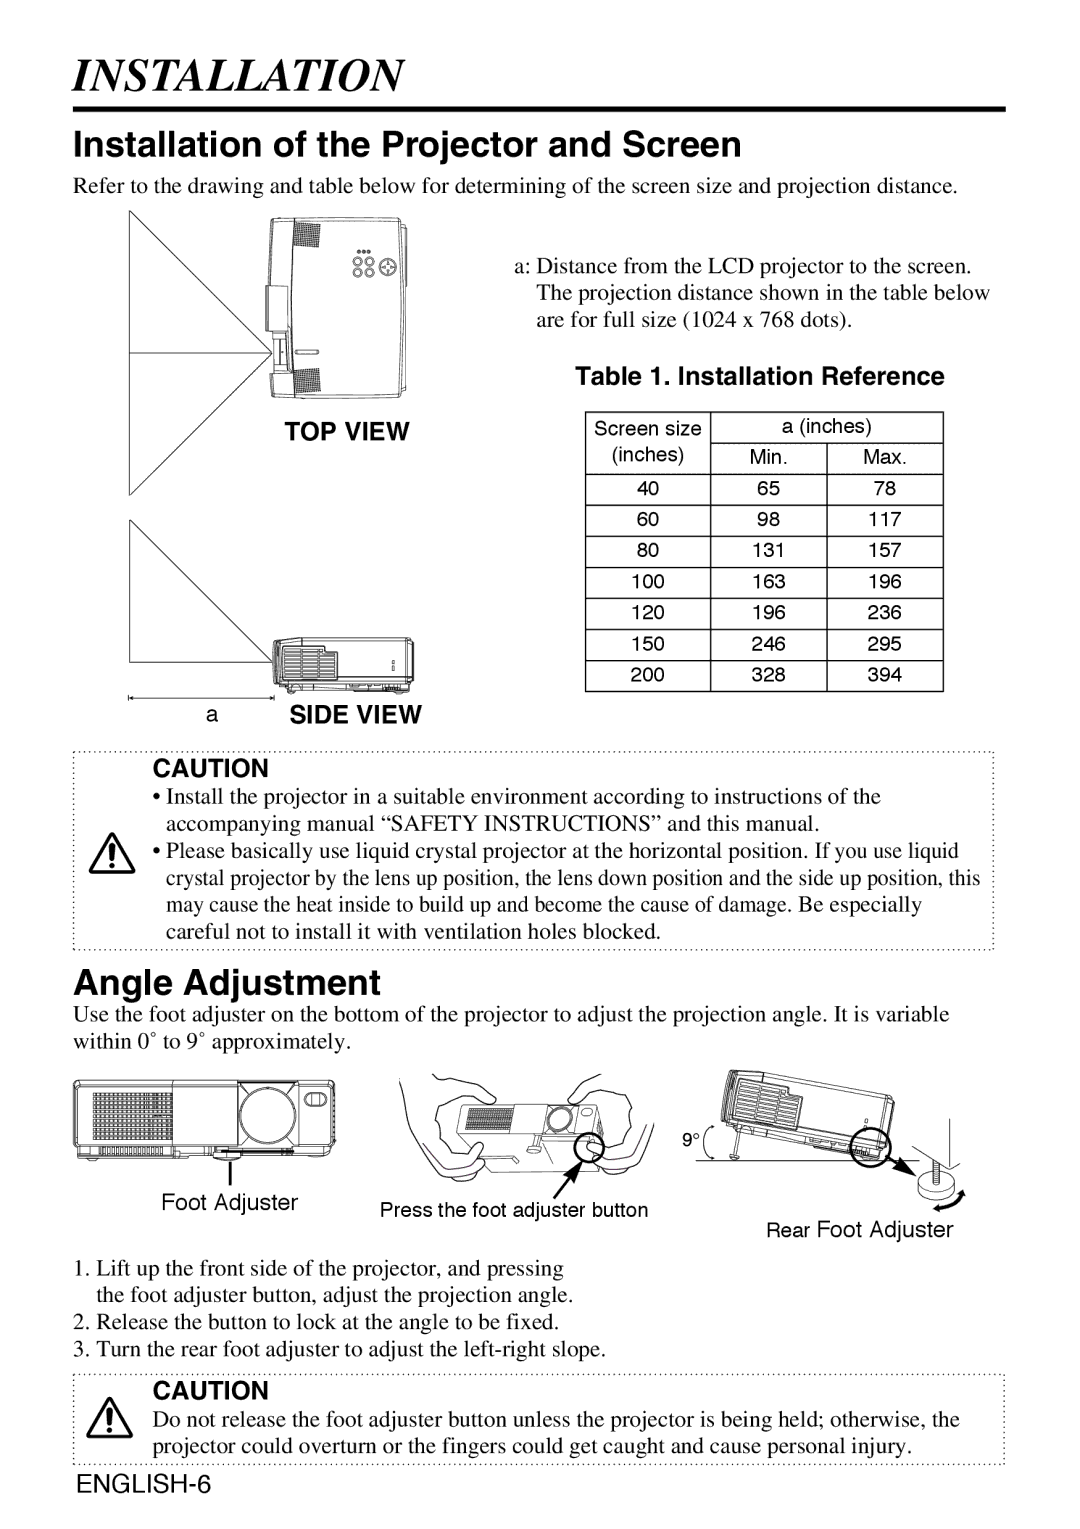
Refer to the drawing and table below for determining of the screen size and projection distance.
a:Distance from the LCD projector to the screen. The projection distance shown in the table below are for full size (1024 x 768 dots).
Table 1. Installation Reference
TOP VIEW | Screen size | a (inches) | |
| (inches) | Min. | Max. |
| 40 | 65 | 78 |
| 60 | 98 | 117 |
| 80 | 131 | 157 |
| 100 | 163 | 196 |
| 120 | 196 | 236 |
| 150 | 246 | 295 |
| 200 | 328 | 394 |
aSIDE VIEW
CAUTION
•Install the projector in a suitable environment according to instructions of the accompanying manual “SAFETY INSTRUCTIONS” and this manual.
• Please basically use liquid crystal projector at the horizontal position. If you use liquid crystal projector by the lens up position, the lens down position and the side up position, this may cause the heat inside to build up and become the cause of damage. Be especially careful not to install it with ventilation holes blocked.
Angle Adjustment
Use the foot adjuster on the bottom of the projector to adjust the projection angle. It is variable within 0˚ to 9˚ approximately.
Foot Adjuster | Press the foot adjuster button |
Rear Foot Adjuster
1.Lift up the front side of the projector, and pressing the foot adjuster button, adjust the projection angle.
2.Release the button to lock at the angle to be fixed.
3.Turn the rear foot adjuster to adjust the
CAUTION
Do not release the foot adjuster button unless the projector is being held; otherwise, the projector could overturn or the fingers could get caught and cause personal injury.