19
45
38 3/8 X 2”
7
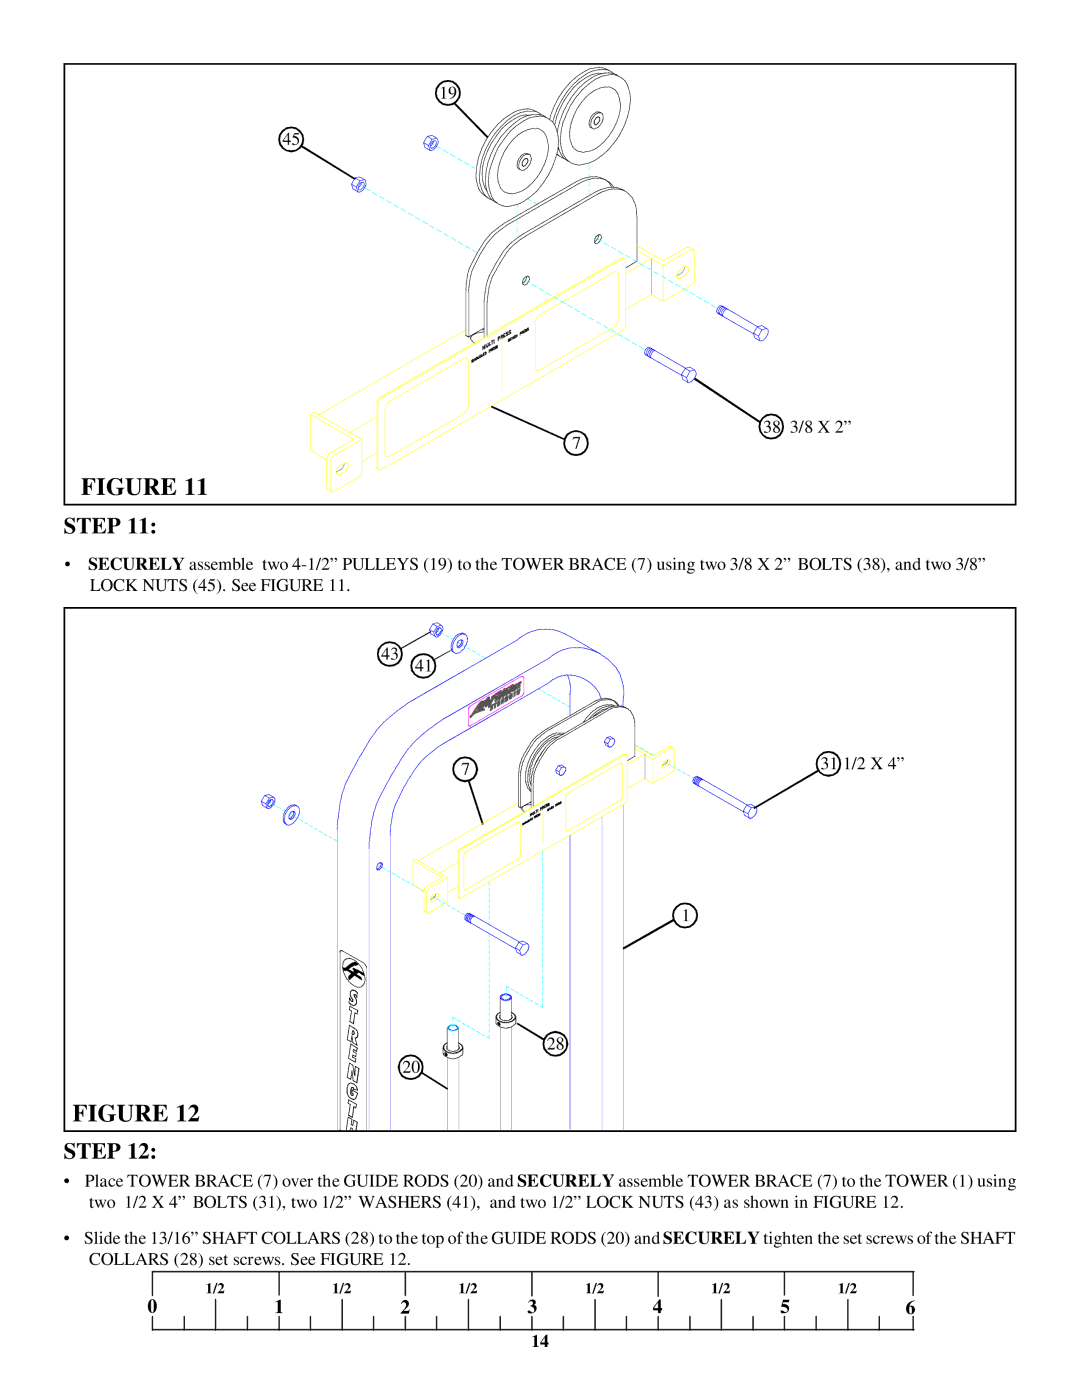
FIGURE 11
STEP 11:
•SECURELY assemble two
43
41
FIGURE 12
STEP 12:
7
20
28
31 1/2 X 4”
1
•Place TOWER BRACE (7) over the GUIDE RODS (20) and SECURELY assemble TOWER BRACE (7) to the TOWER (1) using two 1/2 X 4” BOLTS (31), two 1/2” WASHERS (41), and two 1/2” LOCK NUTS (43) as shown in FIGURE 12.
•Slide the 13/16”SHAFT COLLARS (28) to the top of the GUIDE RODS (20) and SECURELY tighten the set screws of the SHAFT COLLARS (28) set screws. See FIGURE 12.
1/2
1/2
1/2
1/2
1/2
1/2
0
1 | 2 | 3 | 4 | 5 |
|
|
|
|
|
14
6
