4.2ADJUSTING THE SELECT STRIDE (CONTINUED) 3-STEP OPERATION
![]() B
B
A
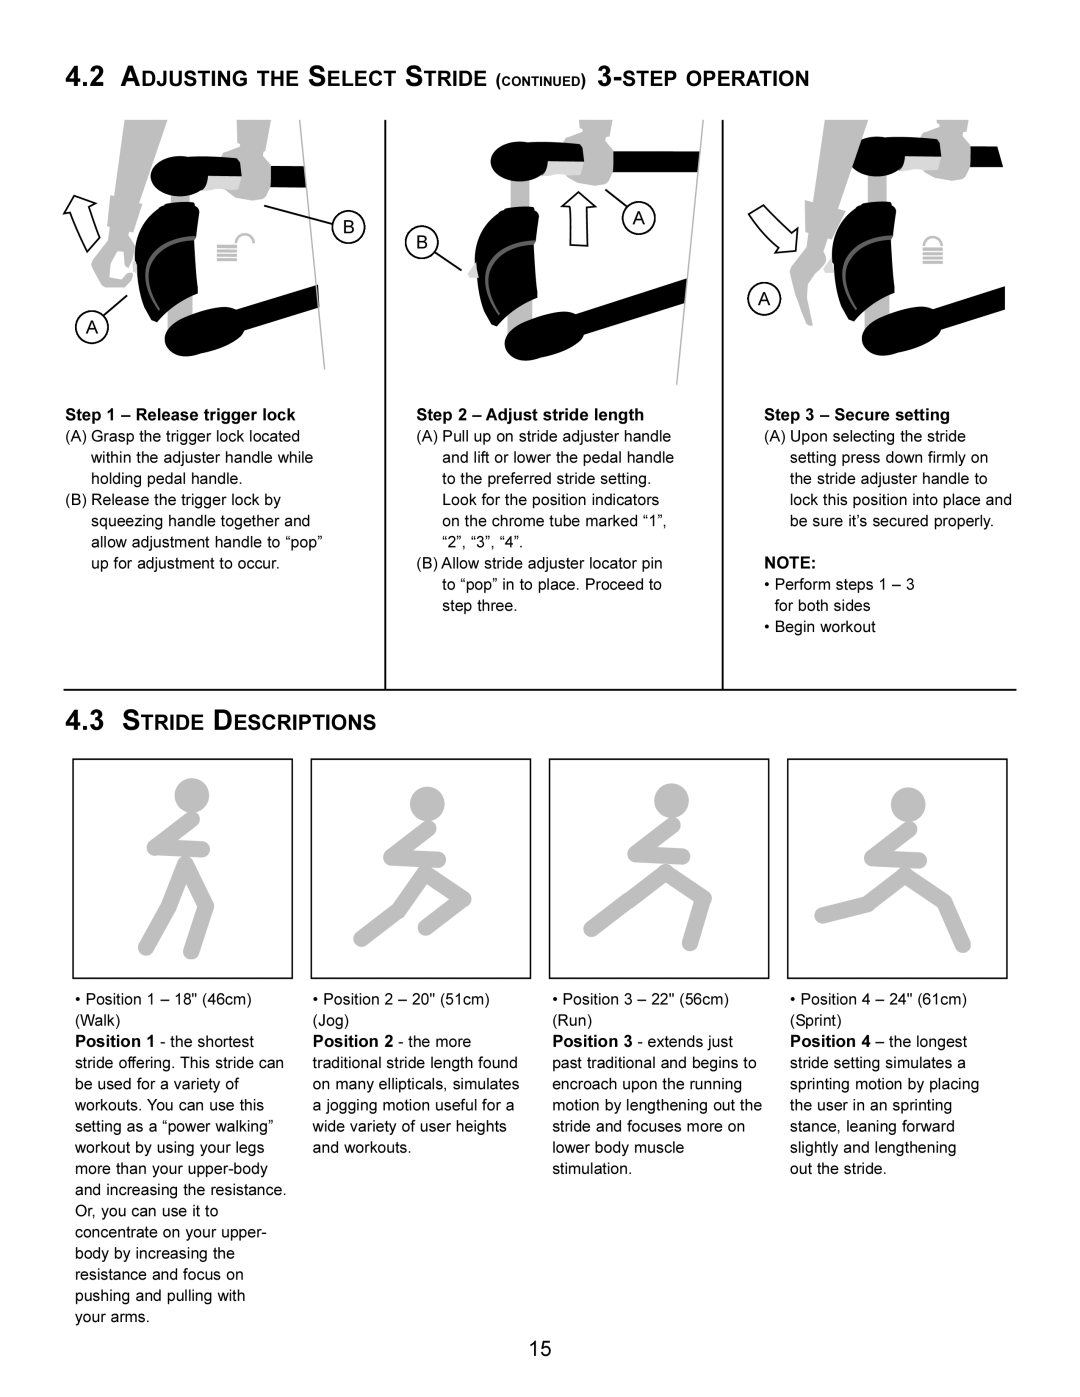
Step 1 – Release trigger lock
(A)Grasp the trigger lock located within the adjuster handle while holding pedal handle.
(B)Release the trigger lock by squeezing handle together and allow adjustment handle to “pop” up for adjustment to occur.
A
B
Step 2 – Adjust stride length
(A)Pull up on stride adjuster handle and lift or lower the pedal handle to the preferred stride setting.
Look for the position indicators on the chrome tube marked “1”, “2”, “3”, “4”.
(B)Allow stride adjuster locator pin to “pop” in to place. Proceed to step three.
A
Step 3 – Secure setting
(A)Upon selecting the stride setting press down firmly on the stride adjuster handle to lock this position into place and be sure it’s secured properly.
NOTE:
•Perform steps 1 – 3 for both sides
•Begin workout
4.3STRIDE DESCRIPTIONS
•Position 1 – 18" (46cm) (Walk)
Position 1 - the shortest stride offering. This stride can be used for a variety of workouts. You can use this setting as a “power walking” workout by using your legs more than your
•Position 2 – 20" (51cm) (Jog)
Position 2 - the more traditional stride length found on many ellipticals, simulates a jogging motion useful for a wide variety of user heights and workouts.
•Position 3 – 22" (56cm) (Run)
Position 3 - extends just past traditional and begins to encroach upon the running motion by lengthening out the stride and focuses more on lower body muscle stimulation.
•Position 4 – 24" (61cm) (Sprint)
Position 4 – the longest stride setting simulates a sprinting motion by placing the user in an sprinting stance, leaning forward slightly and lengthening out the stride.
15
