1.4SETUP
Tools required: Socket set, Phillips Screwdriver, 9/16" open end wrench
Please read instructions carefully before assembly. Be sure to assemble the unit where it is to be used.
STEP 1
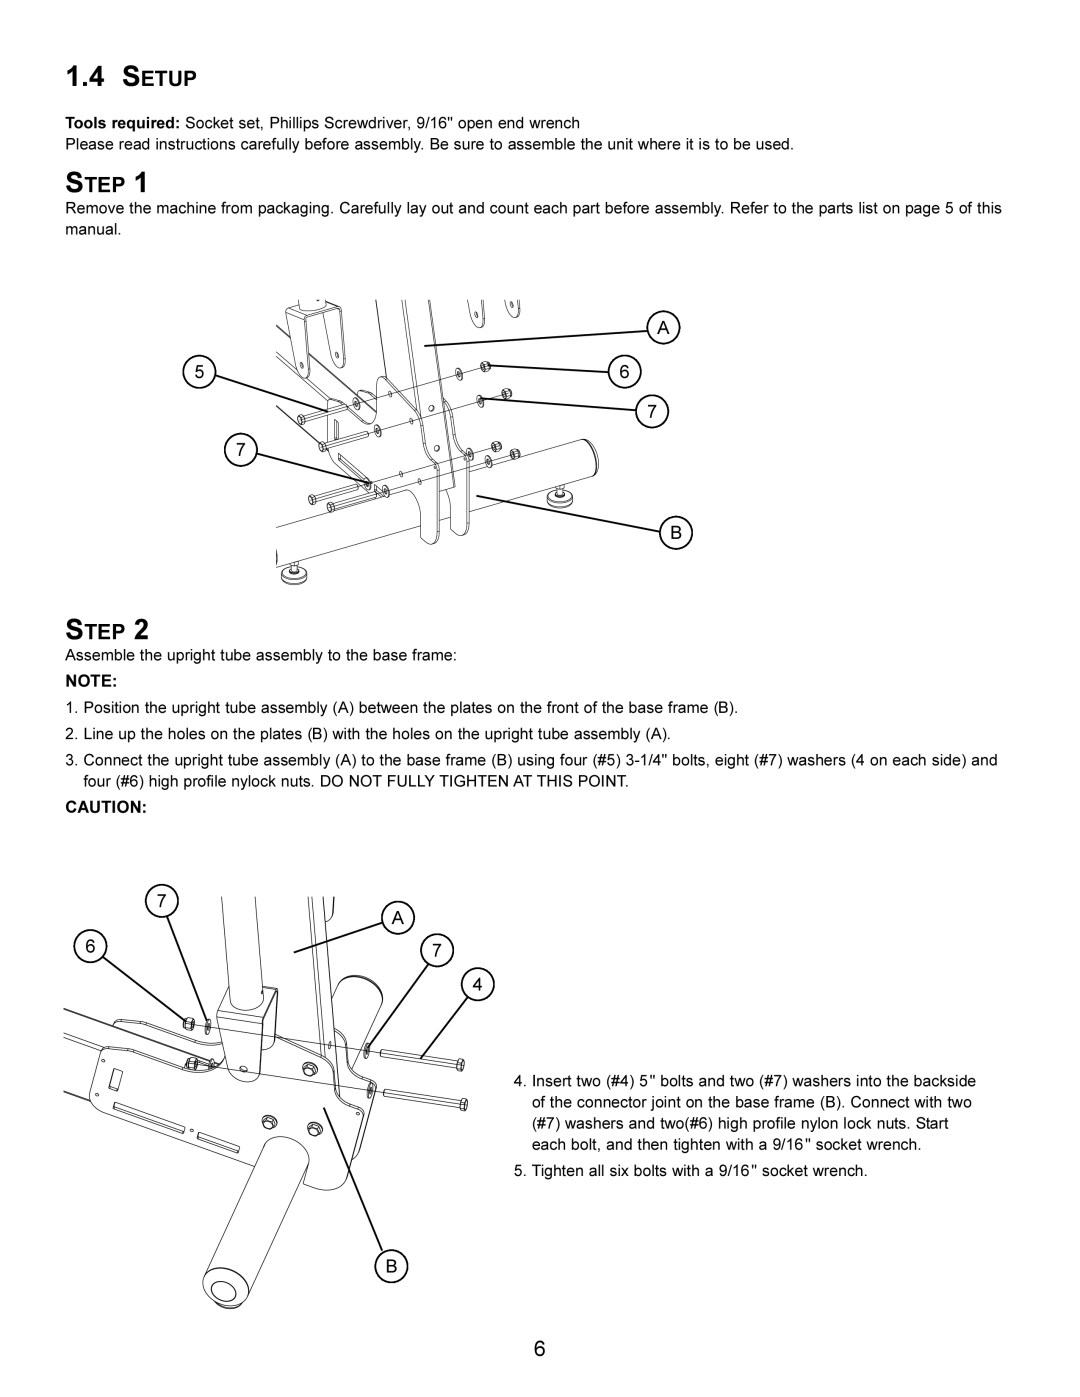
Remove the machine from packaging. Carefully lay out and count each part before assembly. Refer to the parts list on page 5 of this manual.
A
5 | 6 |
7
7
![]() B
B
STEP 2
Assemble the upright tube assembly to the base frame:
NOTE: This step could require two people.
1.Position the upright tube assembly (A) between the plates on the front of the base frame (B).
2.Line up the holes on the plates (B) with the holes on the upright tube assembly (A).
3.Connect the upright tube assembly (A) to the base frame (B) using four (#5)
CAUTION: The wire harness may obstruct the connecting holes. If this happens, gently pull on the end of the wire harness at the top of the upright tube assembly (A) to clear the hole. Do not force the bolt through the hole if the wire harness is obstructing the bolt, as damage to the wire harness may result.
7
A
6 | 7 |
4
4.Insert two (#4) 5" bolts and two (#7) washers into the backside of the connector joint on the base frame (B). Connect with two (#7) washers and two(#6) high profile nylon lock nuts. Start each bolt, and then tighten with a 9/16" socket wrench.
5.Tighten all six bolts with a 9/16" socket wrench.
B
6
