OPERATION |
|
| |||||||
5. Loosen the socket head cap screw that holds the | 3. Press the trigger to feed the wire electrode through | ||||||||
connector bar against the gun bushing. |
| the gun and cable. For solid wire cut the electrode | |||||||
Important: Do not attempt to completely | within approximately 3/8" (10 mm) of the end of the | ||||||||
remove the socket head cap screw. |
| contact tip [3/4" (20 mm) for Outershield®]. | |||||||
6. Remove the outer wire guide, and push the gun | 4. When welding with gas, turn on the gas supply and | ||||||||
bushing out of the wire drive. Because of the pre- | |||||||||
cision fit, light tapping may be required to remove | set the required flow rate (typically | ||||||||
the gun bushing. |
| 16 liters/min). |
|
|
|
| |||
7. Disconnect the shielding gas hose from the gun | 5. Connect work cable to metal to be welded. Work | ||||||||
clamp must make good electrical contact to the | |||||||||
bushing, if required. |
| work. The work must also be grounded as stated in | |||||||
8. Connect the shielding gas hose to the new gun | “Arc Welding Safety Precautions”. | ||||||||
bushing, if required. |
|
|
|
|
|
|
| WARNING |
|
|
|
|
|
|
|
| |||
9. Rotate the gun bushing until the thumb screw hole |
|
|
|
|
|
|
|
| |
|
| • When using an open arc process, it | |||||||
aligns with the thumb screw hole in the feed plate. |
|
| |||||||
Slide the gun receiver bushing into the wire drive |
|
| is necessary to use correct eye, | ||||||
and verify the thumb screw holes are aligned. |
|
| head, and body protection. | ||||||
|
| ||||||||
10. Tighten the socket head cap screw. |
| ||||||||
11. Insert the welding gun into the gun bushing and | 6. Position electrode over joint. End of electrode may | ||||||||
|
| be lightly touching the work. | |||||||
tighten the thumb screw. |
| 7. Lower welding helmet, close gun trigger, and | |||||||
MAKING A WELD |
|
|
| begin welding. Hold the gun so the contact tip to | |||||
1. Check that the electrode polarity is correct for the |
|
| work distance is about 3/8" (10 mm) [3/4" (20 mm) | ||||||
|
| for Outershield | ® | ]. |
| ||||
process being used, then turn the power switch ON. |
|
|
|
|
| ||||
2. Set desired arc voltage tap and wire speed for the | 8. To stop welding, release the gun trigger and then | ||||||||
particular electrode wire, material type and thick- |
|
| pull the gun away from the work after the arc goes | ||||||
ness, and gas (for MIG and Outershield®) being |
|
| out. |
|
|
|
| ||
used. Use the Application Chart on the door inside |
|
|
|
|
|
|
|
| |
the wire compartment as a quick reference for |
|
|
|
|
|
|
|
| |
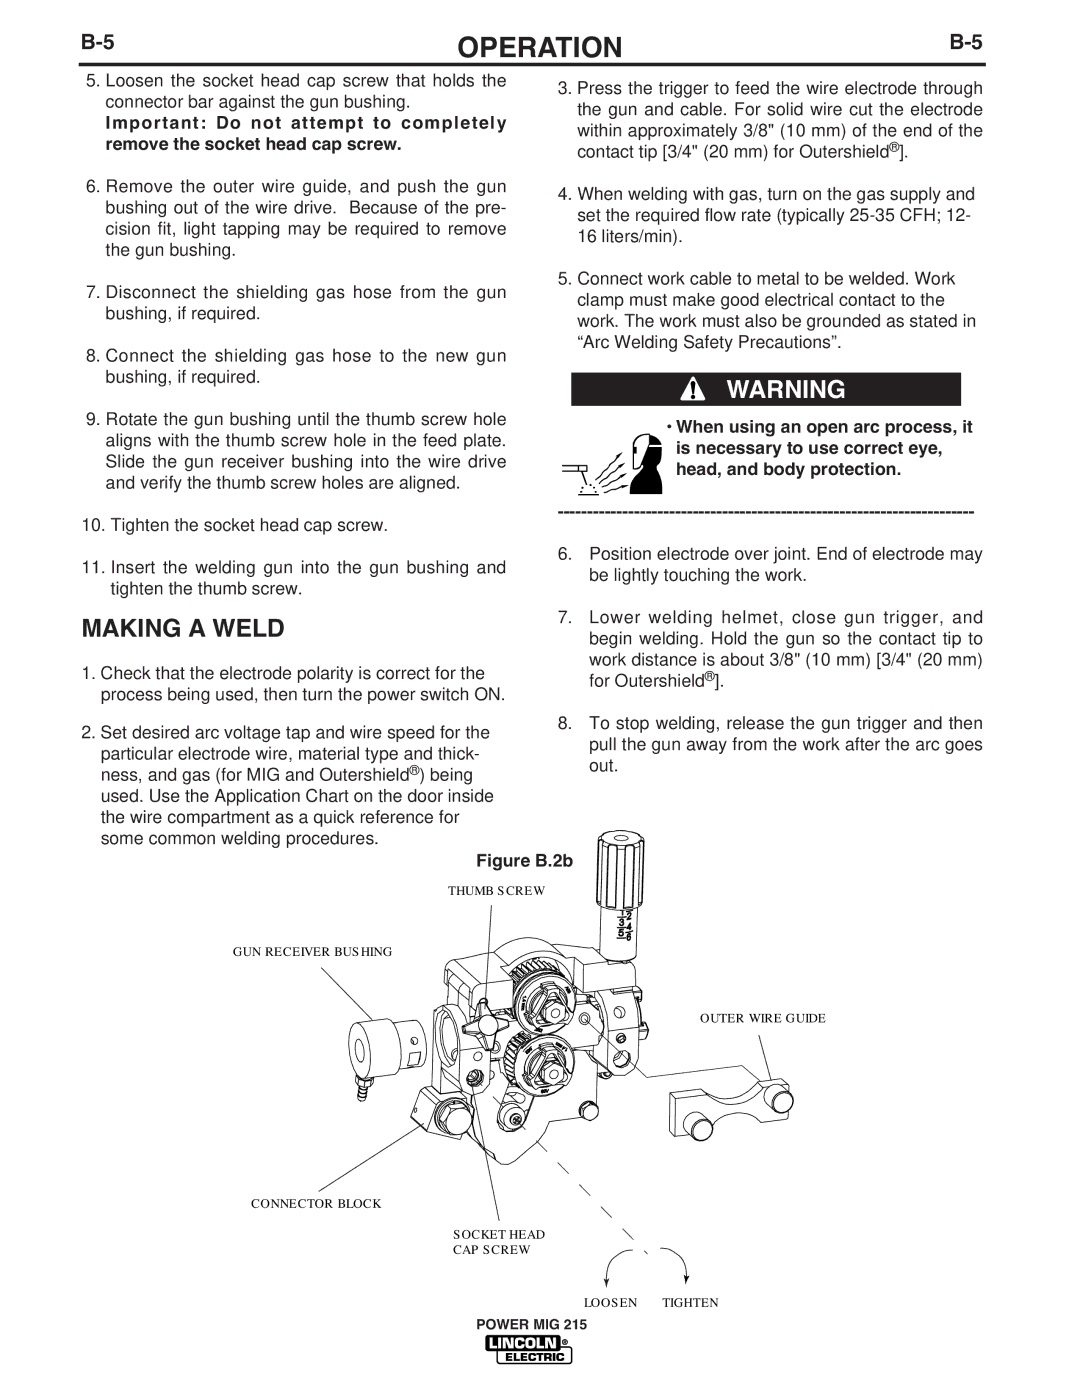
some common welding procedures. | Figure B.2b |
| |
| THUMB SCREW |
GUN RECEIVER BUSHING |
|
| OUTER WIRE GUIDE |
CONNECTOR BLOCK
SOCKET HEAD
CAP SCREW
POWER MIG 215LOOSEN TIGHTEN