OPERATION |
•When ready to cut, place the torch near the work, make certain all safety precautions have been taken and pull the trigger.
-The air will flow for a preflow time of 3 seconds and the pilot arc will start.
-The pilot arc will run for 3.0 seconds and shut off unless the arc is brought in contact with the work and the arc is transferred. Avoid excessive pilot arc time by transferring the arc to the workpiece quickly.
-When the arc is brought within 1/8” - 1/4" from the work piece: the arc will transfer, the current will ramp to the setting on the control panel, and the cut can last indefinitely (or until the duty cycle of the unit is exceeded).
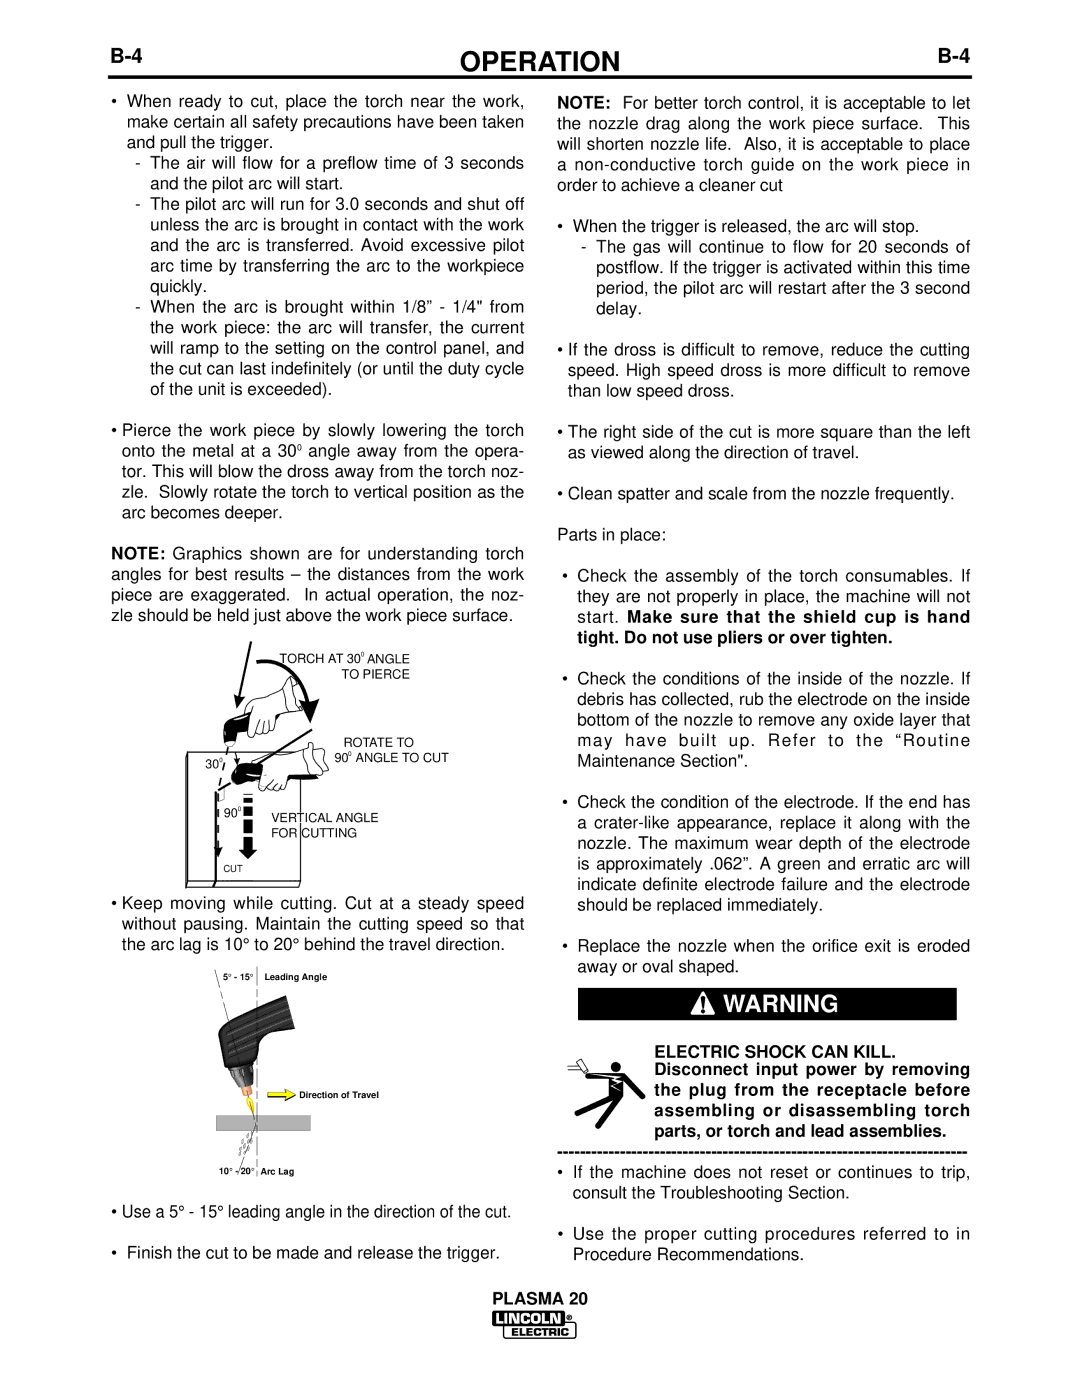
•Pierce the work piece by slowly lowering the torch onto the metal at a 300 angle away from the opera- tor. This will blow the dross away from the torch noz- zle. Slowly rotate the torch to vertical position as the arc becomes deeper.
NOTE: Graphics shown are for understanding torch angles for best results – the distances from the work piece are exaggerated. In actual operation, the noz- zle should be held just above the work piece surface.
| TORCH AT 300 ANGLE |
| TO PIERCE |
| ROTATE TO |
300 | 900 ANGLE TO CUT |
| 900 |
| VERTICAL ANGLE |
| FOR CUTTING |
CUT
•Keep moving while cutting. Cut at a steady speed without pausing. Maintain the cutting speed so that the arc lag is 10° to 20° behind the travel direction.
5° - 15° Leading Angle
![]() Direction of Travel
Direction of Travel
10° - 20° Arc Lag
•Use a 5° - 15° leading angle in the direction of the cut.
•Finish the cut to be made and release the trigger.
NOTE: For better torch control, it is acceptable to let the nozzle drag along the work piece surface. This will shorten nozzle life. Also, it is acceptable to place
a
•When the trigger is released, the arc will stop.
-The gas will continue to flow for 20 seconds of postflow. If the trigger is activated within this time period, the pilot arc will restart after the 3 second delay.
•If the dross is difficult to remove, reduce the cutting speed. High speed dross is more difficult to remove than low speed dross.
•The right side of the cut is more square than the left as viewed along the direction of travel.
•Clean spatter and scale from the nozzle frequently. Parts in place:
•Check the assembly of the torch consumables. If they are not properly in place, the machine will not start. Make sure that the shield cup is hand tight. Do not use pliers or over tighten.
•Check the conditions of the inside of the nozzle. If debris has collected, rub the electrode on the inside bottom of the nozzle to remove any oxide layer that may have built up. Refer to the “Routine Maintenance Section".
•Check the condition of the electrode. If the end has a
•Replace the nozzle when the orifice exit is eroded away or oval shaped.
![]() WARNING
WARNING
ELECTRIC SHOCK CAN KILL.
Disconnect input power by removing the plug from the receptacle before assembling or disassembling torch parts, or torch and lead assemblies.
•If the machine does not reset or continues to trip, consult the Troubleshooting Section.
•Use the proper cutting procedures referred to in Procedure Recommendations.
PLASMA 20