12 | 12 |
After running at high engine speed for
Allow the engine to warm up by letting it run at low idle for a few minutes.
Stopping the Engine
Remove all welding and auxiliary power loads and allow engine to run at low idle speed for a few minutes to cool the engine. NOTE: Backfiring may occur if engine is not allowed to cool at low idle before stop- ping.
Stop the engine by placing the “Engine” switch in the “OFF” position. Close the fuel valve on the LPG sup- ply cylinder.
Always
Break-in Period
It is normal for any engine to use a greater amount of oil until the
IMPORTANT: IN ORDER TO ACCOMPLISH THIS
The engine manufacturer’s recommendation for the running time until the first oil change is 5 hours.
The oil filter is to be changed at the second oil change. Refer to the Engine Owner’s Manual for more information.
Welding Process
Stick (Constant Current) Welding
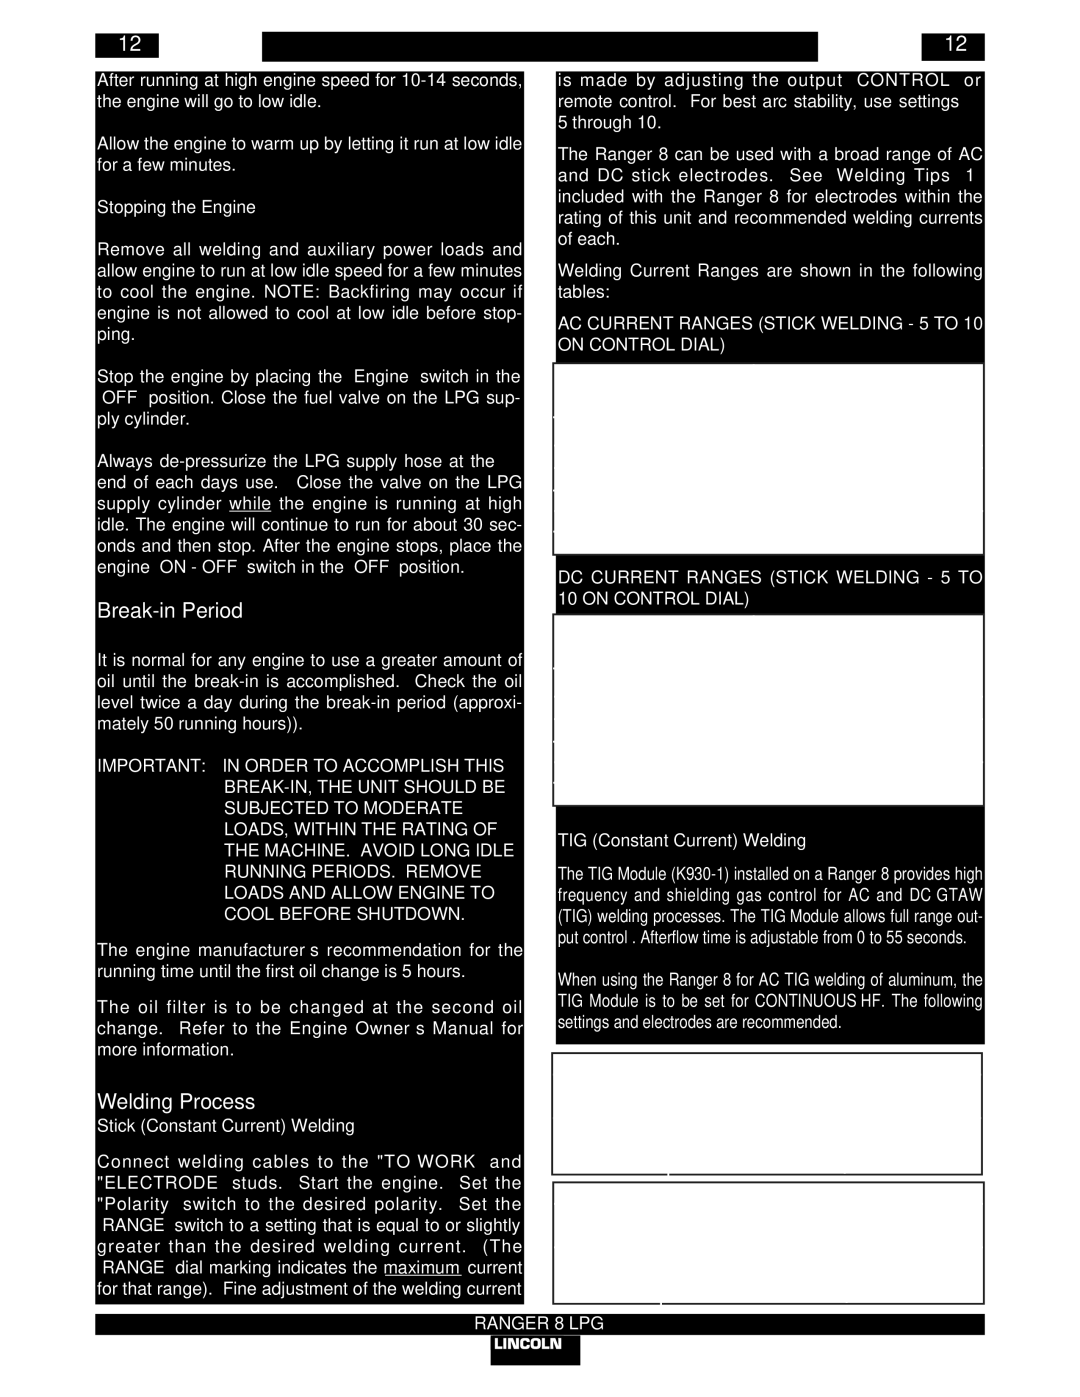
Connect welding cables to the "TO WORK” and "ELECTRODE” studs. Start the engine. Set the "Polarity” switch to the desired polarity. Set the “RANGE” switch to a setting that is equal to or slightly greater than the desired welding current. (The “RANGE” dial marking indicates the maximum current for that range). Fine adjustment of the welding current
is made by adjusting the output “CONTROL” or remote control. For best arc stability, use settings 5 through 10.
The Ranger 8 can be used with a broad range of AC and DC stick electrodes. See “Welding Tips 1” included with the Ranger 8 for electrodes within the rating of this unit and recommended welding currents of each.
Welding Current Ranges are shown in the following tables:
AC CURRENT RANGES (STICK WELDING - 5 TO 10 ON CONTROL DIAL)
Range |
| Current | ||
Setting |
| Range | ||
|
|
|
|
|
50 | 30 | - 50 Amps | ||
70 | 40 | - 70 Amps | ||
90 | 50 | - 90 Amps | ||
125 | 70 | - 125 Amps |
|
|
175 | 90 | - 175 Amps | ||
MAX | 120 | - 225 Amps |
| |
DC CURRENT RANGES (STICK WELDING - 5 TO 10 ON CONTROL DIAL)
Range |
| Current | ||
Setting |
| Range | ||
|
|
|
|
|
50 | 30 | - 50 Amps | ||
70 | 40 | - 70 Amps | ||
90 | 50 | - 90 Amps | ||
125 | 70 | - 125 Amps |
|
|
175 | 90 | - 175 Amps | ||
MAX | 120 | - 210 Amps |
| |
TIG (Constant Current) Welding
The TIG Module
When using the Ranger 8 for AC TIG welding of aluminum, the TIG Module is to be set for CONTINUOUS HF. The following settings and electrodes are recommended.
SETTINGS FOR PURE TUNGSTEN
TUNGSTEN | RANGE SWITCH |
| APPROXIMATE | |||||||
DIAMETER (in.) |
|
| SETTINGS |
|
| CURRENT RANGE | ||||
|
|
|
|
|
|
|
| |||
1/8 |
| 70, | 90, | or 125 | 80 | - 150 Amps | ||||
3/32 |
| 50, | 70, | or | 90 | 45 | - 130 Amps | |||
1/16 |
|
|
| 50, | or | 70 | 40 | - 80 Amps | ||
|
|
|
|
|
| |||||
|
|
|
| |||||||
SETTINGS FOR 1% THORIATED TUNGSTEN |
| |||||||||
|
|
|
|
| ||||||
TUNGSTEN |
| RANGE SWITCH |
| APPROXIMATE | ||||||
DIAMETER (in.) |
|
|
| SETTINGS |
|
| CURRENT RANGE | |||
|
|
|
|
|
|
|
| |||
1/8 |
| 70, | 90, 125, or 175 |
| 80 | - 225 | Amps | |||
3/32 |
| 50, | 70, | 90, or 125 |
| 50 | - 180 | Amps | ||
1/16 |
|
| 50, | 70, or | 90 |
| 45 | - 120 | Amps | |
|
|
|
|
|
|
|
|
|
|
|
