INSTALLATION | ||
|
|
|
INSTALLING WITh AN LFA 10FT. OR 13FT. WALL-MOUNTED PACKAGE
(continued)
MOUNTING THE LFA 3.1 OR 4.1 ARM TO THE WALL-MOUNTING BRACKET
(continued)
Position one 8” rubber seal (Fig. 7B) and the flexible hose supplied with the arm (Fig. 7C) on the hood end of the arm (Fig. 7A). Put the last rubber seal on the hood connection. Mount the friction block into the U- section, using one bolt and nut as shown in Figure 7.
![]() A
A
B
![]() C
C
D
Fig. 7
Snap the hose running guard into place atop the mid- dle hinge section so the “nose” end faces the base of the arm as shown in Figure 8.
C(2x)
Fig. 8
Remove the plastic and tape from the arm sections. Adjust the friction of the arm and hood movement as described in the Maintenance Section of the LFA Extraction Arm Manual.
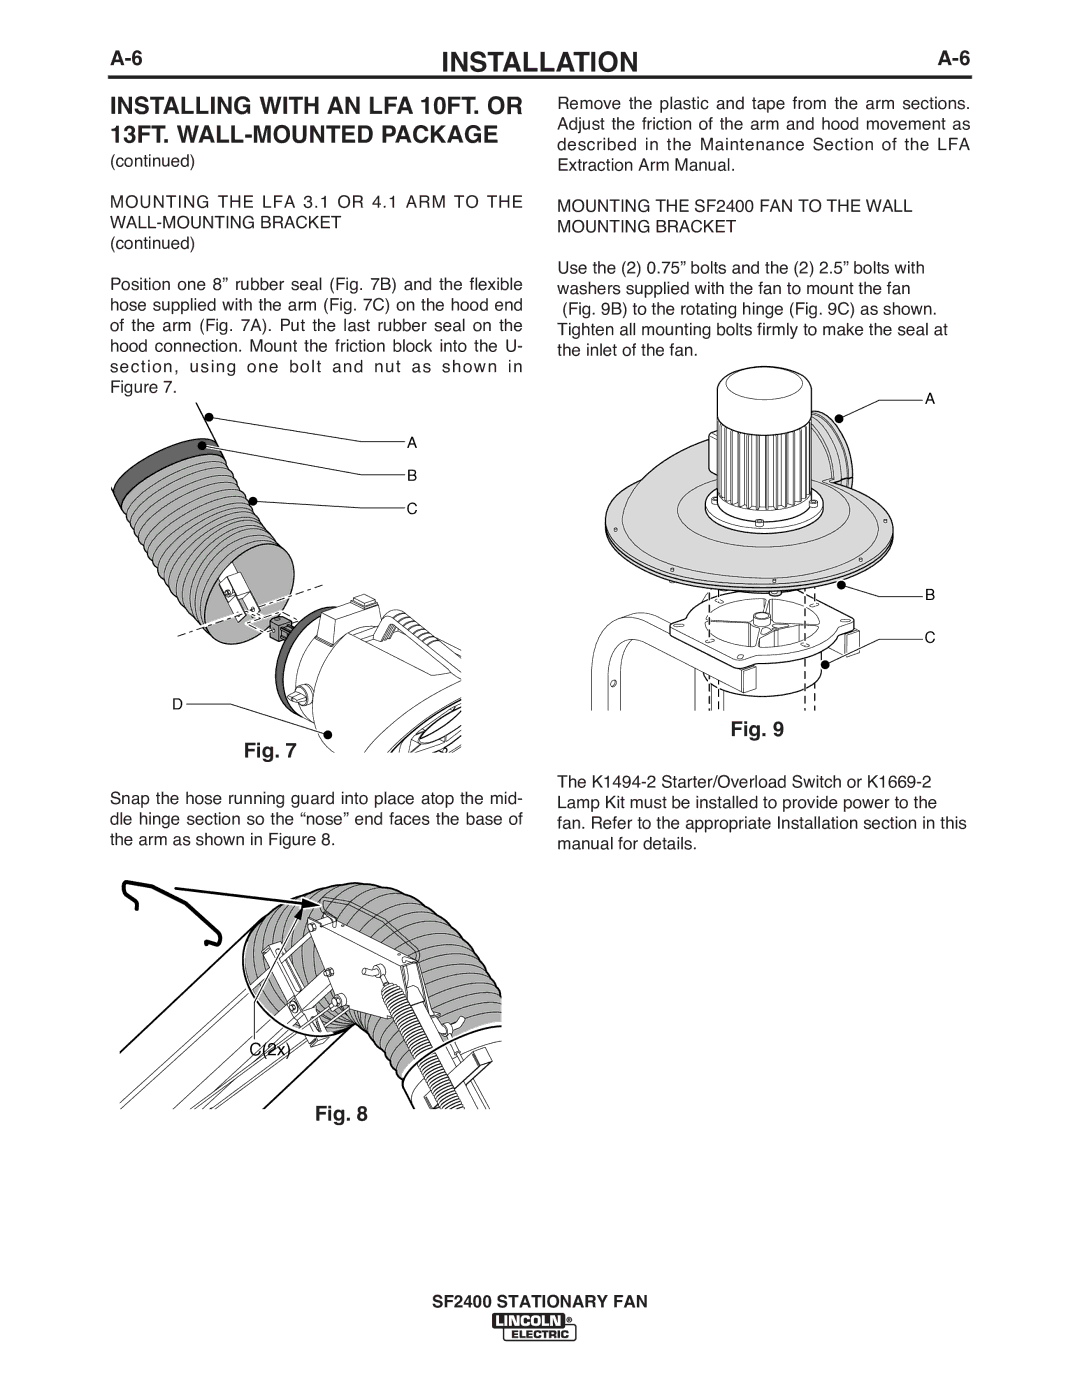
MOUNTING THE SF2400 FAN TO THE WALL MOUNTING BRACKET
Use the (2) 0.75” bolts and the (2) 2.5” bolts with washers supplied with the fan to mount the fan (Fig. 9B) to the rotating hinge (Fig. 9C) as shown. Tighten all mounting bolts firmly to make the seal at the inlet of the fan.
A
![]() B
B
C
Fig. 9
The
SF2400 STATIONARY FAN