Wireless-N Notebook Adapter
Create a New Profile
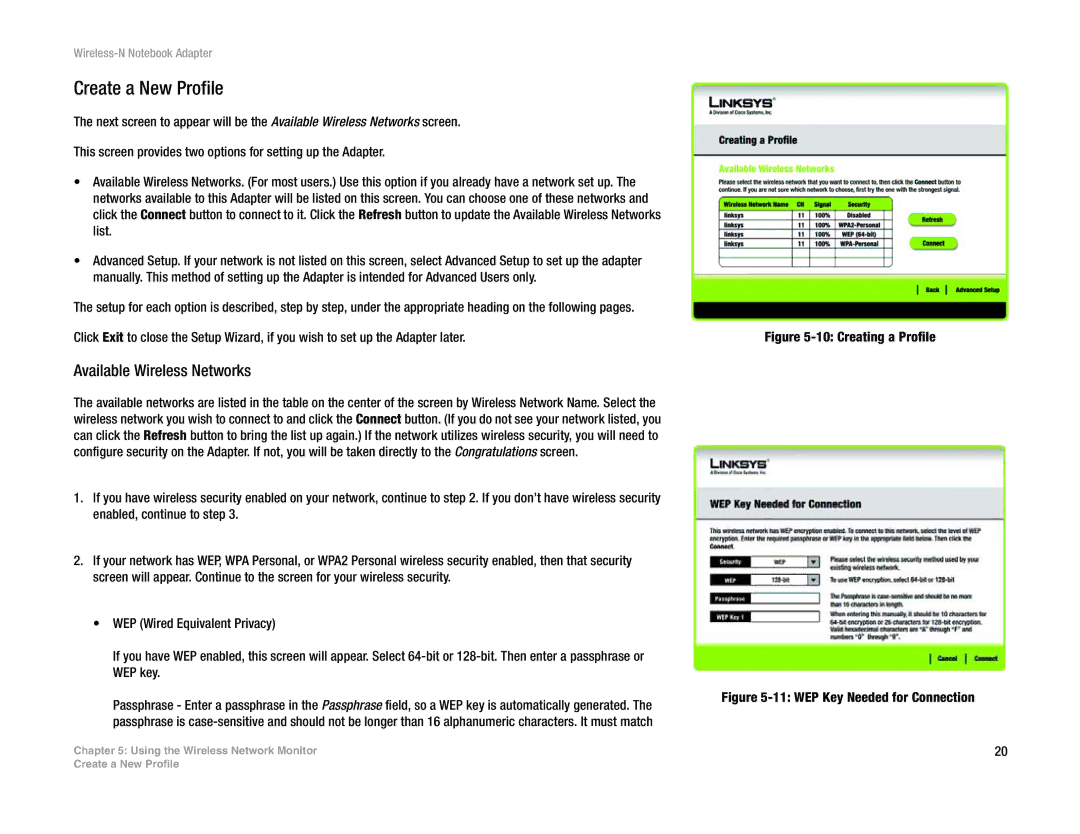
The next screen to appear will be the Available Wireless Networks screen.
This screen provides two options for setting up the Adapter.
•Available Wireless Networks. (For most users.) Use this option if you already have a network set up. The networks available to this Adapter will be listed on this screen. You can choose one of these networks and click the Connect button to connect to it. Click the Refresh button to update the Available Wireless Networks list.
•Advanced Setup. If your network is not listed on this screen, select Advanced Setup to set up the adapter manually. This method of setting up the Adapter is intended for Advanced Users only.
The setup for each option is described, step by step, under the appropriate heading on the following pages.
Click Exit to close the Setup Wizard, if you wish to set up the Adapter later.
Available Wireless Networks
The available networks are listed in the table on the center of the screen by Wireless Network Name. Select the wireless network you wish to connect to and click the Connect button. (If you do not see your network listed, you can click the Refresh button to bring the list up again.) If the network utilizes wireless security, you will need to configure security on the Adapter. If not, you will be taken directly to the Congratulations screen.
1.If you have wireless security enabled on your network, continue to step 2. If you don’t have wireless security enabled, continue to step 3.
2.If your network has WEP, WPA Personal, or WPA2 Personal wireless security enabled, then that security screen will appear. Continue to the screen for your wireless security.
•WEP (Wired Equivalent Privacy)
If you have WEP enabled, this screen will appear. Select
Passphrase - Enter a passphrase in the Passphrase field, so a WEP key is automatically generated. The passphrase is
Chapter 5: Using the Wireless Network Monitor
Figure 5-10: Creating a Profile
Figure 5-11: WEP Key Needed for Connection
20
Create a New Profile
