
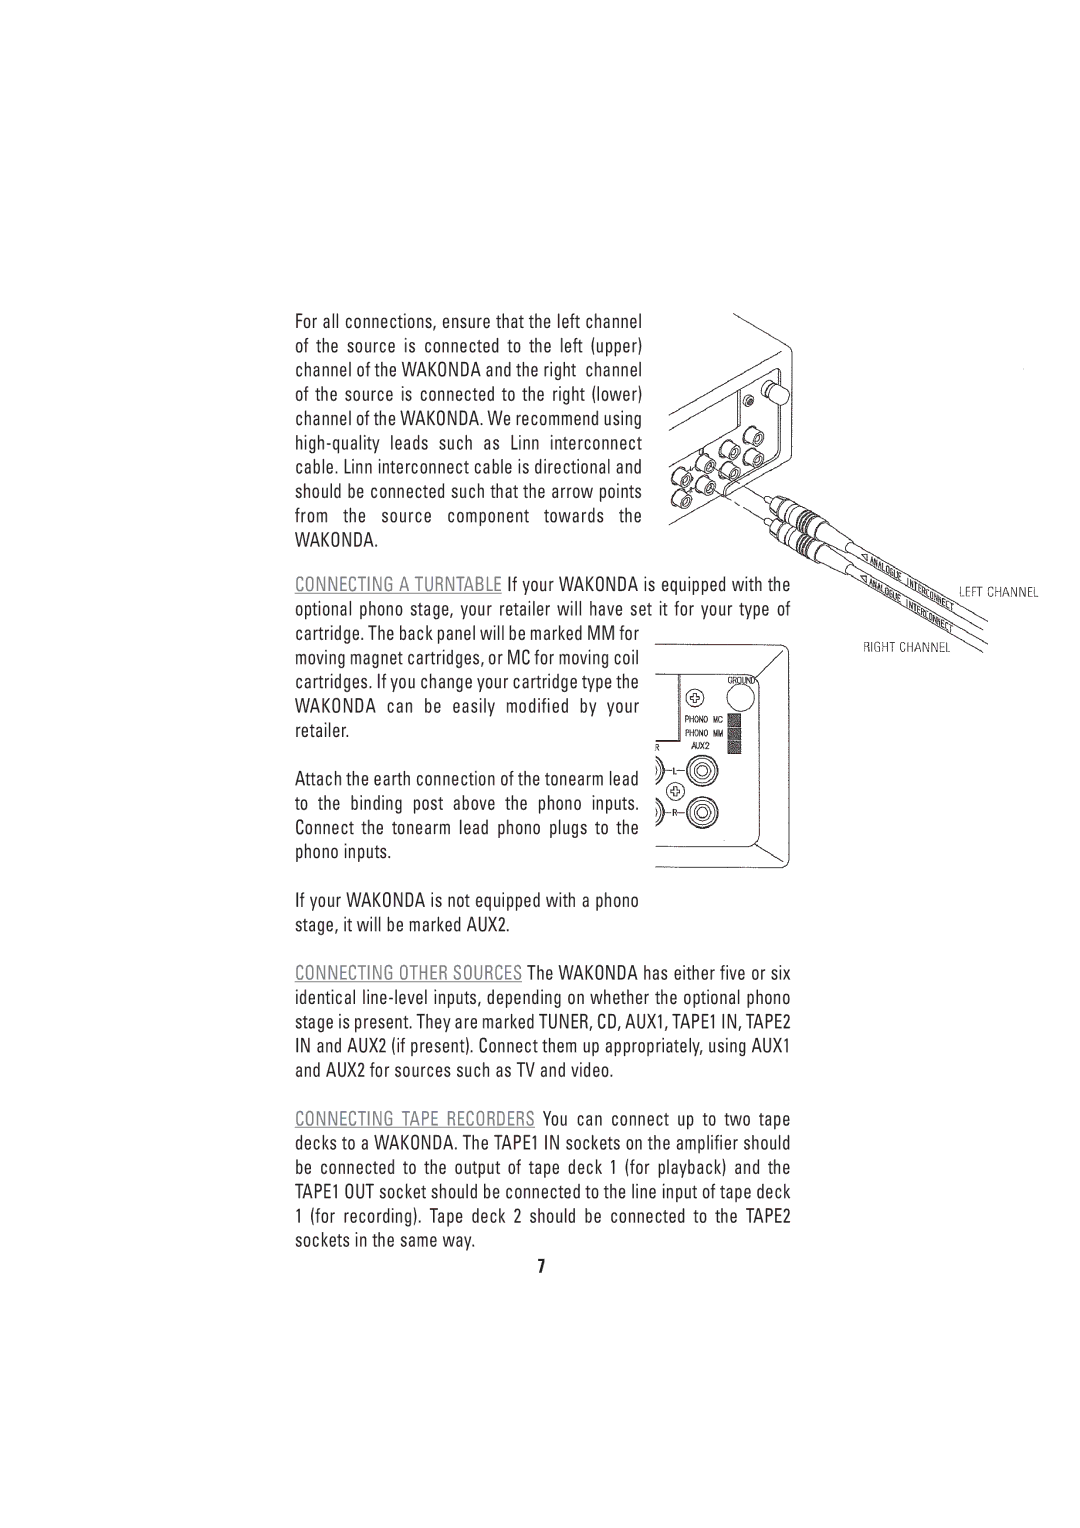
WAKONDA specifications
Linn WAKONDA is a standalone music streaming system that has revolutionized the way audiophiles experience their favorite tracks. Crafted with precision by the Scottish audio engineering company Linn Products, WAKONDA represents a blend of elegance and top-notch audio technology. One of its most striking features is its impeccable sound quality, ensuring that every note is delivered with clarity and richness.Central to the WAKONDA experience is its use of advanced digital audio technology. The system employs Linn’s proprietary Exakt technology, which allows for precise control over the audio signal all the way from the source to your speakers. This results in an immersive listening experience where nuances in music are highlighted, and the listener can appreciate details that are often lost in traditional systems.
The WAKONDA is designed to be user-friendly, with seamless integration into existing home networks, making streaming music from various services effortless. It supports high-resolution audio formats, ensuring that audio enthusiasts can enjoy their favorite tracks in studio-quality sound. The device also features a robust control interface that can be accessed through a dedicated mobile app, allowing users to manage their music library and playlists conveniently.
Another notable characteristic of the WAKONDA is its adaptability. The system is modular, allowing users to start with a basic setup and expand over time by adding new components based on their requirements. This flexibility makes it suitable for both casual listeners and dedicated audiophiles who want to craft a personalized audio experience.
The design of the WAKONDA is just as impressive as its technology. Its sleek and elegant aesthetic complements any home decor, making it a visually appealing addition to any living space. The attention to detail in both design and engineering reflects Linn’s commitment to quality and performance.
In summary, Linn WAKONDA is a state-of-the-art music streaming system that combines exceptional sound quality, advanced digital audio technologies, and user-friendly features in a stylish package. Whether you're a casual listener or a serious audiophile, WAKONDA caters to all, providing a superior music experience tailored to individual tastes.