32 | Optional Equipment |
Surround Panels
SURROUND PANEL SIZE | HEIGHT | WIDTH | PART # |
8" | 99300293 | ||
10" | 99300294 | ||
12" | 99300295 |
Installation Instructions
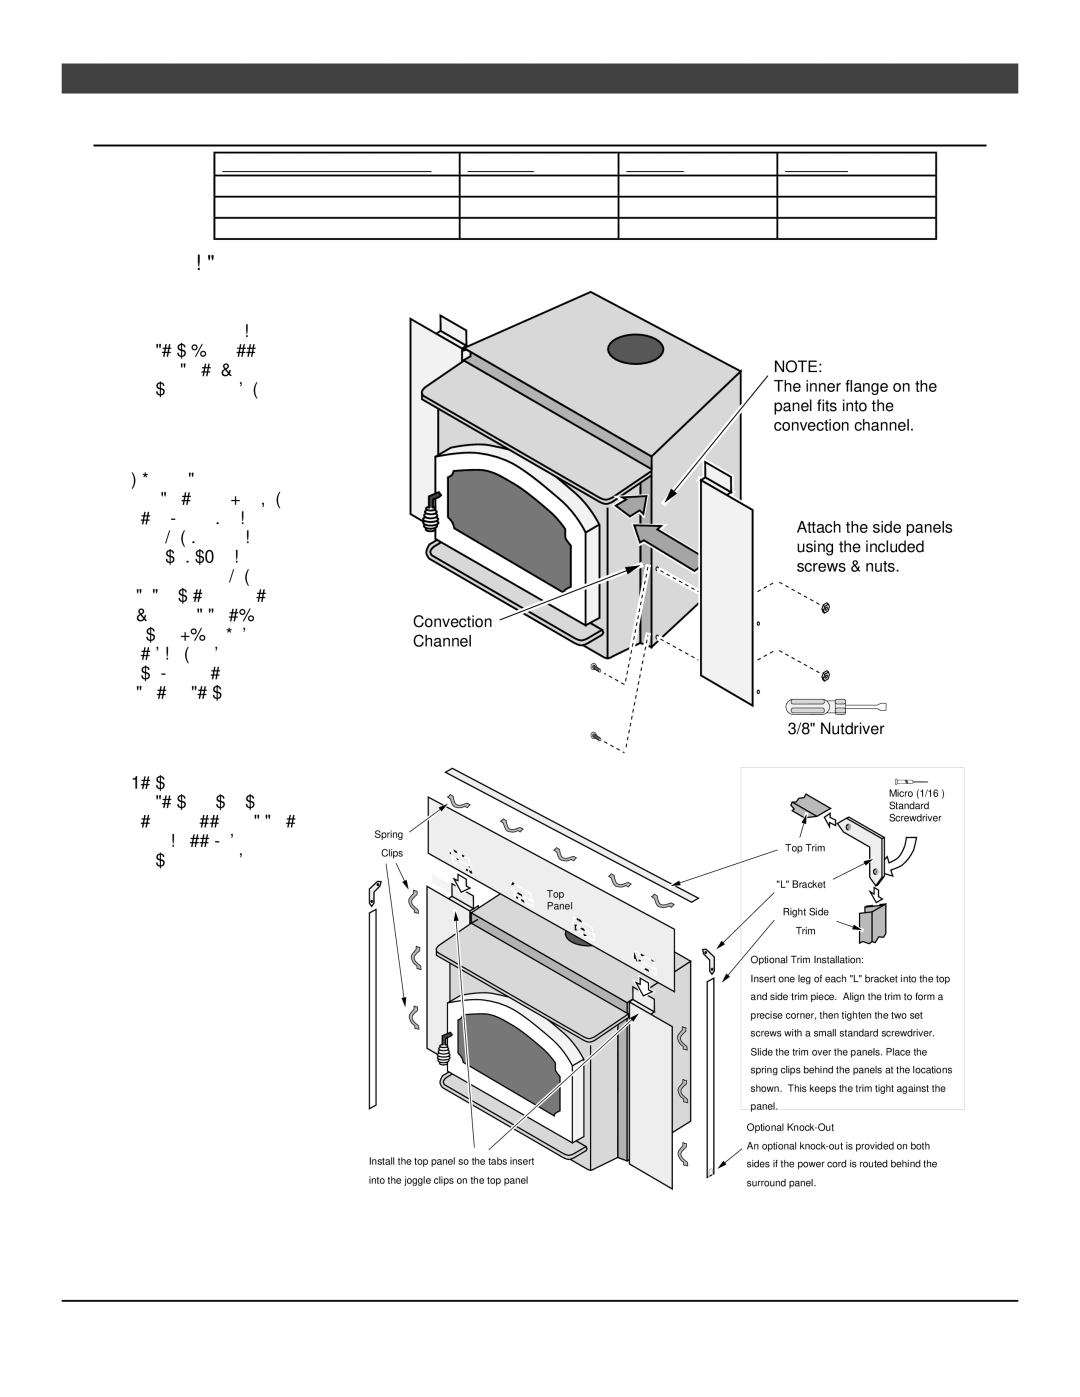
1.With the insert 12” from the fireplace, install the side surround panels (see the directions to the right).
2.Adjust the position of the side panels so they are: 1) flush with the bottom of the insert; 2) both the same distance back from the front of the insert; 3) perpendicular to the floor (use the top panel, if necessary, to judge alignment). Tighten the screws that hold the side panels in place.
3.Place the insert into the fireplace and connect the flue. Install the top panel and trim following the directions to the right.
Convection
Channel
Spring
Clips
Top
Panel
Install the top panel so the tabs insert into the joggle clips on the top panel
NOTE:
The inner flange on the panel fits into the convection channel.
Attach the side panels using the included screws & nuts.
3/8" Nutdriver
Micro (1/16”)
Standard
Screwdriver
Top Trim
"L" Bracket
Right Side
Trim
Optional Trim Installation:
Insert one leg of each "L" bracket into the top and side trim piece. Align the trim to form a precise corner, then tighten the two set screws with a small standard screwdriver. Slide the trim over the panels. Place the spring clips behind the panels at the locations shown. This keeps the trim tight against the panel.
Optional Knock-Out
An optional
© Travis Industries | 4041105 |