BUSINESS & HOME SECURITY
STEP 4
SETTING UP REMOTE SECURITY MONITORING (continued)
Port forwarding Your Router and the Creation of a DDNS Account with Lorex is required in order for you to have Remote Internet Access.
9 | Accessing the DVR Locally / Remotely with a PC | 10 | Logging Into Live Monitoring |
Once the DVR and the Local Network have been successfully configured, a connection can | Once the Web Client application has loaded through Internet Explorer, a | ||
| be made with a Local PC (a PC within the same network as the DVR), or remotely (a PC from |
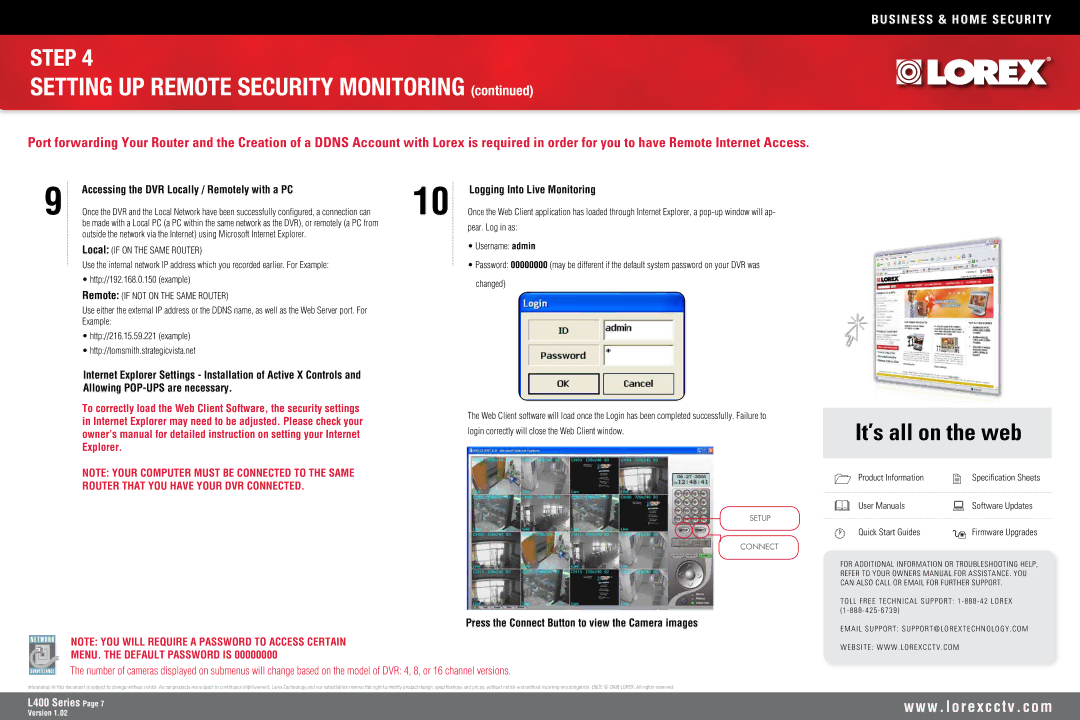
| pear. Log in as: |
| outside the network via the Internet) using Microsoft Internet Explorer. |
| |
|
|
|
Local: (IF ON THE SAME ROUTER)
Use the internal network IP address which you recorded earlier. For Example:
•http://192.168.0.150 (example) Remote: (IF NOT ON THE SAME ROUTER)
Use either the external IP address or the DDNS name, as well as the Web Server port. For Example:
•http://216.15.59.221 (example)
•http://tomsmith.strategicvista.net
•Username: admin
•Password: 00000000 (may be different if the default system password on your DVR was changed)
Internet Explorer Settings - Installation of Active X Controls and Allowing
To correctly load the Web Client Software, the security settings in Internet Explorer may need to be adjusted. Please check your owner’s manual for detailed instruction on setting your Internet Explorer.
NOTE: YOUR COMPUTER MUST BE CONNECTED TO THE SAME ROUTER THAT YOU HAVE YOUR DVR CONNECTED.
The Web Client software will load once the Login has been completed successfully. Failure to login correctly will close the Web Client window.
It’s all on the web
Product Information | Specification Sheets |
User Manuals | Software Updates |
SETUP
CONNECT
Press the Connect Button to view the Camera images
NOTE: YOU WILL REQUIRE A PASSWORD TO ACCESS CERTAIN MENU. THE DEFAULT PASSWORD IS 00000000
The number of cameras displayed on submenus will change based on the model of DVR: 4, 8, or 16 channel versions.
Information in this document is subject to change without notice. As our products are subject to continuous improvement, Lorex Technology and our subsidiaries reserve the right to modify product design, specifications and prices, without notice and without incurring any obligation. E&OE © 2006 LOREX. All rights reserved.
Quick Start Guides | Firmware Upgrades |
FOR ADDITIONAL INFORMATION OR TROUBLESHOOTING HELP, REFER TO YOUR OWNERS MANUAL FOR ASSISTANCE. YOU CAN ALSO CALL OR EMAIL FOR FURTHER SUPPORT.
TOLL FREE TECHNICAL SUPPORT: 1 - 888 - 42 LOREX (1 - 888 - 425 - 6739)
EMAIL SUPPORT: SUPPORT@LOREXTECHNOLOGY . COM
WEBSITE: WWW . LOREXCCTV . COM
L400 Series Page
Version 1.02
w w w . l o r e x c c t v . c o m
