BUSINESS & HOME SECURITY
STEP 4
SETTING UP REMOTE SECURITY MONITORING
Port forwarding Your Router and the Creation of a DDNS Account with Lorex is required in order for you to have Remote Internet Access.
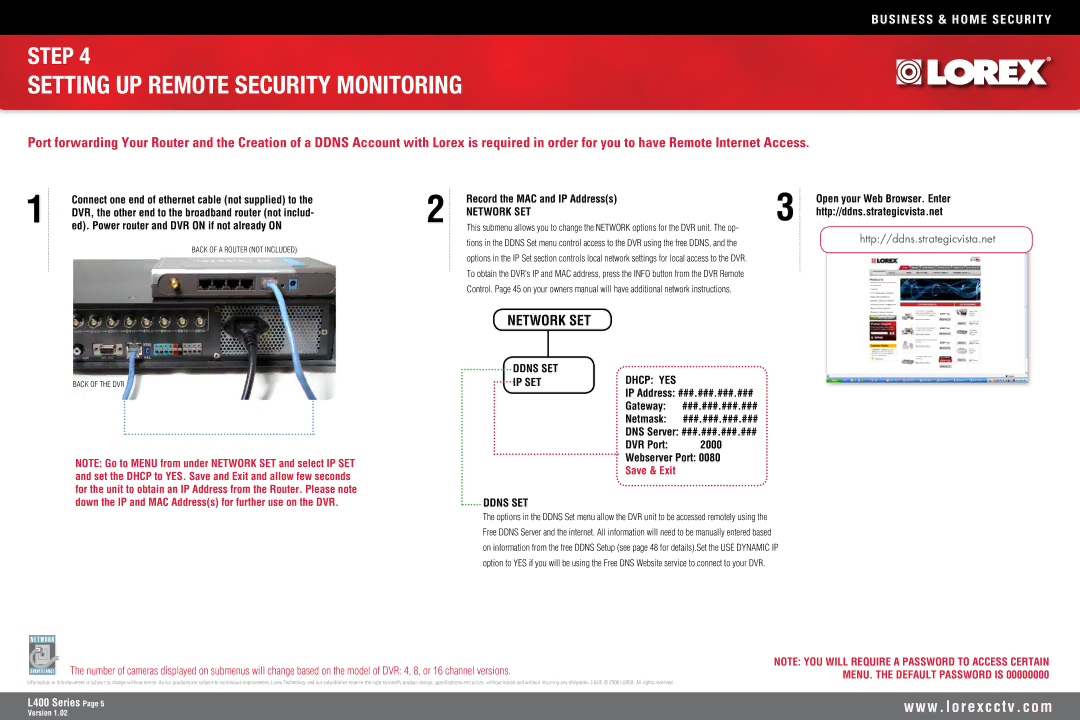
1 | Connect one end of ethernet cable (not supplied) to the |
DVR, the other end to the broadband router (not includ- | |
ed). Power router and DVR ON if not already ON | |
| BACK OF A ROUTER (NOT INCLUDED) |
BACK OF THE DVR
NOTE: Go to MENU from under NETWORK SET and select IP SET and set the DHCP to YES. Save and Exit and allow few seconds for the unit to obtain an IP Address from the Router. Please note down the IP and MAC Address(s) for further use on the DVR.
2 | Record the MAC and IP Address(s) | 3 |
NETWORK SET | ||
This submenu allows you to change the NETWORK options for the DVR unit. The op- | ||
| tions in the DDNS Set menu control access to the DVR using the free DDNS, and the |
|
| options in the IP Set section controls local network settings for local access to the DVR. |
|
| To obtain the DVR’s IP and MAC address, press the INFO button from the DVR Remote |
|
| Control. Page 45 on your owners manual will have additional network instructions. |
|
NETWORK SET
DDNS SET | DHCP: YES |
|
IP SET |
| |
| IP Address: ###.###.###.### | |
| Gateway: | ###.###.###.### |
| Netmask: | ###.###.###.### |
| DNS Server: ###.###.###.### | |
| DVR Port: | 2000 |
| Webserver Port: 0080 | |
| Save & Exit |
|
DDNS SET
The options in the DDNS Set menu allow the DVR unit to be accessed remotely using the Free DDNS Server and the internet. All information will need to be manually entered based on information from the free DDNS Setup (see page 48 for details).Set the USE DYNAMIC IP option to YES if you will be using the Free DNS Website service to connect to your DVR.
Open your Web Browser. Enter http://ddns.strategicvista.net
http://ddns.strategicvista.net
The number of cameras displayed on submenus will change based on the model of DVR: 4, 8, or 16 channel versions.
Information in this document is subject to change without notice. As our products are subject to continuous improvement, Lorex Technology and our subsidiaries reserve the right to modify product design, specifications and prices, without notice and without incurring any obligation. E&OE © 2006 LOREX. All rights reserved.
NOTE: YOU WILL REQUIRE A PASSWORD TO ACCESS CERTAIN MENU. THE DEFAULT PASSWORD IS 00000000
L400 Series Page
Version 1.02
w w w . l o r e x c c t v . c o m