Attach the unit to the gimbal bracket using the supplied gimbal knobs and washers. Slide the rubber washers onto the gimbal knobs then loosely screw the knobs into their sockets. Slide the unit into the bracket with the rubber washers to the outside of the bracket arms. Tilt the unit to the desired viewing angle and tighten the knobs finger tight.
For the X47
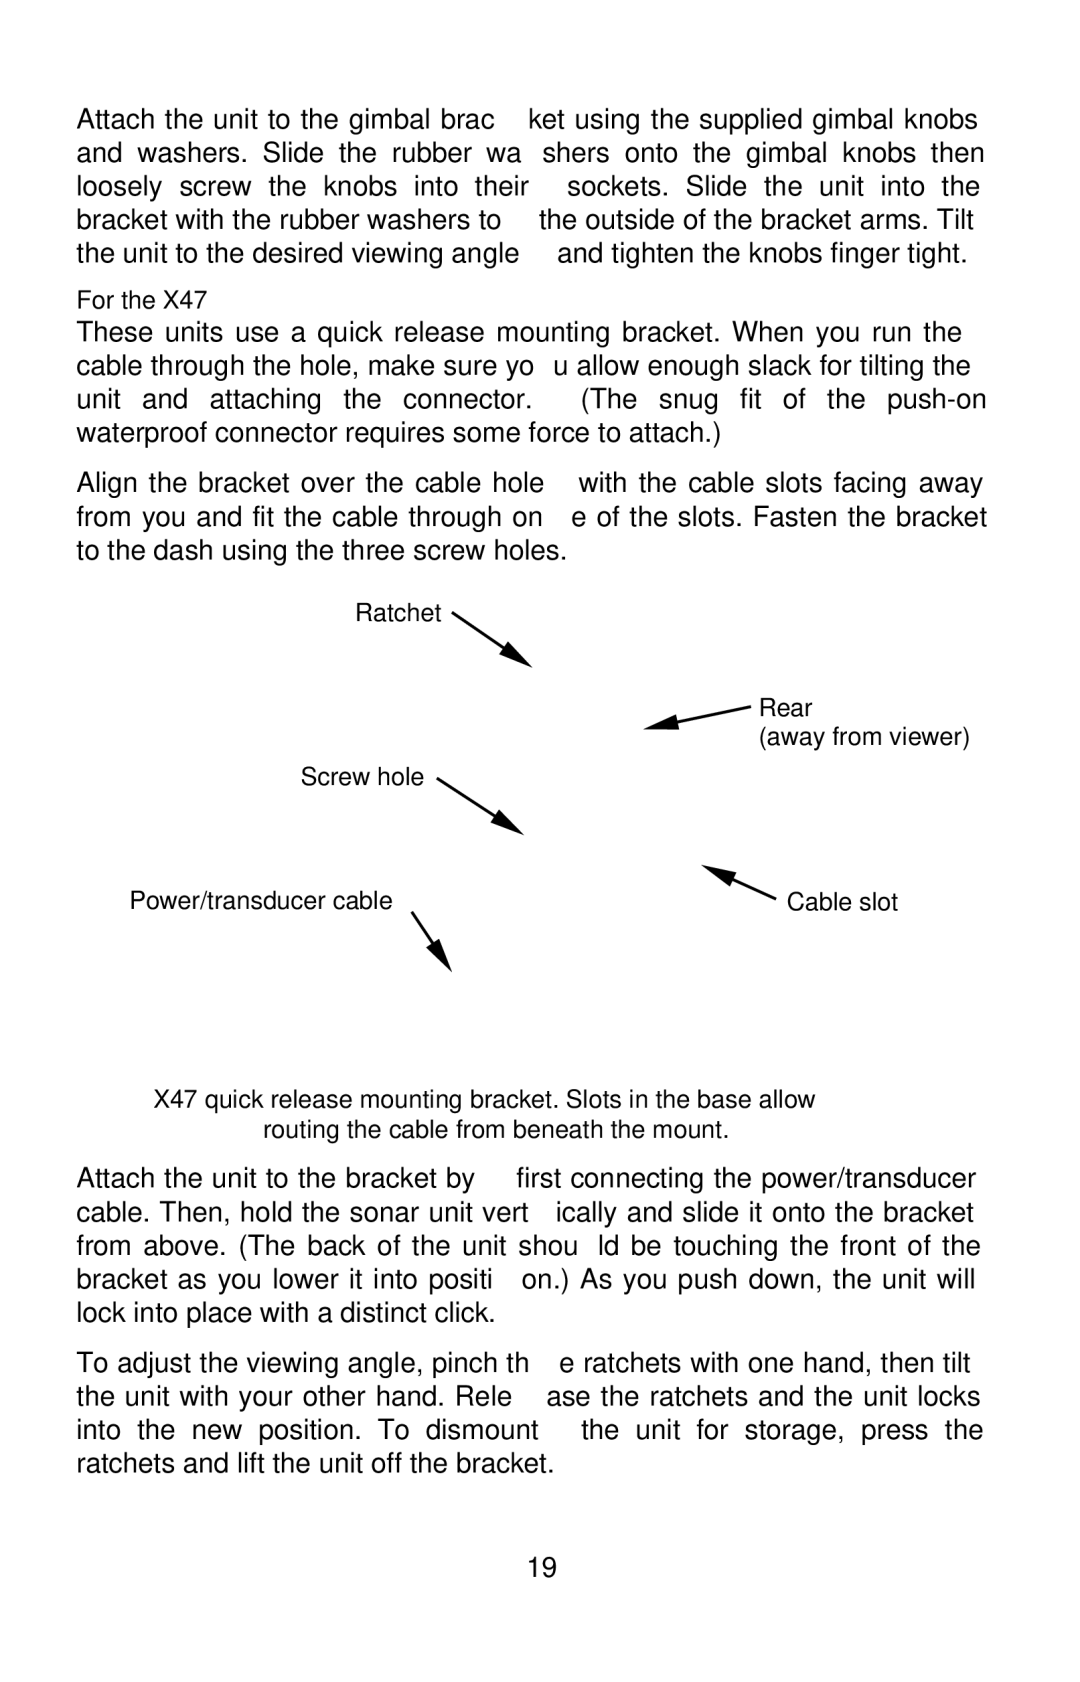
These units use a quick release mounting bracket. When you run the cable through the hole, make sure you allow enough slack for tilting the unit and attaching the connector. (The snug fit of the
Align the bracket over the cable hole with the cable slots facing away from you and fit the cable through one of the slots. Fasten the bracket to the dash using the three screw holes.
Ratchet |
|
| Rear |
| (away from viewer) |
Screw hole |
|
Power/transducer cable | Cable slot |
X47 quick release mounting bracket. Slots in the base allow
routing the cable from beneath the mount.
Attach the unit to the bracket by first connecting the power/transducer cable. Then, hold the sonar unit vertically and slide it onto the bracket from above. (The back of the unit should be touching the front of the bracket as you lower it into position.) As you push down, the unit will lock into place with a distinct click.
To adjust the viewing angle, pinch the ratchets with one hand, then tilt the unit with your other hand. Release the ratchets and the unit locks into the new position. To dismount the unit for storage, press the ratchets and lift the unit off the bracket.
19