TM
•Horizontal wire runs should be routed through holes drilled at equal heights in the studs.
•Do not install the actual speaker until the wall board is in place. Until then leave several feet of wire secured to the back of the mounting ring. The excess wire can be removed during
final installation.
During the drywall installation, make sure the speaker
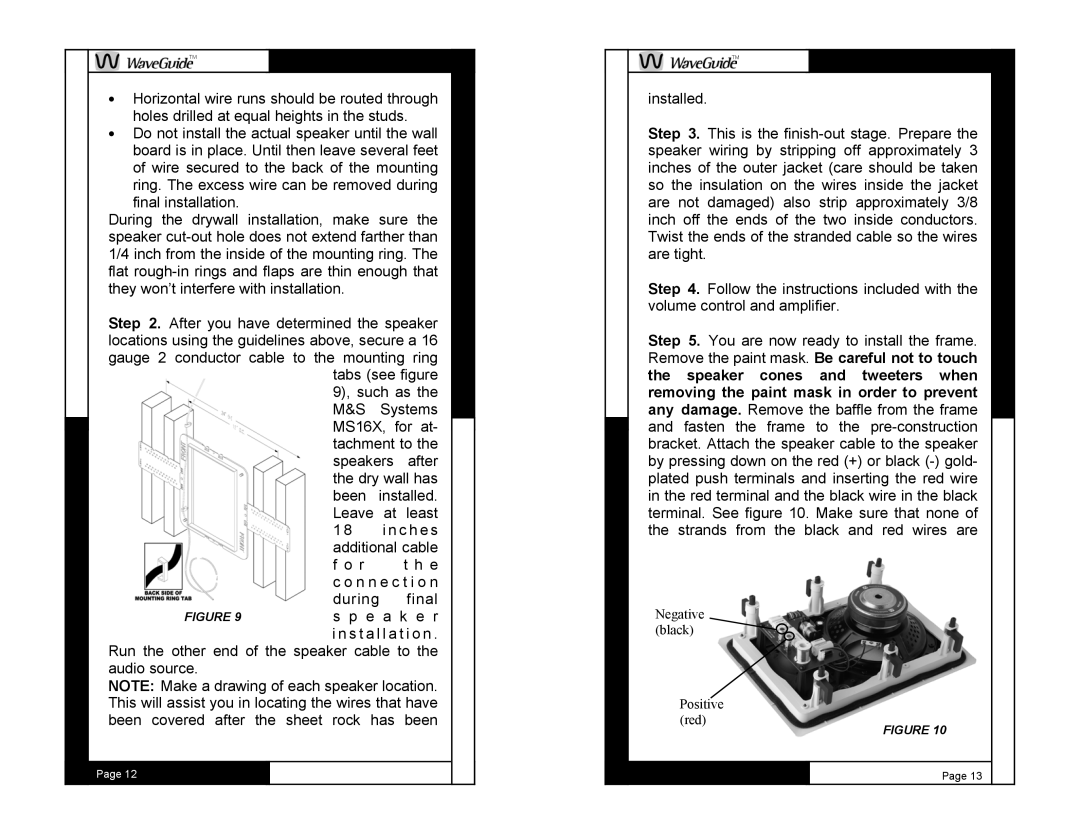
Step 2. After you have determined the speaker locations using the guidelines above, secure a 16 gauge 2 conductor cable to the mounting ring
| tabs (see figure | ||
| 9), such as the | ||
| M&S | Systems | |
| MS16X, for at- | ||
| tachment to the | ||
| speakers | after | |
| the dry wall has | ||
| been installed. | ||
| Leave | at | least |
| 1 8 | i n c h e s | |
| additional cable | ||
| f o r |
| t h e |
| c o n n e c t i o n | ||
| during |
| final |
FIGURE 9 | s p e | a | k e r |
| i n s t a l l a t i o n . | ||
Run the other end of the speaker cable to the audio source.
NOTE: Make a drawing of each speaker location. This will assist you in locating the wires that have been covered after the sheet rock has been
Page 12
TM
installed.
Step 3. This is the
Step 4. Follow the instructions included with the volume control and amplifier.
Step 5. You are now ready to install the frame. Remove the paint mask. Be careful not to touch the speaker cones and tweeters when removing the paint mask in order to prevent any damage. Remove the baffle from the frame and fasten the frame to the
Negative (black)
Positive (red)
FIGURE 10
Page 13
