Operations
MKG Series Gas Griddle
2. Operation Section
Ensure that a proper installation has been performed on the appliance and that all warnings, cautions, and notices contained in this manual have been read, understood and adhered to before proceeding.
2.1.Lighting Instructions
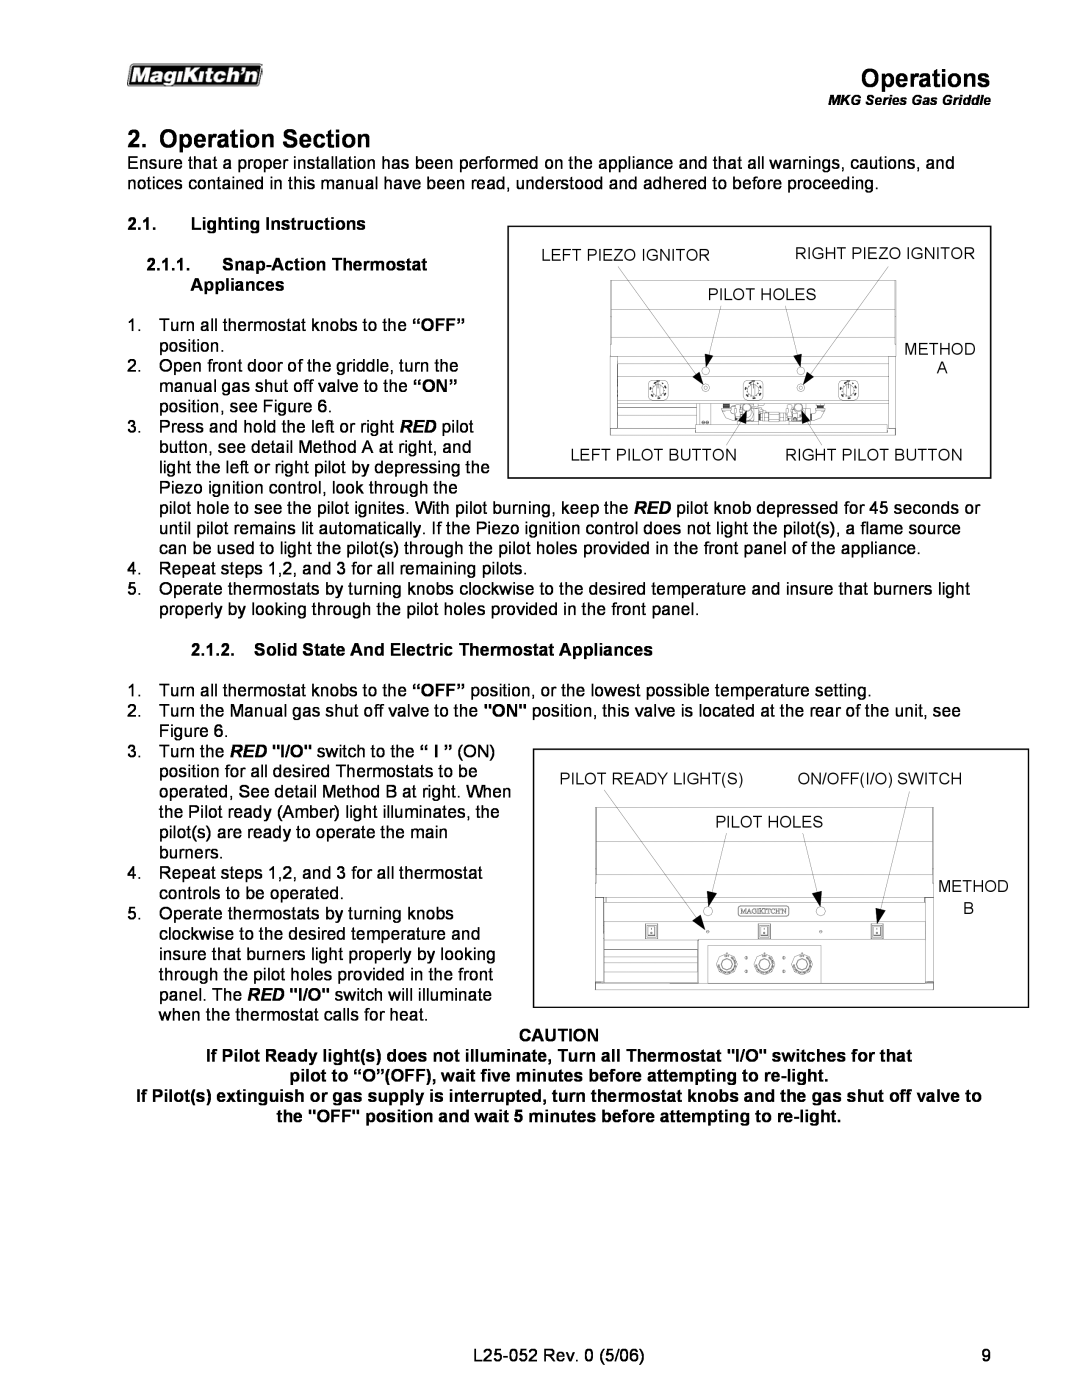
| 2.1.1. | LEFT PIEZO IGNITOR | RIGHT PIEZO IGNITOR |
|
|
| |
| Appliances | PILOT HOLES | |
|
| ||
1. | Turn all thermostat knobs to the “OFF” |
|
|
2. | position. |
| METHOD |
Open front door of the griddle, turn the |
| A | |
| manual gas shut off valve to the “ON” |
|
|
| position, see Figure 6. |
|
|
3. | Press and hold the left or right RED pilot |
|
|
| button, see detail Method A at right, and | LEFT PILOT BUTTON | RIGHT PILOT BUTTON |
| light the left or right pilot by depressing the | ||
|
|
| |
| Piezo ignition control, look through the |
|
|
pilot hole to see the pilot ignites. With pilot burning, keep the RED pilot knob depressed for 45 seconds or until pilot remains lit automatically. If the Piezo ignition control does not light the pilot(s), a flame source can be used to light the pilot(s) through the pilot holes provided in the front panel of the appliance.
4.Repeat steps 1,2, and 3 for all remaining pilots.
5.Operate thermostats by turning knobs clockwise to the desired temperature and insure that burners light properly by looking through the pilot holes provided in the front panel.
2.1.2.Solid State And Electric Thermostat Appliances
1.Turn all thermostat knobs to the “OFF” position, or the lowest possible temperature setting.
2.Turn the Manual gas shut off valve to the "ON" position, this valve is located at the rear of the unit, see Figure 6.
3. Turn the RED "I/O" switch to the “ I ” (ON) |
|
| |
position for all desired Thermostats to be | PILOT READY LIGHT(S) | ON/OFF(I/O) SWITCH | |
operated, See detail Method B at right. When | |||
|
| ||
the Pilot ready (Amber) light illuminates, the | PILOT HOLES | ||
pilot(s) are ready to operate the main | |||
|
| ||
burners. |
|
| |
4. Repeat steps 1,2, and 3 for all thermostat |
| METHOD | |
controls to be operated. |
| ||
| B | ||
5. Operate thermostats by turning knobs |
| ||
clockwise to the desired temperature and |
|
| |
insure that burners light properly by looking |
|
| |
through the pilot holes provided in the front |
|
| |
panel. The RED "I/O" switch will illuminate |
|
| |
when the thermostat calls for heat. |
|
| |
CAUTION
If Pilot Ready light(s) does not illuminate, Turn all Thermostat "I/O" switches for that
pilot to “O”(OFF), wait five minutes before attempting to
If Pilot(s) extinguish or gas supply is interrupted, turn thermostat knobs and the gas shut off valve to
the "OFF" position and wait 5 minutes before attempting to
9 |