Repair | P 6/ 8 |
|
[3]DISASSEMBLY/ASSEMBLY [3]-4. Motor Section
DISASSEMBLING
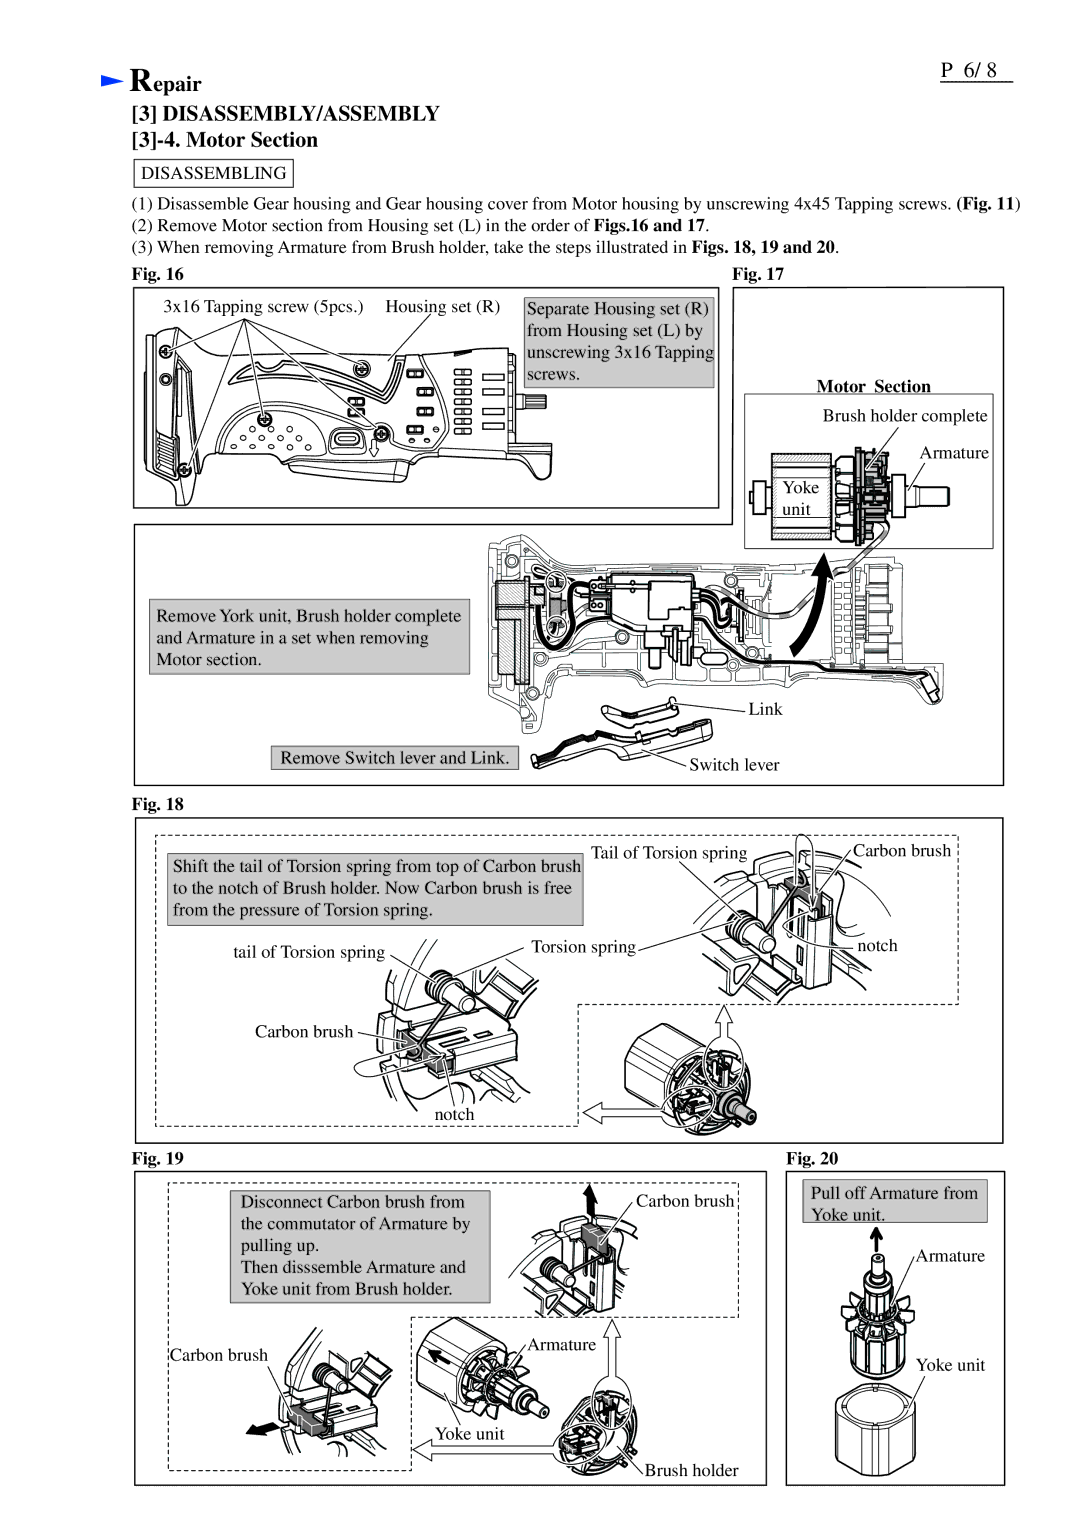
(1)Disassemble Gear housing and Gear housing cover from Motor housing by unscrewing 4x45 Tapping screws. (Fig. 11)
(2)Remove Motor section from Housing set (L) in the order of Figs.16 and 17.
(3)When removing Armature from Brush holder, take the steps illustrated in Figs. 18, 19 and 20.
Fig. 16
3x16 Tapping screw (5pcs.) Housing set (R) | Separate Housing set (R) |
| from Housing set (L) by |
| unscrewing 3x16 Tapping |
| screws. |
Fig. 17
Motor Section
Brush holder complete ![]()
![]()
![]() Armature
Armature
![]()
![]()
![]() Yoke
Yoke ![]()
![]()
![]()
![]()
![]()
![]()
![]()
![]()
![]()
![]()
![]() unit
unit ![]()
![]()
![]()
![]()
![]()
![]()
Remove York unit, Brush holder complete and Armature in a set when removing Motor section.
Remove Switch lever and Link.
Fig. 18
![]()
![]()
![]()
![]()
![]()
![]()
![]()
![]()
![]() Link
Link
![]() Switch lever
Switch lever
Shift the tail of Torsion spring from top of Carbon brush to the notch of Brush holder. Now Carbon brush is free from the pressure of Torsion spring.
Tail of Torsion spring
Carbon brush
tail of Torsion spring | Torsion spring |
|
Carbon brush ![]()
![]()
notch
notch
Fig. 19
Disconnect Carbon brush from | Carbon brush |
the commutator of Armature by |
|
pulling up. |
|
Then disssemble Armature and |
|
Yoke unit from Brush holder. |
|
Carbon brush | Armature |
|
Yoke unit
![]()
![]()
![]()
![]() Brush holder
Brush holder
Fig. 20
Pull off Armature from |
Yoke unit. |
Armature |
Yoke unit |
