P 12/ 13
 Wiring diagram
[2] Wiring around Stator
Fig. D-3
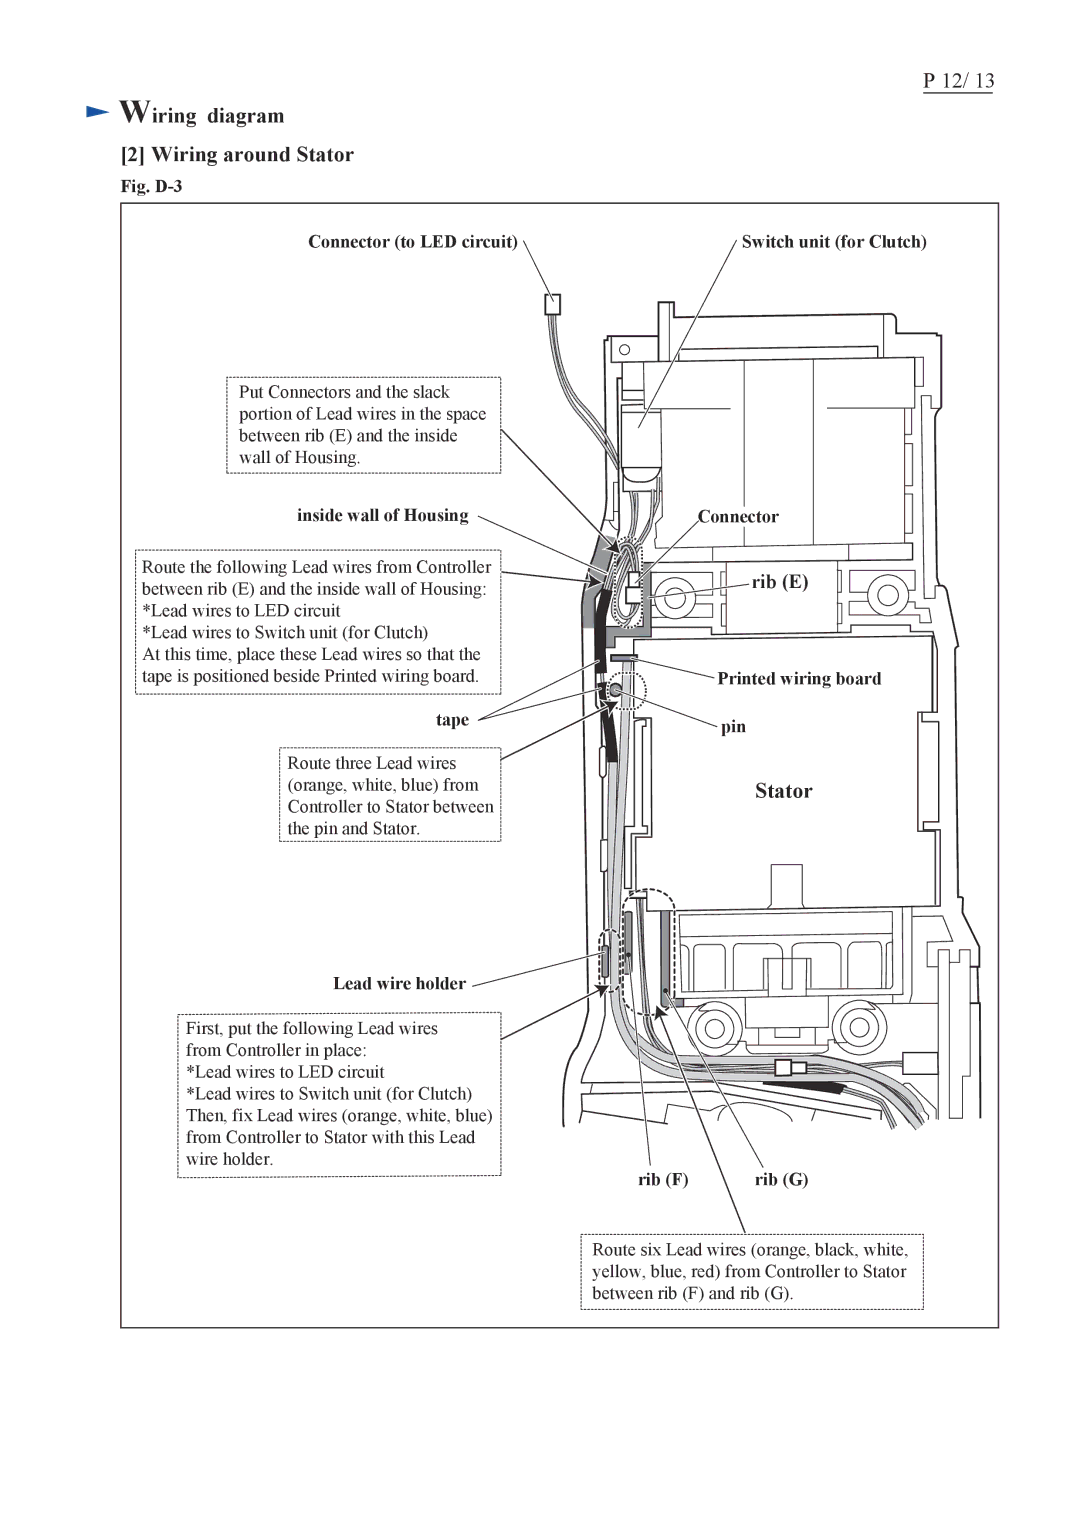
Connector (to LED circuit) | Switch unit (for Clutch) |
Put Connectors and the slack portion of Lead wires in the space between rib (E) and the inside wall of Housing.
inside wall of Housing | Connector |
Route the following Lead wires from Controller between rib (E) and the inside wall of Housing: *Lead wires to LED circuit
*Lead wires to Switch unit (for Clutch)
At this time, place these Lead wires so that the tape is positioned beside Printed wiring board.
tape
Route three Lead wires (orange, white, blue) from Controller to Stator between the pin and Stator.
rib (E)
![]()
![]() Printed wiring board
Printed wiring board ![]() pin
pin
Stator
Lead wire holder 
First, put the following Lead wires from Controller in place:
*Lead wires to LED circuit
*Lead wires to Switch unit (for Clutch) Then, fix Lead wires (orange, white, blue) from Controller to Stator with this Lead wire holder.
rib (F) | rib (G) |
Route six Lead wires (orange, black, white, yellow, blue, red) from Controller to Stator between rib (F) and rib (G).