P 12/ 14
 Repair
[4] DISASSEMBLY/ASSEMBLY
MAINTENANCE
(1)Remove Cylinder cover.
(2)Remove Exhaust Muffler.
(3)Remove Spark arrester from Exhaust muffler (Fig. 59). Sweep it off if dirt or soot is on Spark arrester.
Replace it with a new one if spark arrester has a breakage or fray.
(4)Assemble Spark arrester to Exhaust muffler.
(5)Set Exhaust muffler in place.
Note: • Refer to Parts breakdown, and do not forget muffler gasket.
•Two M5x40 Hex socket head bolts on Exhaust muffler are threadlocker type. Once removing them for repair, apply ThreeBond 1342 / Loctite 242 to
the threads to screw them.
(6)Set Cylinder cover in place.
Fig. 59
Exhaust muffler | Spark arrester |
[4]-14. Engine block
DISASSEMBLING
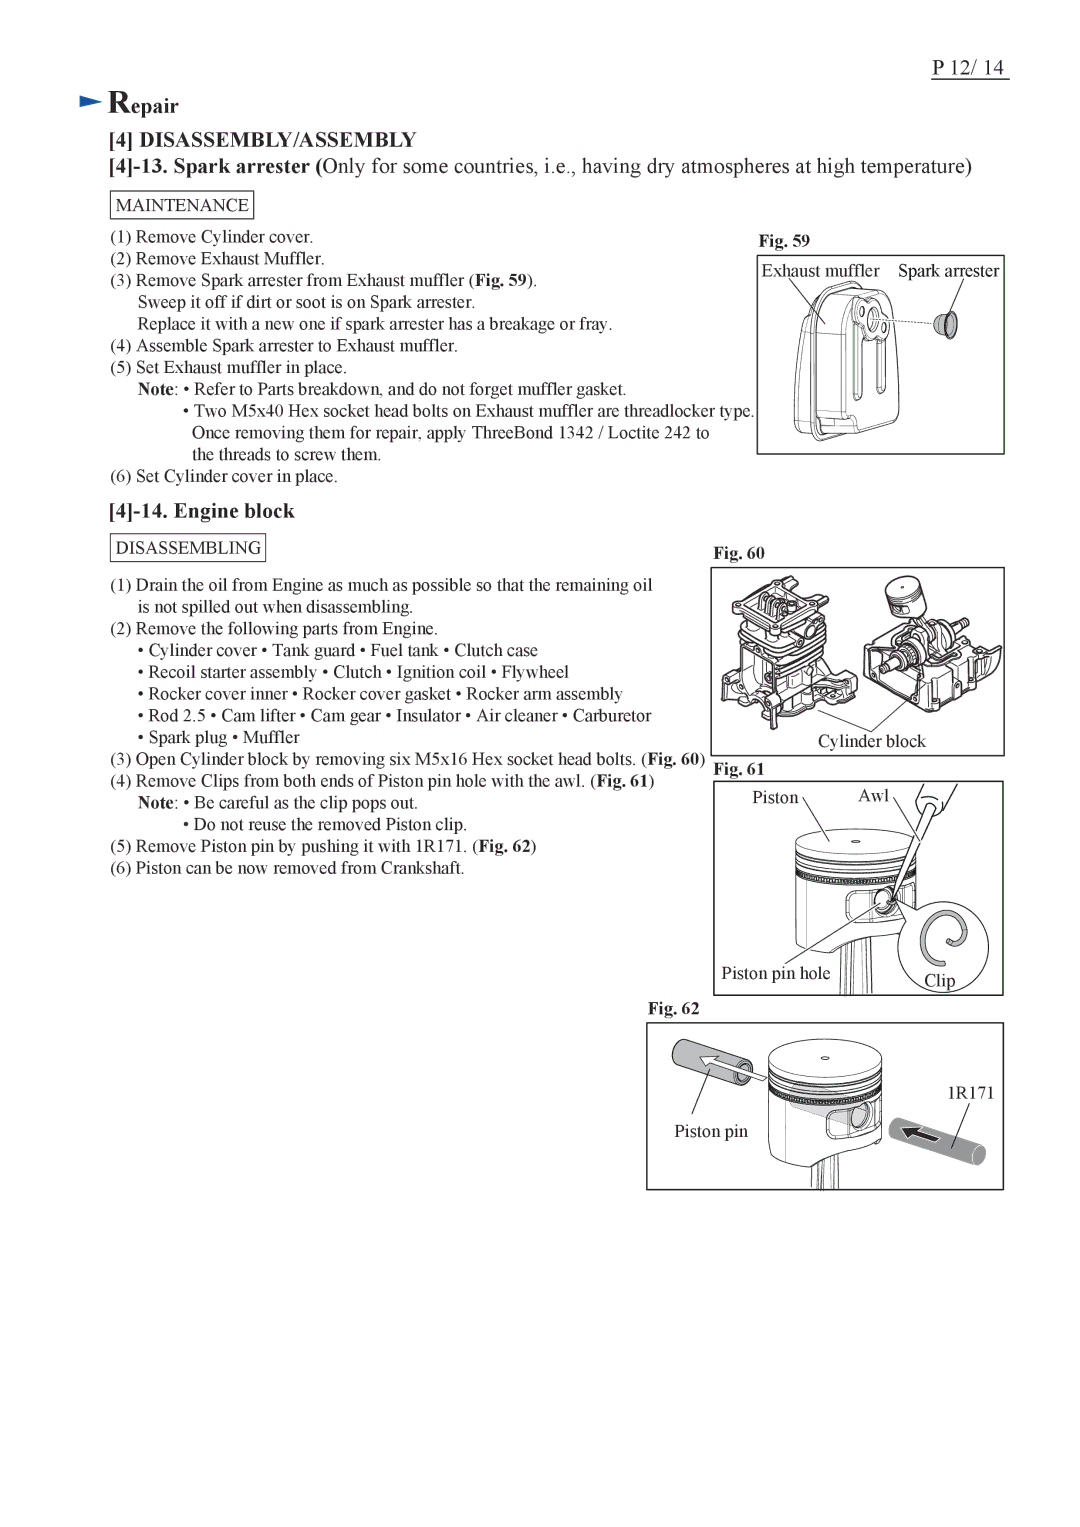
Fig. 60
(1)Drain the oil from Engine as much as possible so that the remaining oil is not spilled out when disassembling.
(2)Remove the following parts from Engine.
•Cylinder cover • Tank guard • Fuel tank • Clutch case
•Recoil starter assembly • Clutch • Ignition coil • Flywheel
•Rocker cover inner • Rocker cover gasket • Rocker arm assembly
•Rod 2.5 • Cam lifter • Cam gear • Insulator • Air cleaner • Carburetor
•Spark plug • Muffler
(3)Open Cylinder block by removing six M5x16 Hex socket head bolts. (Fig. 60)
(4)Remove Clips from both ends of Piston pin hole with the awl. (Fig. 61) Note: • Be careful as the clip pops out.
•Do not reuse the removed Piston clip.
(5)Remove Piston pin by pushing it with 1R171. (Fig. 62)
(6)Piston can be now removed from Crankshaft.
Fig. 62
| Cylinder block |
Fig. 61 |
|
Piston | Awl |
Piston pin hole | Clip |
|
1R171 |
Piston pin |
