To remove the saw chain, perform the following steps:
1.Loosen the sprocket cover.
2.(For nut models) Turn the chain adjusting screw counterclockwise to release the saw chain tension.
(For lever models) Turn the adjusting dial to
1.Adjusting screw
1
|
|
|
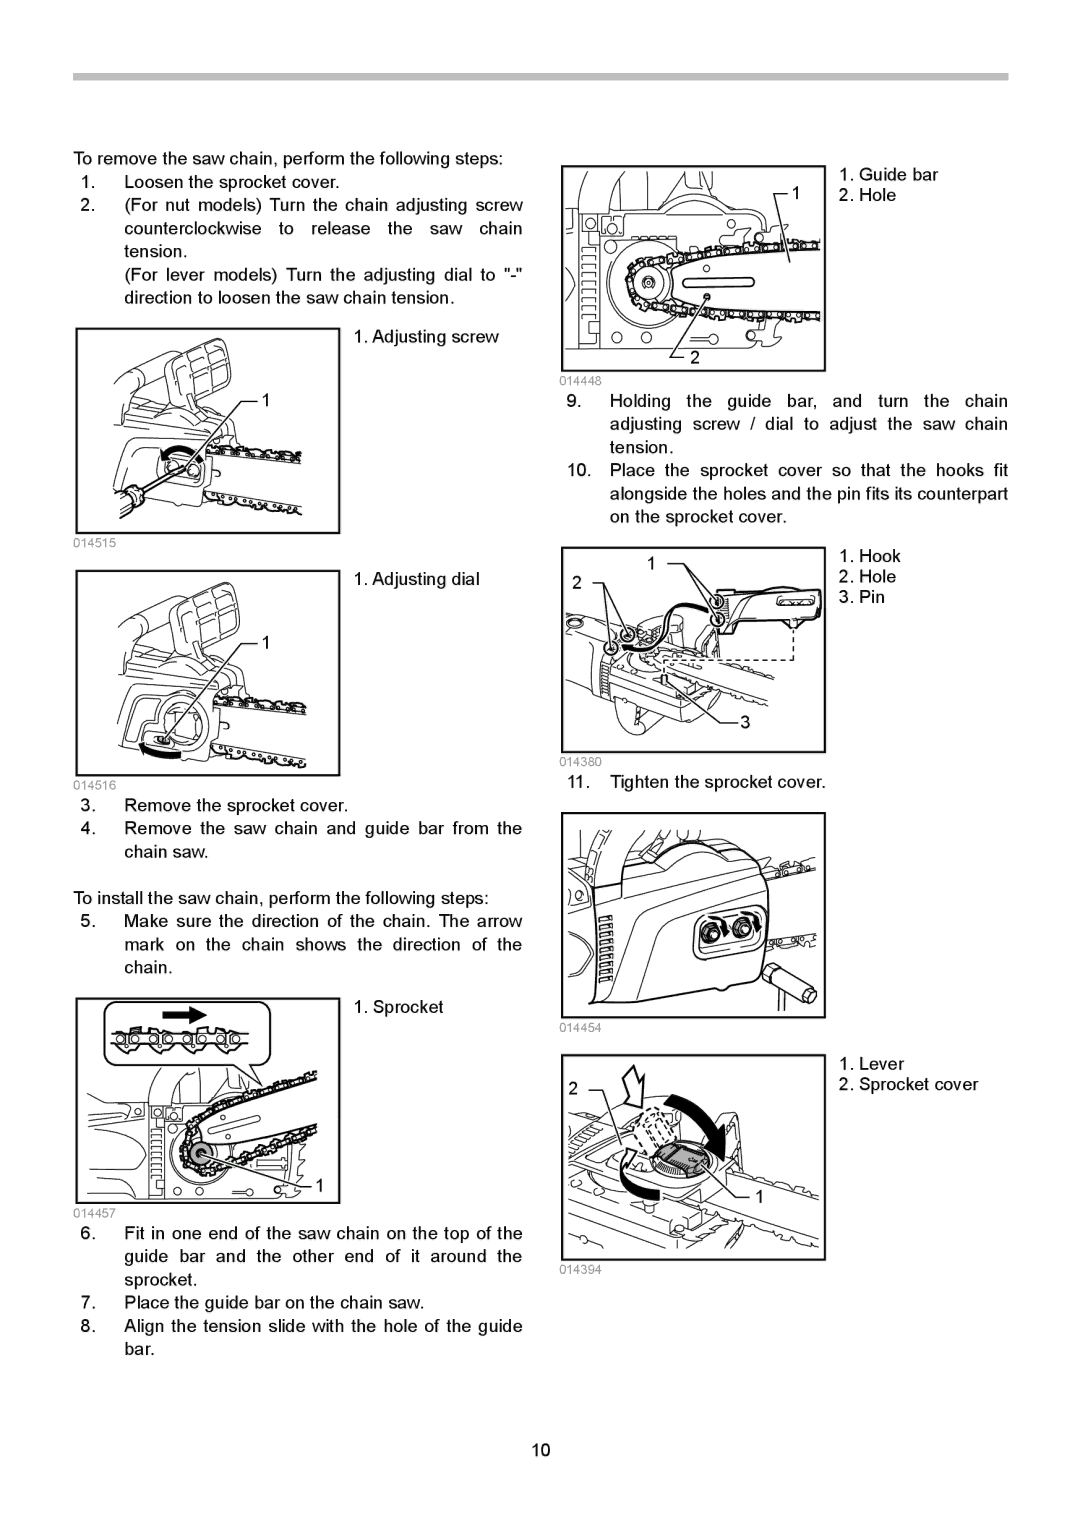
| 1 | 1. Guide bar |
| ||
|
|
|
| 2. Hole |
|
| ||
|
| 2 |
|
|
|
|
|
|
014448 |
|
|
|
|
|
|
|
|
9. | Holding | the | guide | bar, | and | turn | the | chain |
adjusting screw / dial to adjust the saw chain tension.
10.Place the sprocket cover so that the hooks fit alongside the holes and the pin fits its counterpart on the sprocket cover.
014515
1
014516
1. Adjusting dial
1 |
2 |
3 |
014380 |
11.Tighten the sprocket cover.
1.Hook
2.Hole
3.Pin
3.Remove the sprocket cover.
4.Remove the saw chain and guide bar from the chain saw.
To install the saw chain, perform the following steps:
5.Make sure the direction of the chain. The arrow mark on the chain shows the direction of the chain.
1. Sprocket
![]() 1
1
014457
014454 |
2 |
![]() 1
1
1.Lever
2.Sprocket cover
6.Fit in one end of the saw chain on the top of the guide bar and the other end of it around the sprocket.
7.Place the guide bar on the chain saw.
8.Align the tension slide with the hole of the guide bar.
014394
10