OSD Setting – Menu Color | Configuration |
Menu Items: Select an item to change its color.
Red, Green, Blue: Enter with
Default: If you wish to return to default settings, press OK
Summer, Spring, Autumn, Winter: You can select other default themes with colored keys.
Identification of Menu items
SELECTING OUTPUT SIGNAL TO TV
Press MENU key and select TV Setting.
TV Setting | Configuration |
| Standard: If TV is connected via UHF lead, select |
| relevant standard. Example; for UK select PAL I |
| Aspect Ratio: Select picture format for your TV. |
| Video Output: Select RGB if your TV supports this |
| via SCART input otherwise select Comp. |
| UHF Channel: If you have interference on UHF |
| output, select a different channel and |
| TV (OPTIONAL) |
Video Level: Press OK to adjust Brightness and Contrast levels of the picture. Use up / down keys to navigate and left / right keys to adjust the level.
SETTING THE TIME
Press MENU key and select Time Setting.
Note: Time in Auto mode is derived from the satellite signal and it may vary from satellite to satellite. Auto settings can only be done after the channels are tuned.
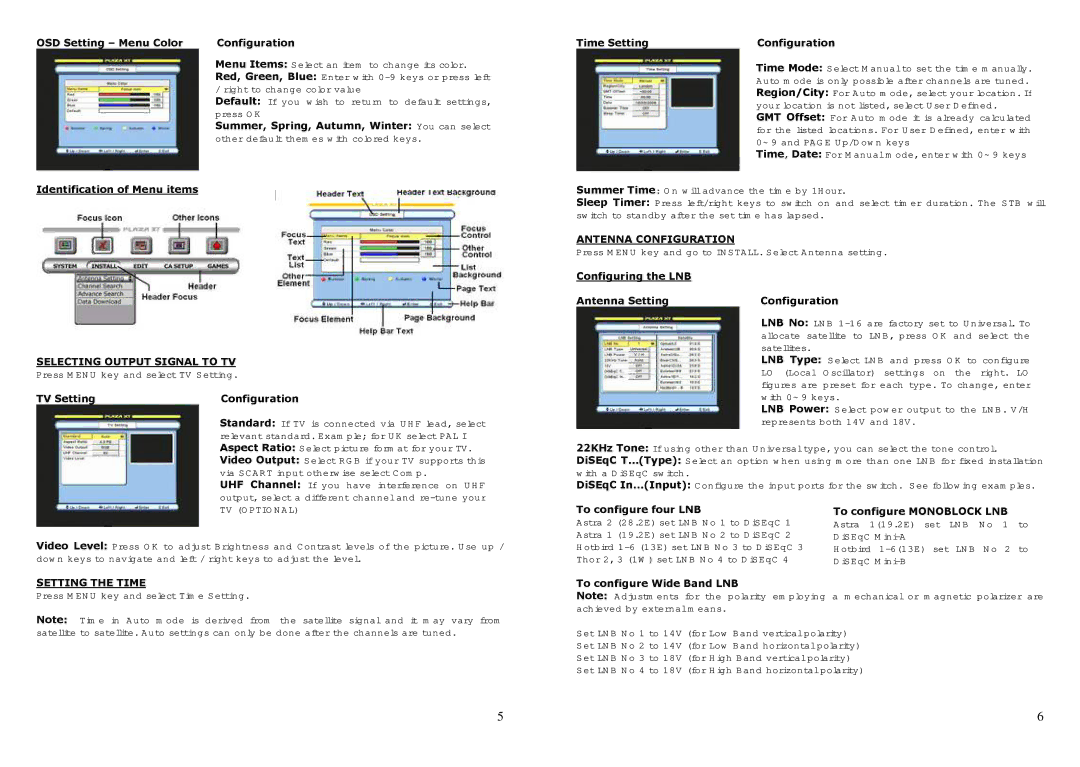
Time Setting | Configuration |
| Time Mode: Select Manual to set the time manually. |
| Auto mode is only possible after channels are tuned. |
| Region/City: For Auto mode, select your location. If |
| your location is not listed, select User Defined. |
| GMT Offset: For Auto mode it is already calculated |
| for the listed locations. For User Defined, enter with |
| 0~9 and PAGE Up/Down keys |
| Time, Date: For Manual mode, enter with 0~9 keys |
Summer Time: On will advance the time by 1Hour.
Sleep Timer: Press left/right keys to switch on and select timer duration. The STB will switch to standby after the set time has lapsed.
ANTENNA CONFIGURATION
Press MENU key and go to INSTALL. Select Antenna setting.
Configuring the LNB |
|
Antenna Setting | Configuration |
| LNB No: LNB |
| allocate satellite to LNB, press OK and select the |
| satellites. |
| LNB Type: Select LNB and press OK to configure |
| LO (Local Oscillator) settings on the right. LO |
| figures are preset for each type. To change, enter |
| with 0~9 keys. |
| LNB Power: Select power output to the LNB. V/H |
| represents both 14V and 18V. |
22KHz Tone: If using other than Universal type, you can select the tone control.
DiSEqC T…(Type): Select an option when using more than one LNB for fixed installation with a DiSEqC switch.
DiSEqC In…(Input): Configure the input ports for the switch. See following examples.
To configure four LNB | To configure MONOBLOCK LNB |
Astra 2 (28.2E) set LNB No 1 to DiSEqC 1 | Astra 1(19.2E) set LNB No 1 to |
Astra 1 (19.2E) set LNB No 2 to DiSEqC 2 | DiSEqC |
Hotbird | Hotbird |
Thor 2, 3 (1W) set LNB No 4 to DiSEqC 4 | DiSEqC |
To configure Wide Band LNB
Note: Adjustments for the polarity employing a mechanical or magnetic polarizer are achieved by external means.
Set LNB No 1 to 14V (for Low Band vertical polarity)
Set LNB No 2 to 14V (for Low Band horizontal polarity)
Set LNB No 3 to 18V (for High Band vertical polarity)
Set LNB No 4 to 18V (for High Band horizontal polarity)
5 | 6 |