USING THE RECORDER
The numbers between parentheses refer to the
Switching ON and OFF
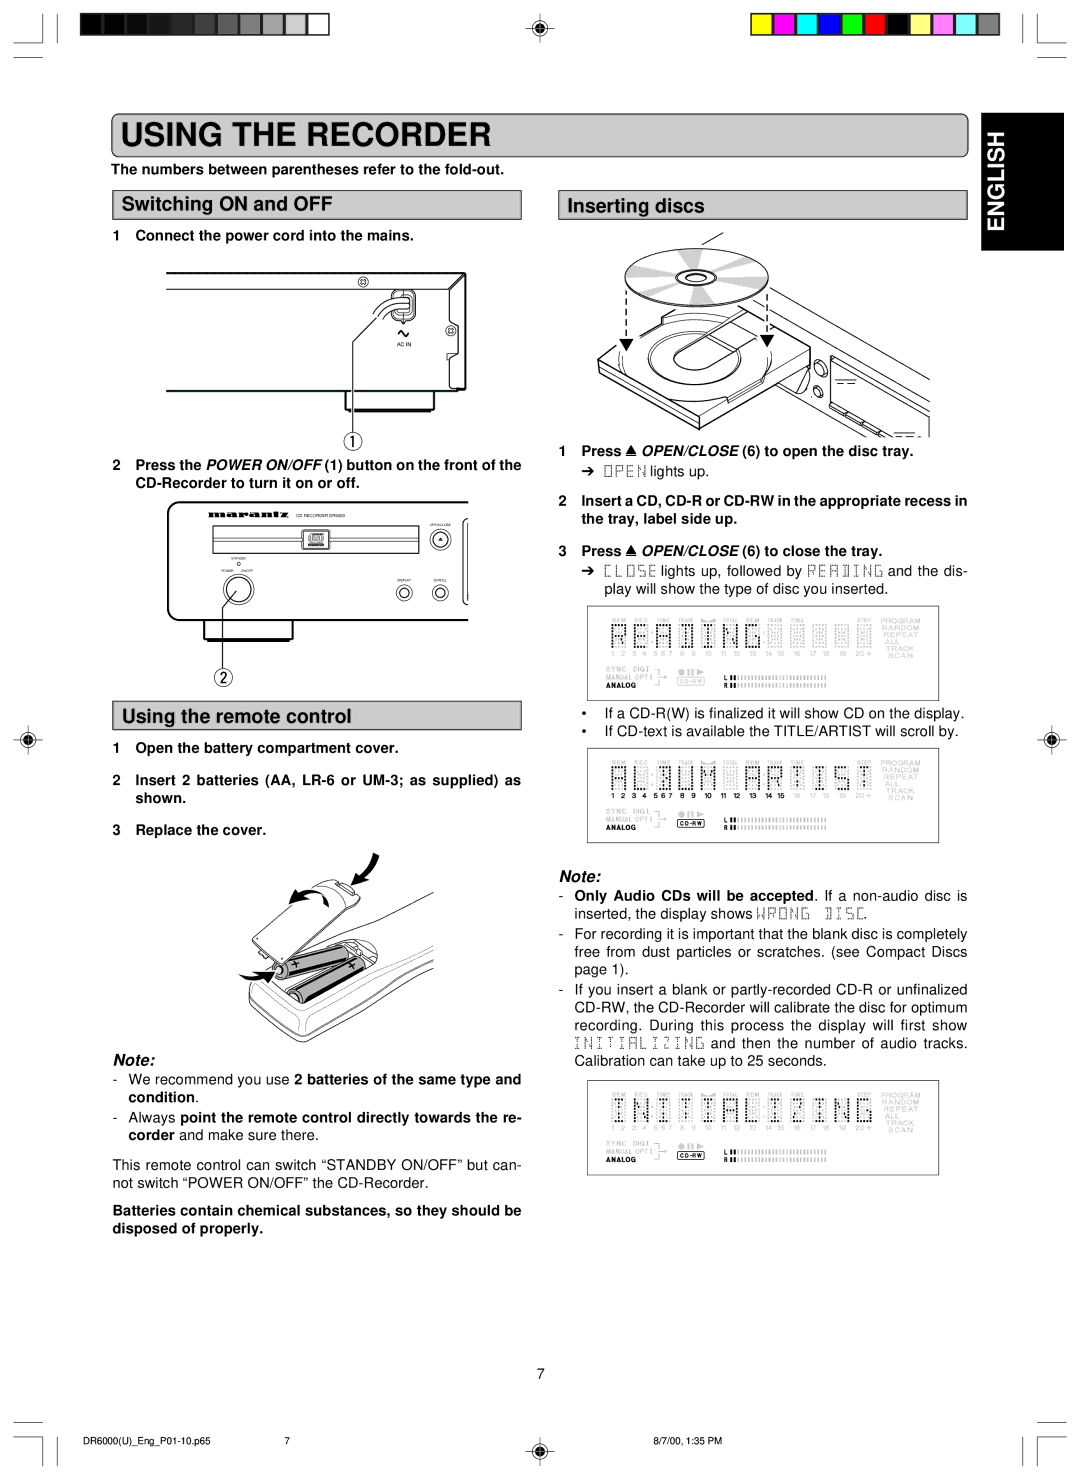
1 Connect the power cord into the mains.
AC IN
q
2Press the POWER ON/OFF (1) button on the front of the
| CD RECORDER DR6000 |
|
|
| OPEN/CLOSE |
| Recordable |
|
| ReWritable |
|
STANDBY |
| |
POWER | ON/OFF |
|
| DISPLAY | SCROLL |
Inserting discs | ENGLISH |
|
1Press / OPEN/CLOSE (6) to open the disc tray.
➔ lights up.
2Insert a CD,
3Press / OPEN/CLOSE (6) to close the tray.
➔ | lights up, followed by | and the dis- |
| play will show the type of disc you inserted. | |
w
Using the remote control
1Open the battery compartment cover.
2Insert 2 batteries (AA,
3Replace the cover.
•If a
•If
Note:
- | Only Audio CDs will be accepted. If a | |
| inserted, the display shows | . |
- For recording it is important that the blank disc is completely | ||
| free from dust particles or scratches. (see Compact Discs | |
| page 1). |
|
- | If you insert a blank or | |
| ||
| recording. During this process the display will first show | |
Note: | and then the number of audio tracks. | |
Calibration can take up to 25 seconds. |
| |
-We recommend you use 2 batteries of the same type and
condition.
- Always point the remote control directly towards the re-
corder and make sure there.
This remote control can switch “STANDBY ON/OFF” but can- not switch “POWER ON/OFF” the
Batteries contain chemical substances, so they should be disposed of properly.
7
7 | 8/7/00, 1:35 PM |
