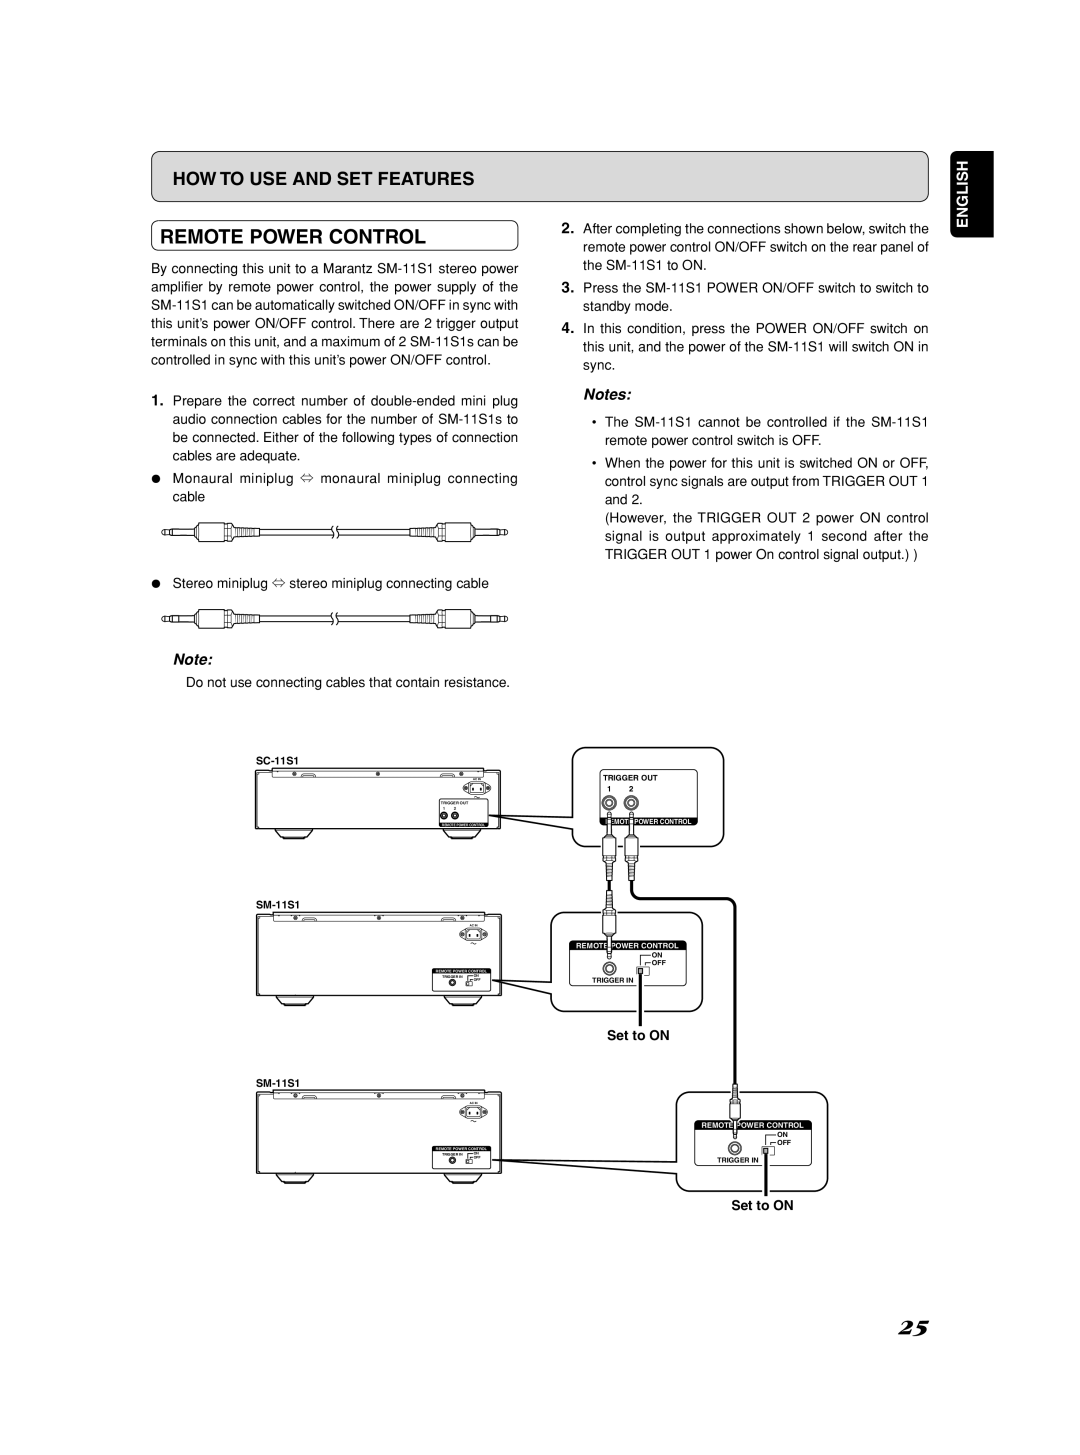
HOW TO USE AND SET FEATURES
REMOTE POWER CONTROL
By connecting this unit to a Marantz
1.Prepare the correct number of
¶Monaural miniplug ⇔ monaural miniplug connecting cable
¶Stereo miniplug ⇔ stereo miniplug connecting cable
2.After completing the connections shown below, switch the remote power control ON/OFF switch on the rear panel of the
3.Press the
4.In this condition, press the POWER ON/OFF switch on this unit, and the power of the
Notes:
•The
•When the power for this unit is switched ON or OFF, control sync signals are output from TRIGGER OUT 1 and 2.
(However, the TRIGGER OUT 2 power ON control signal is output approximately 1 second after the TRIGGER OUT 1 power On control signal output.) )
ENGLISH
Note:
Do not use connecting cables that contain resistance.
AC IN
TRIGGER OUT
1 2
REMOTE POWER CONTROL
AC IN
REMOTE POWER CONTROL
TRIGGER IN | ON |
| OFF |
AC IN
REMOTE POWER CONTROL
TRIGGER IN | ON |
| OFF |
TRIGGER OUT
1 2
REMOTE POWER CONTROL
REMOTE POWER CONTROL
ON
![]() OFF
OFF
TRIGGER IN
Set to ON
REMOTE POWER CONTROL
ON
![]() OFF
OFF
TRIGGER IN
Set to ON
25