Display
OSD/Blanking
ENGLISH
Standard 1
![]() Fine Menu 1
Fine Menu 1
![]() Fine Menu 2
Fine Menu 2
![]() Input Signal
Input Signal
![]() RGB/HD Adjust
RGB/HD Adjust
Display |
OSD/Blanking |
Config. |
Keystone | 0 |
Scale | 0 |
Width | 0 |
Position H | 0 |
Position V | 0 |
Overscan | Enable |
Installation | Front |
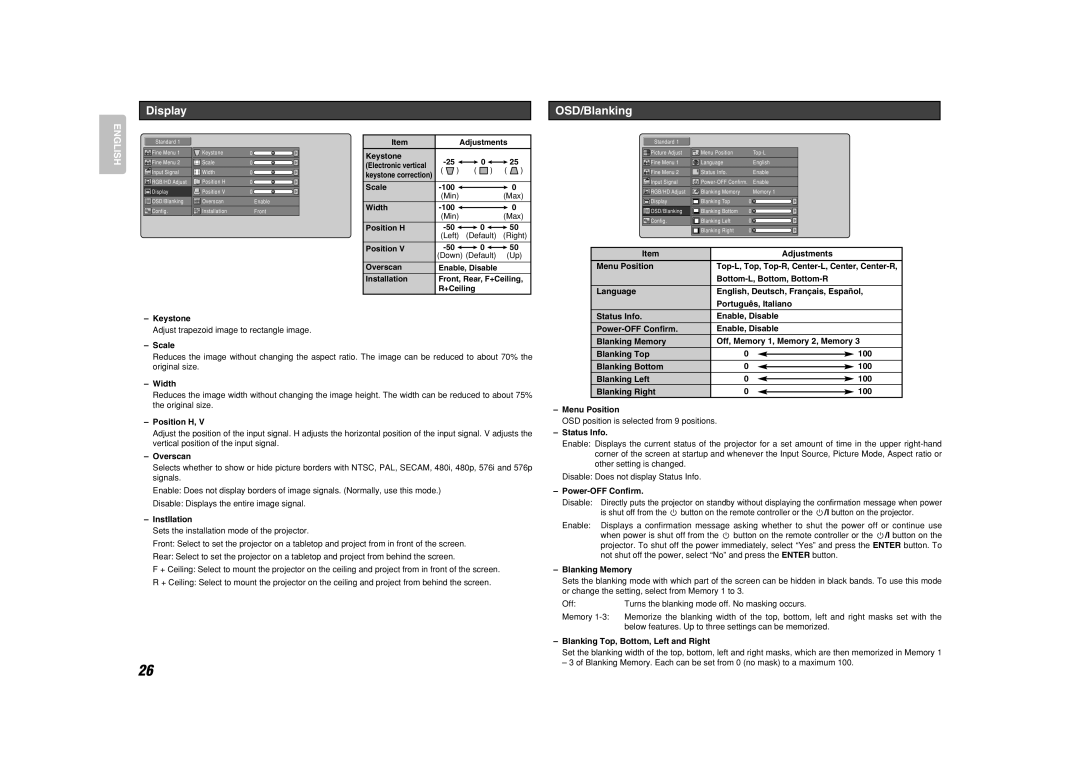
Item |
|
| Adjustments |
| ||
Keystone |
| 0 |
| 25 | ||
(Electronic vertical |
|
| ||||
( | ) | ( ) | ( | ) | ||
keystone correction) | ||||||
|
|
|
|
| ||
|
|
|
|
|
| |
Scale |
|
|
|
| 0 | |
| (Min) |
| (Max) | |||
Width |
|
|
| 0 | ||
| (Min) |
| (Max) | |||
Position H |
| 0 |
| 50 | ||
| (Left) | (Default) | (Right) | |||
|
|
|
|
|
| |
Position V |
| 0 |
| 50 | ||
Standard 1
![]() Picture Adjust
Picture Adjust
![]() Fine Menu 1
Fine Menu 1
![]() Fine Menu 2
Fine Menu 2
![]()
![]()
![]() Input Signal
Input Signal
![]() RGB/HD Adjust
RGB/HD Adjust
Display |
OSD/Blanking |
Config. |
Menu Position | |
Language | English |
Status Info. | Enable |
Enable | |
Blanking Memory | Memory 1 |
Blanking Top | 0 |
Blanking Bottom | 0 |
Blanking Left | 0 |
Blanking Right | 0 |
| (Down) (Default) (Up) |
Overscan | Enable, Disable |
Installation | Front, Rear, F+Ceiling, |
| R+Ceiling |
Item | Adjustments |
Menu Position | |
| |
|
|
Language | English, Deutsch, Français, Español, |
| Português, Italiano |
–Keystone
Adjust trapezoid image to rectangle image.
–Scale
Reduces the image without changing the aspect ratio. The image can be reduced to about 70% the original size.
–Width
Reduces the image width without changing the image height. The width can be reduced to about 75% the original size.
–Position H, V
Adjust the position of the input signal. H adjusts the horizontal position of the input signal. V adjusts the vertical position of the input signal.
–Overscan
Selects whether to show or hide picture borders with NTSC, PAL, SECAM, 480i, 480p, 576i and 576p signals.
Enable: Does not display borders of image signals. (Normally, use this mode.)
Disable: Displays the entire image signal.
–Instllation
Sets the installation mode of the projector.
Front: Select to set the projector on a tabletop and project from in front of the screen.
Rear: Select to set the projector on a tabletop and project from behind the screen.
F + Ceiling: Select to mount the projector on the ceiling and project from in front of the screen.
R + Ceiling: Select to mount the projector on the ceiling and project from behind the screen.
26
Status Info. | Enable, Disable |
| |
Enable, Disable |
| ||
Blanking Memory | Off, Memory 1, Memory 2, Memory 3 | ||
Blanking Top | 0 |
| 100 |
| |||
Blanking Bottom | 0 |
| 100 |
| |||
Blanking Left | 0 |
| 100 |
| |||
Blanking Right | 0 |
| 100 |
| |||
–Menu Position
OSD position is selected from 9 positions.
–Status Info.
Enable: Displays the current status of the projector for a set amount of time in the upper
Disable: Does not display Status Info.
–
Disable: Directly puts the projector on standby without displaying the confirmation message when power
is shut off from the ![]() button on the remote controller or the
button on the remote controller or the ![]() /I button on the projector. Enable: Displays a confirmation message asking whether to shut the power off or continue use
/I button on the projector. Enable: Displays a confirmation message asking whether to shut the power off or continue use
when power is shut off from the ![]() button on the remote controller or the
button on the remote controller or the ![]() /I button on the projector. To shut off the power immediately, select “Yes” and press the ENTER button. To not shut off the power, select “No” and press the ENTER button.
/I button on the projector. To shut off the power immediately, select “Yes” and press the ENTER button. To not shut off the power, select “No” and press the ENTER button.
–Blanking Memory
Sets the blanking mode with which part of the screen can be hidden in black bands. To use this mode or change the setting, select from Memory 1 to 3.
Off: | Turns the blanking mode off. No masking occurs. |
Memory
–Blanking Top, Bottom, Left and Right
Set the blanking width of the top, bottom, left and right masks, which are then memorized in Memory 1
– 3 of Blanking Memory. Each can be set from 0 (no mask) to a maximum 100.