Delayed Start
Select or deselect this option by pressing the Delayed Start button. The machine will start the programme 5 hours after you press the selection + Start/Stop button.
A lighted red field by the button indicates that the option has been activated. If you change your mind, press the Start/Stop button for 3 seconds.You can now start the machine as usual
6Press the Start button
Drying time remaining
An estimate of the remaining drying time will be shown in the display within 2 min- utes of the drying programme starting. For example, 1:35 means that approximately 1 hour and 35 minutes remain until the load achieves the selected level of dryness. If the
If you want to stop or change a programme
Press and hold the Start/Stop button for three seconds. The red field next to the but- ton goes out.
Note!
The programme is not affected if the pro- gramme selector is changed after the pro- gramme starts.
To load or remove washing
If you want to load or remove washing once you have started the machine, open the door and the machine will stop auto- matically. Load more washing, close the door and press the Start/Stop button.
7Drying programme finishedThe text in the display indicatesthat the programme has finished.
If the
Important!
• Clean the fluff filter after each load.
Caution!
If the fluff filter becomes clogged, the ma- chine’s automatic overheating
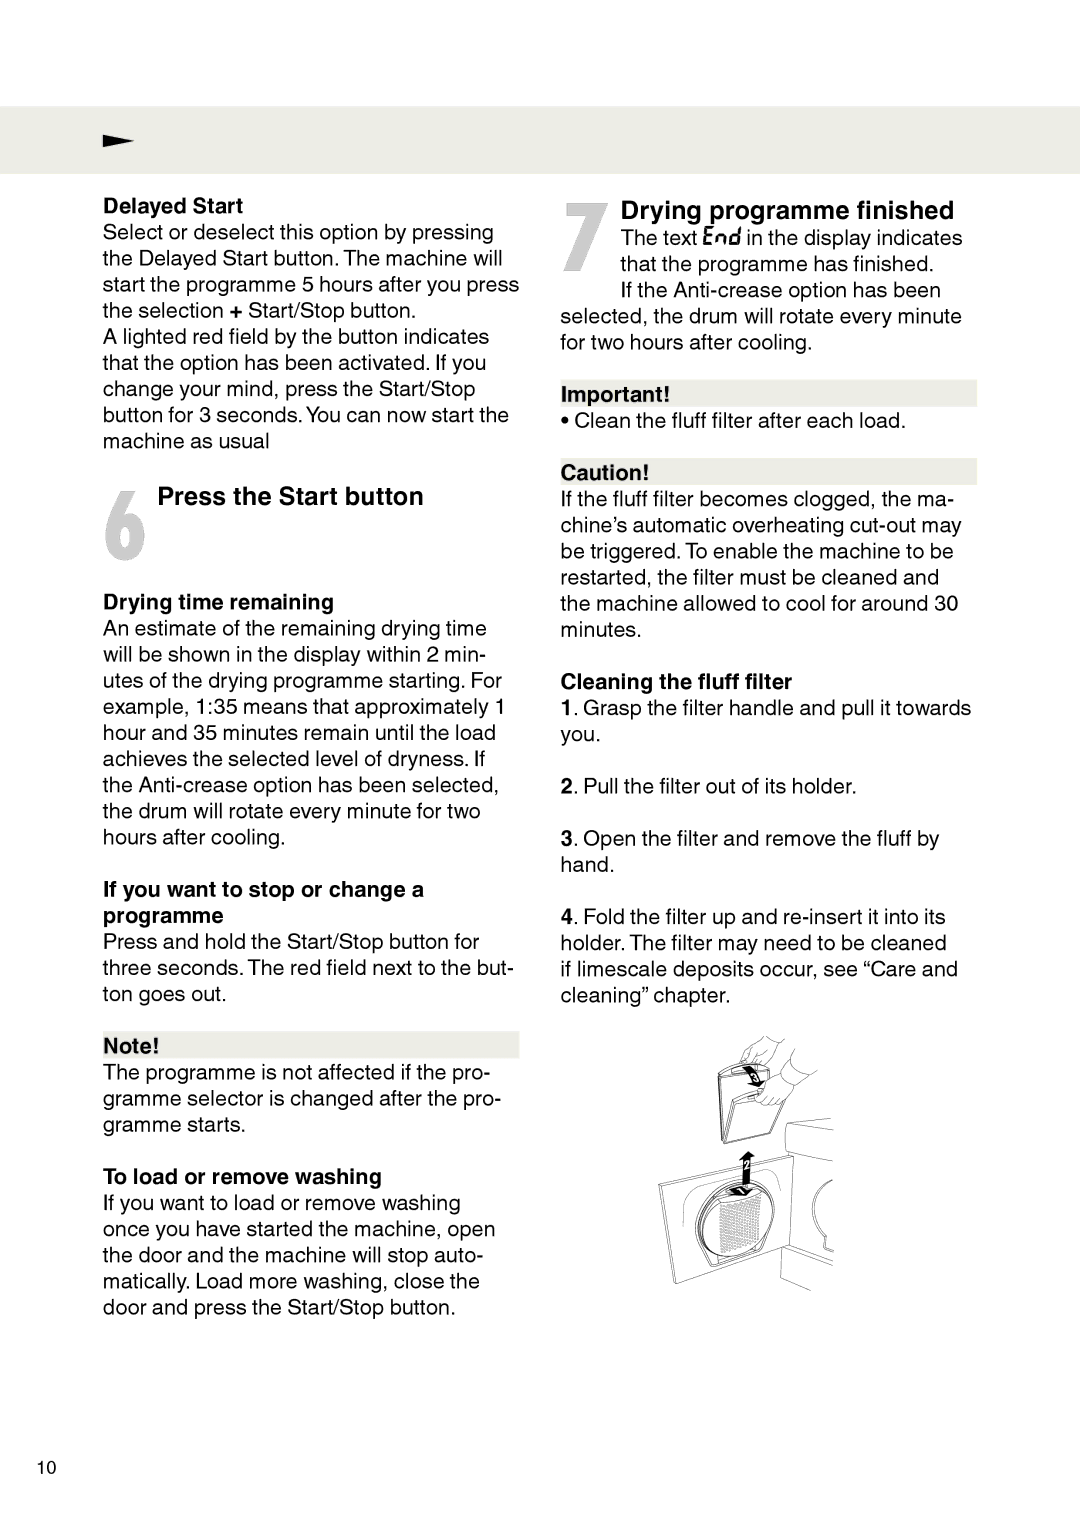
Cleaning the fluff filter
1. Grasp the filter handle and pull it towards you.
2. Pull the filter out of its holder.
3. Open the filter and remove the fluff by hand.
4. Fold the filter up and
2
1
10
