
MET8885XS, W10289539A specifications
The Maytag MET8885XS is a high-performance electric range designed for efficiency and durability, making it an ideal choice for home cooks and baking enthusiasts. This versatile appliance combines cutting-edge technology with traditional design to create a cooking experience that is both practical and stylish.One of the standout features of the MET8885XS is its powerful oven. With a generous capacity, it provides ample space for baking multiple dishes at once, ensuring that family meals or gatherings are handled with ease. The oven includes a convection cooking feature that circulates hot air for even cooking results, reducing cooking times and enhancing your culinary outcomes.
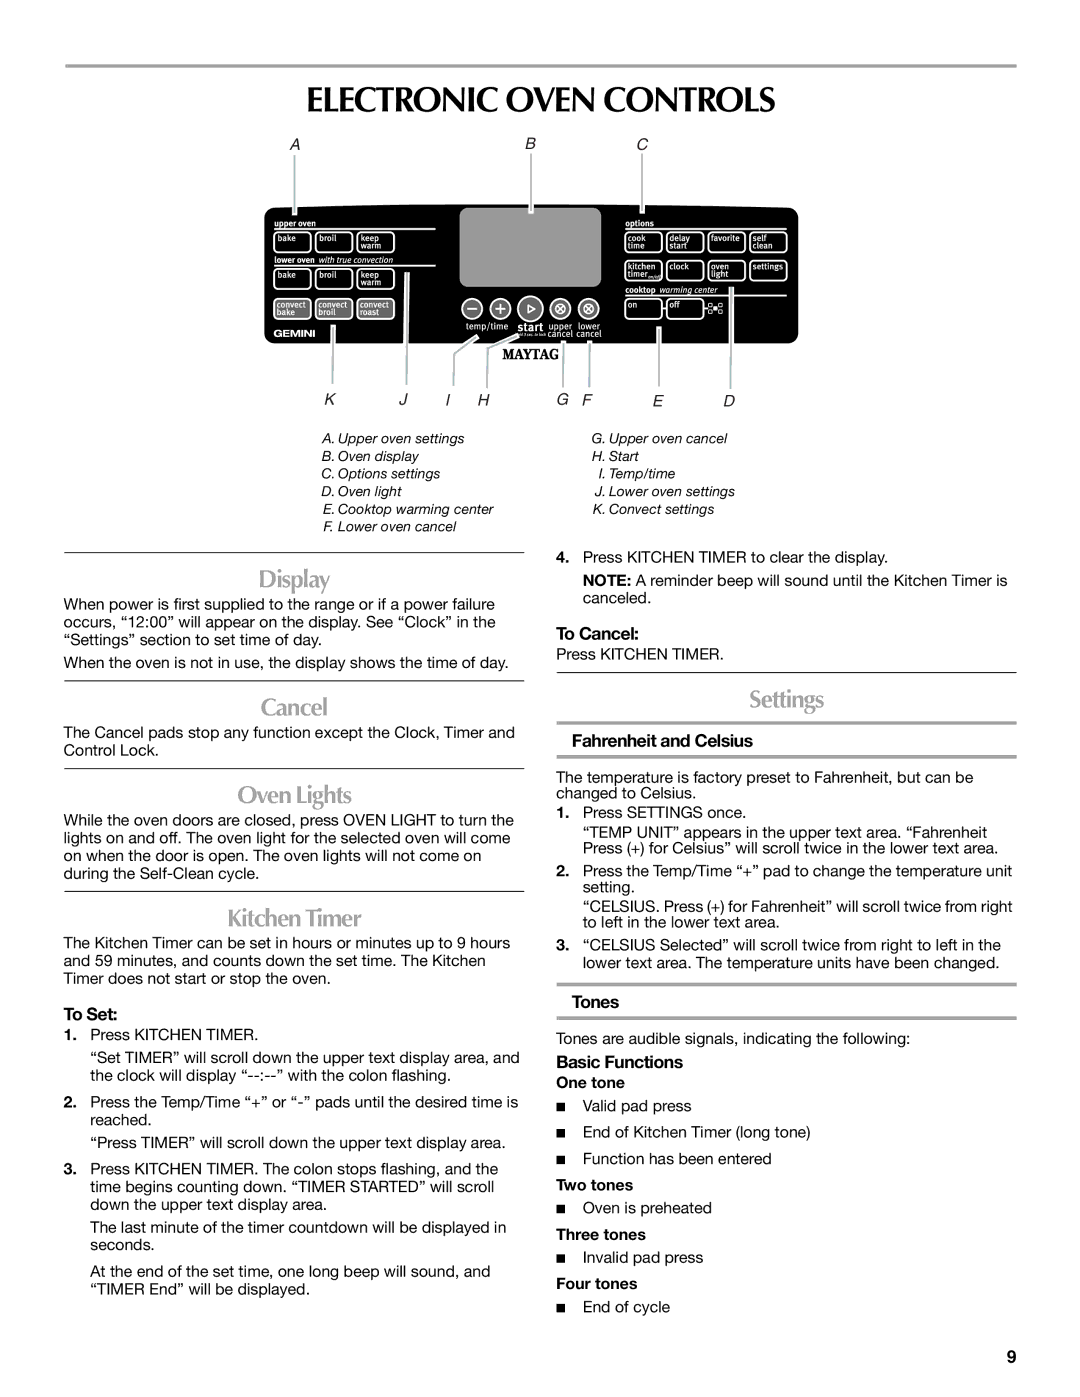
Another notable characteristic of the MET8885XS is its intuitive controls. The user-friendly interface includes a digital display that allows for easy navigation between cooking modes and settings. Users can quickly set their desired temperatures, select cooking times, and adjust functions, ensuring that they can focus on what truly matters – creating delicious meals.
The cooktop features a versatile arrangement of burners, including both traditional coils and a smooth, ceramic glass surface. This combination allows for flexible cooking options, accommodating various pot sizes and types, from small saucepans to large skillets. Additionally, the Maytag MET8885XS is equipped with power burners for quicker boil times and simmer burners for delicate sauces.
Durability is a key characteristic of the MET8885XS, as it is built with commercial-grade materials designed to withstand the rigors of daily cooking. With a robust construction and scratch-resistant finish, this range is built to last, making it a reliable investment for any kitchen.
The oven also features a self-cleaning option, saving you time and effort in maintaining a clean cooking environment. This convenient feature utilizes high temperatures to burn off food residues, simplifying the cleaning process and enhancing the longevity of the appliance.
Energy efficiency is another technology integrated into the MET8885XS. With its energy-saving features, users can enjoy high-performance cooking while reducing their energy consumption. This is not only environmentally friendly but also helps in lowering utility bills.
In summary, the Maytag MET8885XS is an exceptional electric range that combines powerful performance with user-friendly technology. Its spacious oven, versatile cooktop, durable construction, and energy efficiency make it a valuable addition to any kitchen, catering to the needs of both novice cooks and experienced chefs alike.