3

10.

Attach the viewfinder: Carefully remove the rubber eyecup from the viewfinder before


sliding the viewfinder into the bracket. Slide the viewfinder, eyepiece-end first, into the


viewfinder bracket (see Figs. 8a and 8b). Replace the rubber eyecup after the viewfinder


is positioned in the bracket. Tighten the four alignment thumbscrews (8, Fig. 1) to a firm-


feel to hold the viewfinder in the bracket.

11.

Attach the 90° diagonal prism (refractor models only): Pull out to remove the plastic

4

2

1

dust cover from the eyepiece holder. Slide the tube of the diagonal prism (3, Fig. 1) into

the telescope’s eyepiece-holder (2, Fig. 1) and tighten the thumbscrews (to a firm feel only)

to secure the diagonal prism in place.

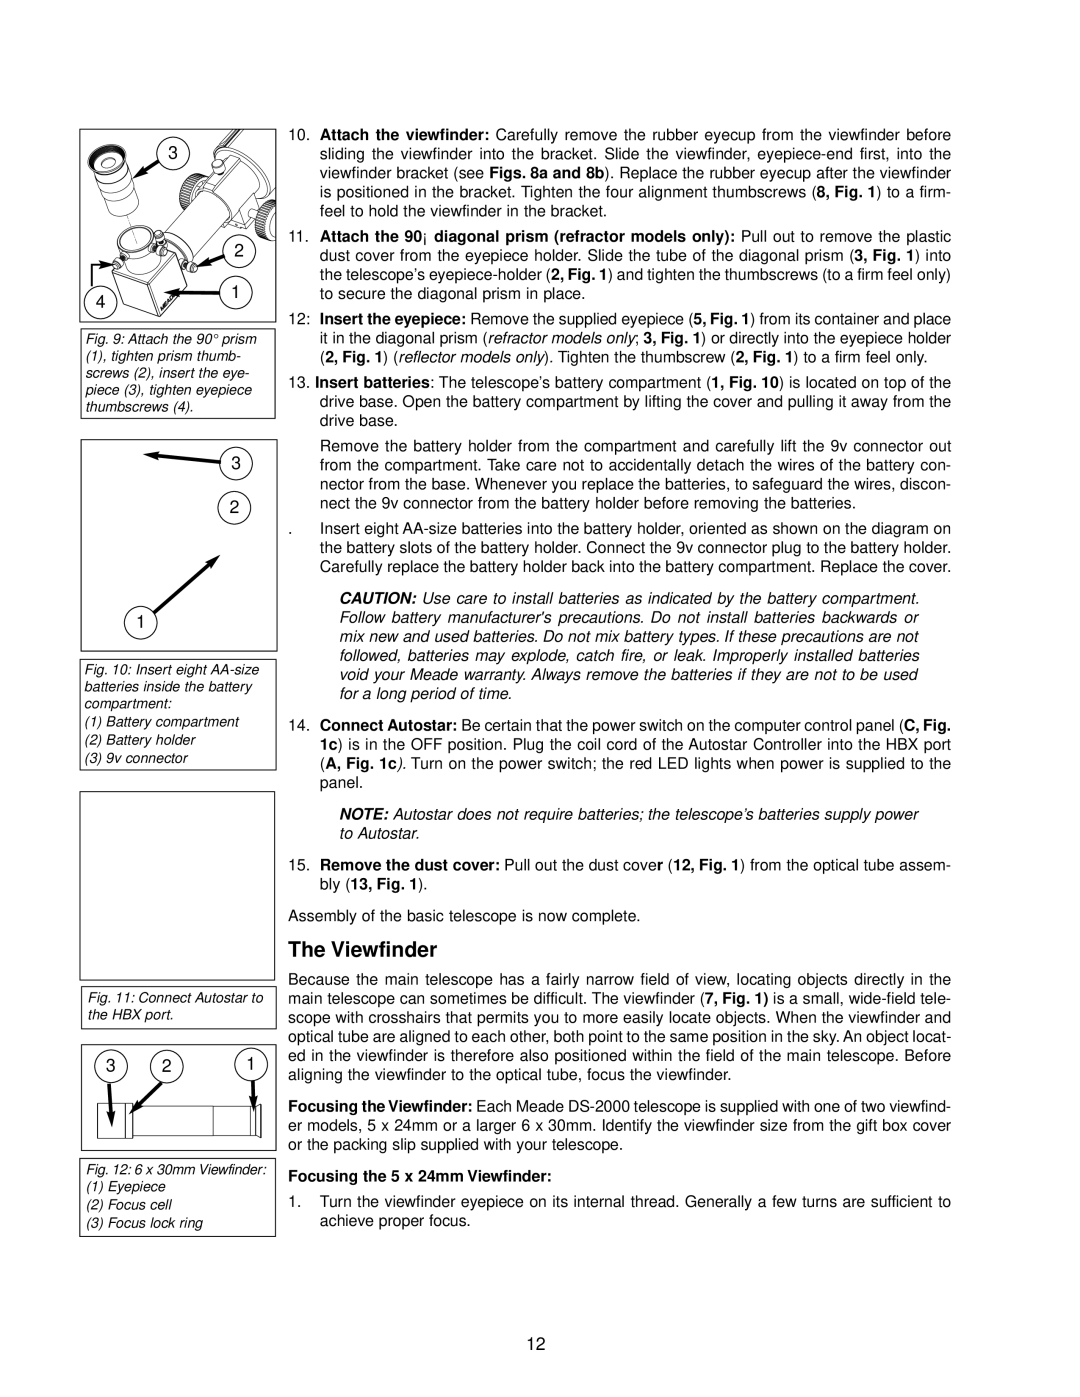
Fig. 9: Attach the 90° prism (1), tighten prism thumb- screws (2), insert the eye- piece (3), tighten eyepiece thumbscrews (4).

12:Insert the eyepiece: Remove the supplied eyepiece (5, Fig. 1) from its container and place it in the diagonal prism (refractor models only; 3, Fig. 1) or directly into the eyepiece holder (2, Fig. 1) (reflector models only). Tighten the thumbscrew (2, Fig. 1) to a firm feel only.

13.Insert batteries: The telescope’s battery compartment (1, Fig. 10) is located on top of the drive base. Open the battery compartment by lifting the cover and pulling it away from the drive base.

3

2

1

Fig. 10: Insert eight AA-size batteries inside the battery compartment:

(1)Battery compartment

(2)Battery holder

(3)9v connector


Remove the battery holder from the compartment and carefully lift the 9v connector out


from the compartment. Take care not to accidentally detach the wires of the battery con-


nector from the base. Whenever you replace the batteries, to safeguard the wires, discon-


nect the 9v connector from the battery holder before removing the batteries.

.

Insert eight AA-size batteries into the battery holder, oriented as shown on the diagram on


the battery slots of the battery holder. Connect the 9v connector plug to the battery holder.


Carefully replace the battery holder back into the battery compartment. Replace the cover.

CAUTION: Use care to install batteries as indicated by the battery compartment. Follow battery manufacturer's precautions. Do not install batteries backwards or mix new and used batteries. Do not mix battery types. If these precautions are not followed, batteries may explode, catch fire, or leak. Improperly installed batteries void your Meade warranty. Always remove the batteries if they are not to be used for a long period of time.

14.Connect Autostar: Be certain that the power switch on the computer control panel (C, Fig. 1c) is in the OFF position. Plug the coil cord of the Autostar Controller into the HBX port (A, Fig. 1c). Turn on the power switch; the red LED lights when power is supplied to the panel.

NOTE: Autostar does not require batteries; the telescope’s batteries supply power to Autostar.

Fig. 11: Connect Autostar to the HBX port.

3

2

1

15.Remove the dust cover: Pull out the dust cover (12, Fig. 1) from the optical tube assem- bly (13, Fig. 1).

Assembly of the basic telescope is now complete.

The Viewfinder

Because the main telescope has a fairly narrow field of view, locating objects directly in the main telescope can sometimes be difficult. The viewfinder (7, Fig. 1) is a small, wide-field tele- scope with crosshairs that permits you to more easily locate objects. When the viewfinder and optical tube are aligned to each other, both point to the same position in the sky. An object locat- ed in the viewfinder is therefore also positioned within the field of the main telescope. Before aligning the viewfinder to the optical tube, focus the viewfinder.

Focusing the Viewfinder: Each Meade DS-2000 telescope is supplied with one of two viewfind- er models, 5 x 24mm or a larger 6 x 30mm. Identify the viewfinder size from the gift box cover or the packing slip supplied with your telescope.

Fig. 12: 6 x 30mm Viewfinder:

(1)Eyepiece

(2)Focus cell

(3)Focus lock ring

Focusing the 5 x 24mm Viewfinder:

1.Turn the viewfinder eyepiece on its internal thread. Generally a few turns are sufficient to achieve proper focus.

12

Page 12
Image 12
Meade DS-2000 instruction manual Focusing the 5 x 24mm Viewfinder

DS-2000 specifications

The Meade DS-2000 is a versatile and user-friendly telescope that caters to both beginners and seasoned astronomers alike. Known for its exceptional performance and ease of use, the DS-2000 series has become a popular choice among amateur stargazers. This telescope features a robust design coupled with advanced technologies that enhance the overall observing experience.

One of the standout features of the Meade DS-2000 is its sturdy mount, which provides stability during observations. This stability is crucial for clearer and more detailed views of celestial objects, as it minimizes vibrations and shakes that can occur while tracking objects across the night sky. The telescope typically comes with an adjustable aluminum tripod to further enhance stability and can handle varying weights and instruments.

The DS-2000 series utilizes an electronically controlled altazimuth mount, allowing users to easily navigate the sky with its automatic tracking capabilities. This intuitive design ensures that even novice astronomers can locate and follow astronomical objects with minimal effort. The built-in computer control allows users to access a database of thousands of celestial bodies, making it easy to select targets for viewing.

In terms of optics, the Meade DS-2000 features high-quality glass optics with multi-coated lenses. This ensures superior light transmission and contrast, resulting in bright, clear images of the Moon, planets, and deep-sky objects. The telescope typically offers a range of apertures, making it suitable for various observing preferences and conditions.

Furthermore, the Meade DS-2000 is often equipped with a 9mm or 25mm eyepiece, enabling users to achieve magnifications adequate for observing different types of celestial phenomena. The addition of a built-in red-dot finder makes it easier to aim and locate objects in the night sky.

Portability is another significant characteristic of the DS-2000 series. Its lightweight design allows astronomers to transport it easily to different observing locations, making spontaneous stargazing adventures possible, whether in the backyard or at a dark-sky site.

In summary, the Meade DS-2000 combines solid construction, user-friendly features, and advanced technology, making it an excellent choice for anyone interested in exploring the night sky. With its impressive optics, reliable tracking capabilities, and enhanced portability, the DS-2000 series provides an enjoyable and rewarding astronomical experience.